Monday, March 24, 2014

What's on the inside...


Time to get these walls a little higher!!  Here's where I left you in the last post.


I continued to add the exterior elements, such as the bracing, so that the lower levels would be more stable, allowing me to go higher.


It did get somewhat tricky, as I tried not to glue the wrong parts together!  I had to wipe away glue more than once.


Now that all the exterior bracing was complete, I started to add the same elements to the interior.  Those were more complicated, since they would have to bear more load.  The pieces on the outside were as much for decoration as for support.


The most complicated bit was going to be these upper sections of walls, which would have to be set back about an inch.  The roof is going to be relatively heavy, since it will hold a bunch of LED lights (chock full of batteries!) and a bunch of miniatures.


I think this view gives you an even better sense of the 'verticality' that I am after.


Some of the upper sections are in place.  Keeping them aligned was definitely a challenge.  Even more so when I could not glue the main pieces together.


A view from the inside.  While I need columns to support the weight of the roof, I need to make sure there is enough room for all the statues, which will help tell the story of the army.

Oh yeah... and there are supposed to be miniatures in there!! :-)


The corners of the knave were encased, which set the level for the height of the support columns.


Speaking of which... time to make some columns!  These are going to be relatively simple, since there is already a lot going on in that space.


These four spots will carry a good chunk of the weight.  The two on the edge of the board will have to hold up even more, since the back of the structure needs to be wide open.


The upper sections are braced with decorative elements, similar to what I did on the lower levels.

With these extra pieces glued to either side of the thin walls, I have now effectively tripled the thickness (and the strength) of the walls!  Now I have the open feel of the thin .25 inch walls, with the structural integrity of .75 inch walls.
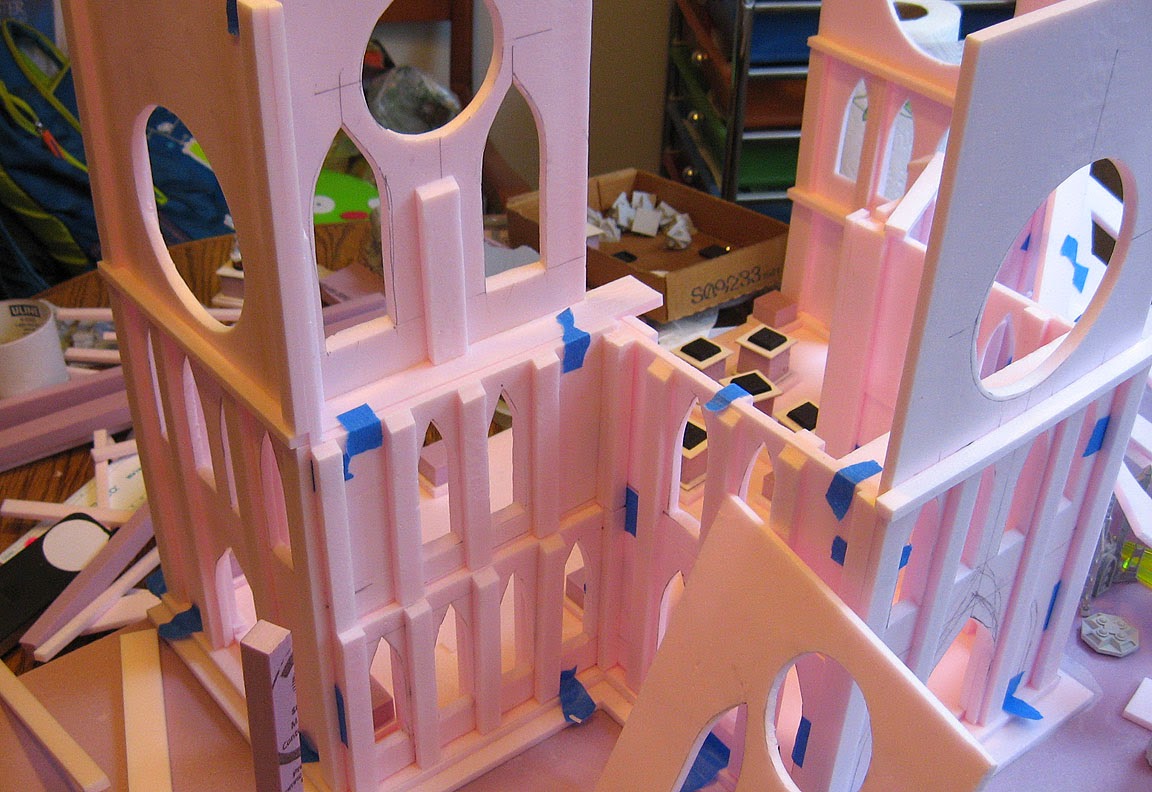

Starting to put the columns in place.  Stay tuned for more!


Sunday, March 23, 2014

The Cathedral rises


Army board time!

A few weeks ago, I was fortunate enough to find a push cart at Home Depot to mount the board.  
This will make it a lot easier to move the display board around, and it also means I have a place to put all the miniatures, books, and other paraphernalia that I am going to need.

The top shelf was much more narrow than what I normally do for my display boards, so a lot of changes had to be made from the original plans.  On the square board, the cathedral was going to be in the corner, with the Aegis Defense Line around one edge.

As you can see, the orientation has changed, with everything lined up on center. I have also added a number of pieces to the ADL.  It will help for actual game play as well, giving me many more options.


Many things are now going in different places.  This is also dictated by the extra tanks.  My original list only had two... but that number has doubled.  Obviously, those take up quite a bit of floor space!

You can see me plotting out the first few walls, using that .25 inch pink foam that I discovered the same day as the cart.  It really is amazing stuff, giving me the opportunity to create those delicate shapes.

A side benefit of the thinned gauge foam is that more miniatures will fit in the structure.  Last year's board lost a ton of room to the thicker foam.


You can see the new pieces of ADL in place, including a few ruined bits.  More walls are created for the lowest level.  It is so much easier to cut the window shapes from this foam!!!!  There are also a number of statue pedestals scattered about...


I am really looking forward to all the rose windows!  So much light will be allowed into the cathedral, just like the real ones.  I will still be placing my LED lights inside, however.


You can see that I am trying to form the 'T' shape in order to create a knave.  It will have to be more "column and pillar free" than the original plan, but that's how there things go.  Sometimes you have to adjust on the fly.


Using a little painter's tape to hold things in place, I started to work up to the next level.


After getting the 'mid level' in place, I started to cut out the shapes for the all important upper level.  This one is very important, since I think it is the best chance to see the stained glass effect from both inside and out.

Yes, you heard that right... stained glass!  More on that in the next post.


A view of the interior.  I am not sure if the big statue will be there or not in the end, but it would be fun to include it.  In any case, it will be removable.


To paint this, I am trying to keep things in pieces during this construction phase.  It will be a lot easier to get everything painted that way than trying to reach into dark crevices with a brush!  I tried this out to a much simpler degree on last year's board, and that was a huge help.

To try and make things more stable, I have been adding the extra ribs, being careful not to glue things together that will need to be taken apart later!


You can see that I have worked up more levels with the ribbing.  I have spent many hours adding these to the interior and exterior.  This is helping to hold things in place as I create decorative elements as well.


Tank terrain


Here's another great product from Secret Weapon Miniatures!  This has all kinds of great uses.

It's a destroyed tank, and as you can see, it has three elements.


They can be placed in all sorts of different positions and still look great!


The turret is very impressive.  And it makes fantastic barricade.


This is one way to truly represent what a messed up tank really is.  Paper counters or upside down tanks are not quite the same.


Here is the last piece of the set.


These can work very well with a diorama/display board (as I am doing), or as stand alone terrain pieces (which I am also doing!)


I put a few miniatures in with the set so that you get an idea of scale, and how it is a much better representation of 'cover', now that everything is reliant on TLOS.

As always, you don't have to wash or scrub this down.  No nasty mould release residue!


Saturday, March 22, 2014

Plasma totin' priest


It's a bummer that there just were not enough points to squeeze in these Ministorum Priests and Astropaths.  That would have been very fun... potentially plaid robes on these guys! :-)


Right now, they are in the colors of my original much loved Demonhunters army.  You can see a number of posts in that section of the blog to show how these worked in my various retinues.

In fact, they still have their coded bases, which let everyone know what they were meant to be.
Since it could have gotten very confusing, each base was labeled with the words Mystic, Sage, Acolyte and so on.

This made it clear for both players, and it was a nice decorative element on the marble bases!


He is also here:


Four of a kind


I was in need of a quad gun for the Aegis Defense Line, so that meant either breaking out the polystyrene tubing or finding s few bits. Rich and AJ happened to have four autocannon bits between them, so out came the knives!


With a little sculpey and a little plasticard, it took shape and then was complete!


I magnetized the base so that it could fit on this stand that I am working on, just in case people don't want it to go on the fortification itself.  You will see what I mean when I post the painted images of it...


Friday, March 21, 2014

Jam session


Welcome to the Headbanger's Ball... bagpipe style!

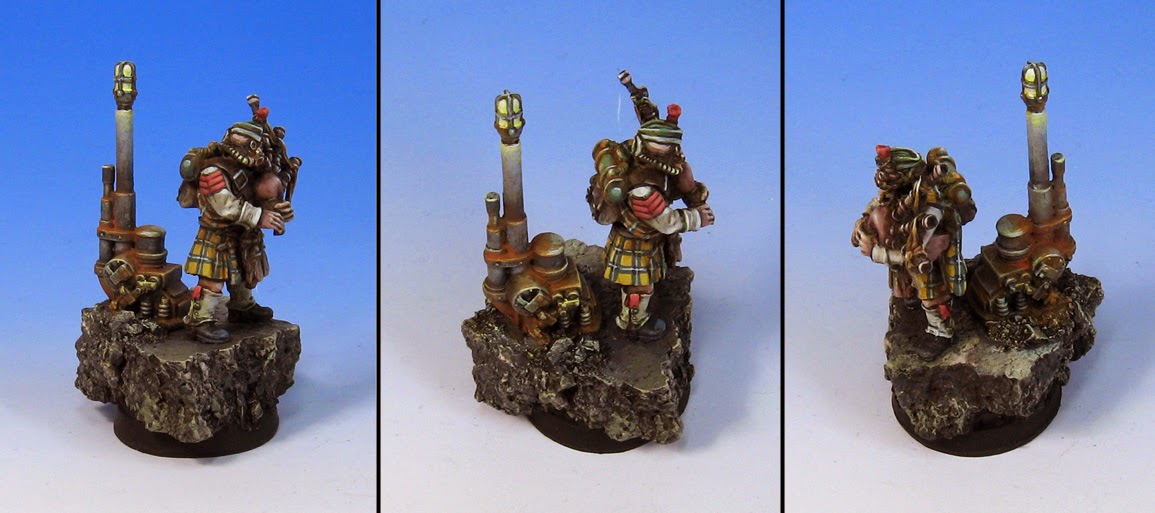
The command squad continues with another fine Highland Moss Guard figure from Victoria Miniatures.  I love the bagpipe guys!  I have this piper near a broadcast mechanism, so that all the lad can do a jig as they march into battle.


I had to come up with a tartan pattern that was different from all the other units... clearly so.  They will, in all likelihood, be right in the middle of a giant blob 'o Guard.  Lots of kilts and plaid in a confined area!


Next up, I will show you the Quad Gun that I just made for the ADL.

Thanks again to Victoria for creating something so unique!!!


Is there a doctor in the house?


Okay, another member of the command squad.  This fine lad proved to be quite valuable in that test game.  Especially when he distributes Feel No Pain to 55 fellow Guardsmen... who are behind an Aegis Defense Line.

Hey, when your only armor is your kilt, you take anything you can get!

I believe this guy is from the 5th edition box. Many Inquisitors and other retinue members have been made from this figure... but this is the first Medic.


Of course it gave me a chance to do some quick blood spatter!


Next up, the Voxcaster!