Monday, August 19, 2013

Time for some shingles!


Terrain week. House.  Then another house.  Balsa wood.  Foam, Glue.


Raise the roof!!!!!!!!!!!!!


This time...  chimney.  An improvement over early attempts over a year ago.


Putting wood planks on the sides of the house.


And the roof.  Cereal box time!  And more balsa wood.


2.5 hours later... roof!


Once all the glue dried, this darn thing was really strong!!!


But wait... that was just the sample!


More shingles.  But this time, made out of cereal boxes. :-)  Conservation is key!  Very green, as in saving my wallet.


Some Oxide Paste for additional texture and strength.


A monumental task


Just as it was with the basing, terrain just took over.  It required such a vastly different setup, it took many hours to get everything in place.


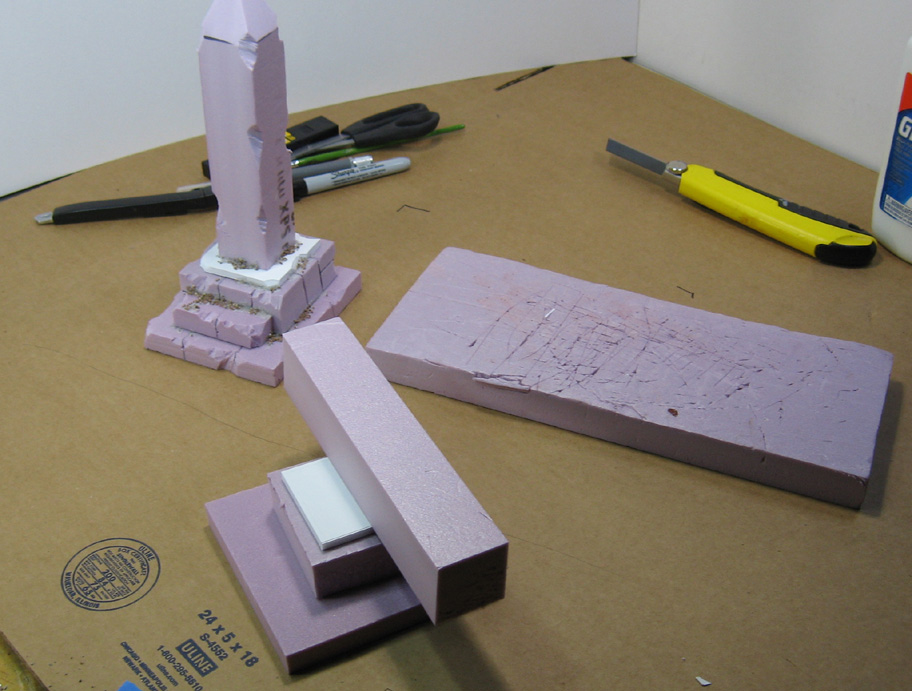
This image is a bit of an illustration as to why I had to remake this monument for the video.  The original monument on the left is at least five inches TALLER than what you can see in this image!


So, I had to redo that, scaling it down by measuring what the camera would be able to show in the actual setup.  Also, it turned out that due to waiting for things like glue and oxide paste to dry, I needed to make even MORE of them.


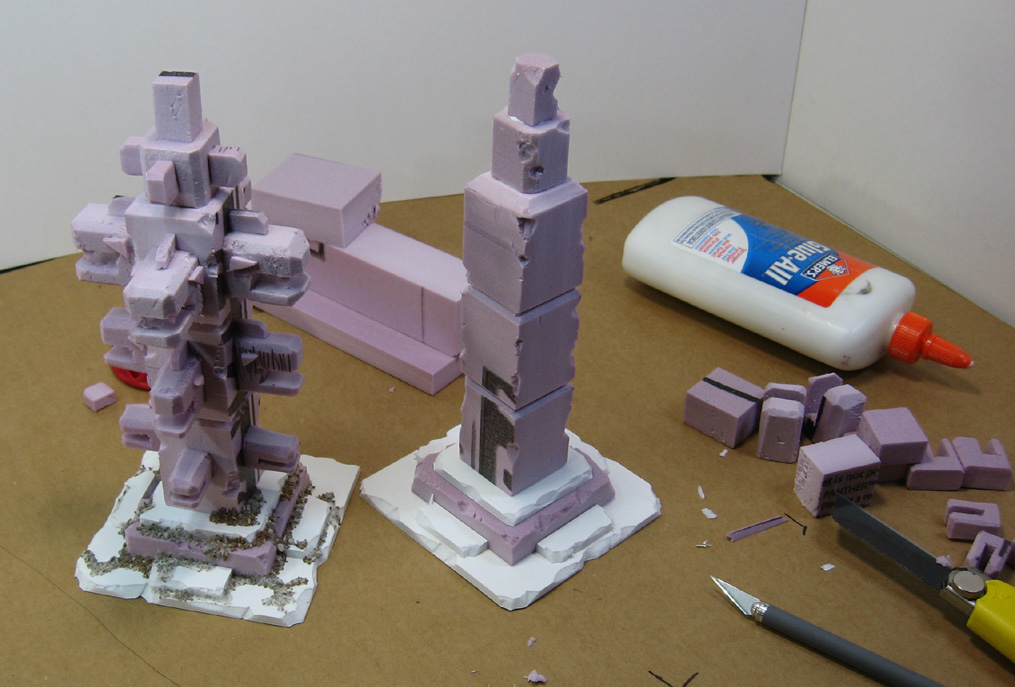
Unlike paint, one does not simply take a hair dryer to soft foam to make it dry when you want!  Here we have the Obelisks...


And now the Mayan Totem.  Reworked to fit the screen, and be much easier to handle.


In that time where I waited for things to dry, I had done some prefabricated pieces on the next demonstration in line to use that time as best as possible.


I only went so far with that, since I did want to show some of the cuts.


I figured that people would get very bored very quickly if all I showed was me making the same cuts 16, 32 or 64 times! :-)  That was another reason to fast forward in that manner.


My blue painter's tape is always a critical ally when gluing foam!


Super sharp brand new blade to cut my snakes on a pole...


Glued in place.


Sand and gravel, and Voila!


But wait, there's more!  Oxide paste to fill gaps, add texture and even strength to the joints and connections.


Sunday, August 18, 2013

Forts and Towers!


Yes, you are seeing a WHOLE lot of terrain.  Maybe that's 'cause a whole week was spent on it.

These were even more complex to film than the basing videos, as it turned out.

Set ups like this definitely took a bit of time to arrange...


Ah yes, the Dreaded Watchtower!


There was a lot of waiting for things to dry, so during those times, I tried to grab the next set of terrain and some some work on those pieces.


This was one of the few finished sample pieces that I could use... long story!


The Watchtower continues...


Yes, those are pieces of cereal boxes!


These were so tough to make, I needed to enlist the help of Wage the Master Builder.


Now for the filming of the Watchtower.


A whole new type of doorway.  I tried to show you a few different ways to do roofs, doors, and so on.


Gotta have windows!


Oxide Paste!  That means we must be getting close to the end...


Fin.


Step into the vortex


While it was a bummer to discover that I had to completely redo the warpgate terrain due to the GW bits, it did mean that I could make improvements on the pieces.

Just using a layer of pink foam on top of the foam core was helpful, since foam core alone has a tendency to warp once it is painted.  Pink foam does not!


The new unpainted gates side by side...


And then it was time for some painting.


I don't know if I want to walk into that...


Saturday, August 17, 2013

The Four Horsemen of the Apocalypse


One more bike added!  The next one will be a little different, as it is the Sergeant with lightning claws...


As the unit begins to take shape, it dramatizes the effect of those Dragon Forge bases.  Fantastic stuff.


Just two more to go and the unit is complete!


Stay tuned for more enraged Mongol Space Marines!


Hey... where ya goin'?


Uh oh!!!