The last major piece of the Barbarossa terrain board is going to be a small wooden church, done in classic Orthodox style. I ran across a few images in a quick google search, focusing more on smaller, simpler versions.
This is essential, since time and space are an issue. We will be placing this on the small "island" in the center of the board. That will provide not only a visual centerpiece, but lots of line of sight screening too!

To match the existing buildings, I chose the simple A frame roof designs, and set about making some quick measurements. I will be using the same thin pink foam underlayment that I have been using for previous structures.

Once the pieces were set, I used a pen to create a quick log texture on the walls. I could have gotten fancier with this, but time constraints meant that I had to make do.

The four basic shapes are ready to glue to the base. I had to leave enough windows for troops to shoot from, but I wanted to restrict the access to the interior by having just one door.
Also, the extreme roof pitch had to factor in, which is why the windows seem so low on the walls.

The initial pieces glued to the base with the strong, fast setting wood glue.

The roof will be made from a thinner hardboard, which is nothing more than the discarded backing of a palette pad. Any sort of notebook backing, etc., is great for this purpose. It is strong, light, and has a thinner profile than the pink foam.
This also has to be removeable from the main section of the building to place troops inside.

I used a few small pieces of painter's tape to secure the parts together as they dried.

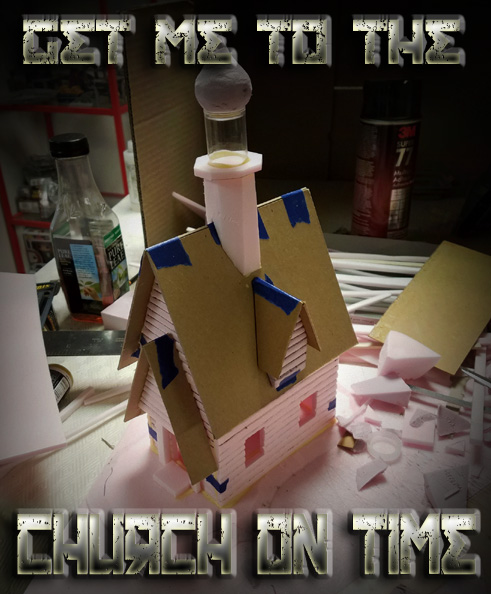
A few left over pieces of thicker insulation foam will form the spire and the dormers. I used my cut out piece of roof foam to get the correct angles for cutting the lower spire.

On this would be placed a chunk of plastic tubing, left over from a roll of green stuff. I cut and shaped a piece of thick foam to create the "onion dome", which was then sanded. I will be putting some stucco like material on that surface to smooth it out prior to painting.

To add the extra roof line dimension seen in the reference pictures, I made a simple A frame roof piece to place over the doorway. A few vertical strips of the thin foam would hold it in place.

I glued it in place, careful not to get any glue on the roof section. Otherwise I would not be able to take that away for troop placement! The added benefit of this decorative piece is that it would help to hold that large roof section where it belonged.

Again, the pieces are held in place as the glue dries with painter's tape, and I started to look for some ideal pieces of thick foam to make the dormers for either side of the main spire.

As before, I used my discarded roof line cut outs to gauge the angles needed to match the roof pitch. The insert image shows the secondary cuts made to create a roof line for the dormer itself. These should not be too huge.

Just as I did with the front decorative roof section, more of the hardboard was used to make slightly overhanging roofs for each dormer.

Once the dormers were in place, and the glue had a little time to set, I wanted to make some roof boards that would match one of the reference images, and a few of the actual buildings on the board. This would take the form of long planks.
Only one of our roofs had shingles on it, and doing the long boards would reduce the amount of time needed. As usual, time is very scarce for these projects, and that is a frequent compromise.
The factors of playbility, strength, realism, time and cost all play into the development of these pieces. Over time, I have been able to really maximize and minimize these 4 elements.
I will post the rest of the construction tomorrow, so stay tuned!

Can't wait to see the end result...this is gonna be amazing!
ReplyDeleteMany thanks! Just posted part two!
DeleteWhere do you find pink insulation foam that thin? Or do you cut it from a thicker sheet?
ReplyDeleteThis is underlayment for flooring, which we got at Home Depot. It is possible to cut thicker foam, which I often do for decorative elements on buildings, or for bricks, etc.
Delete