Tuesday, December 4, 2018

The Evil Eye


I have painted a lot of trolls over the years, but I must say this is one of the more unusual!

The bulging eye was pretty wild, and gave me a chance to paint a lot more of the eye than I would normally have. I could work around the outer edges of the eye, creating veins, etc.


I also used the Vallejo Environment Moss and Lichen.


That does have an interesting effect, which is super matte and a slight bit of thickness as well.


I put some Secret Weapon Miniatures Realistic Water over the eye to give it a little gloss.  That is something I do a lot more these days, as having that gloss effect allows the highlight on the eye to "track" wherever the lights happen to hit it.


Monday, December 3, 2018

Winter vs Summer


As I prepared for Round 3 at Operation Sting, I could not be truly prepared for the unusual list that stood on the opposite side of the table!  It was the very unique Anti-Tank platoon list in the Battle of the Bulge campaign book.  This meant all kinds of heavy weaponry, but not much in the way of infantry.


Once again, finding a match between the actual scenario and the Secret Mission was going to be tough.  Actually, I probably should have labeled this episode as "Ambush Alley", because both of us had to resort to dueling ambushes all game long!

This had to do with the terrain, which did create a lot of blind alleys.  While the anti-tank guns would be overkill against the transports that I had, the vast numbers of medium and heavy machine guns on the tows presented a major issue!

Not only could they dish out plenty of pins... those HMG's can also take out light vehicles.


You can see these very tempting roads.  Since my Secret Mission involved getting infantry units off the opponent's board edge (however, they had to be intact!), utilizing these could facilitate such a task.

This was not going to be the case once all those AT guns and Machine Gun tows started waiting in ambush.


This forced me to bring in some elements far to the left flank, where certain parts of the road could not be covered by those ambushes.  

While we also had the Ambush game going on, there were plenty of Down orders being issued as well.  The idea was to force the opponent to commit those final reserves early.

I was able to get a decent series of order dice draws, and some of the US equipment had to emerge early.  Those ended up in some less than ideal locations.


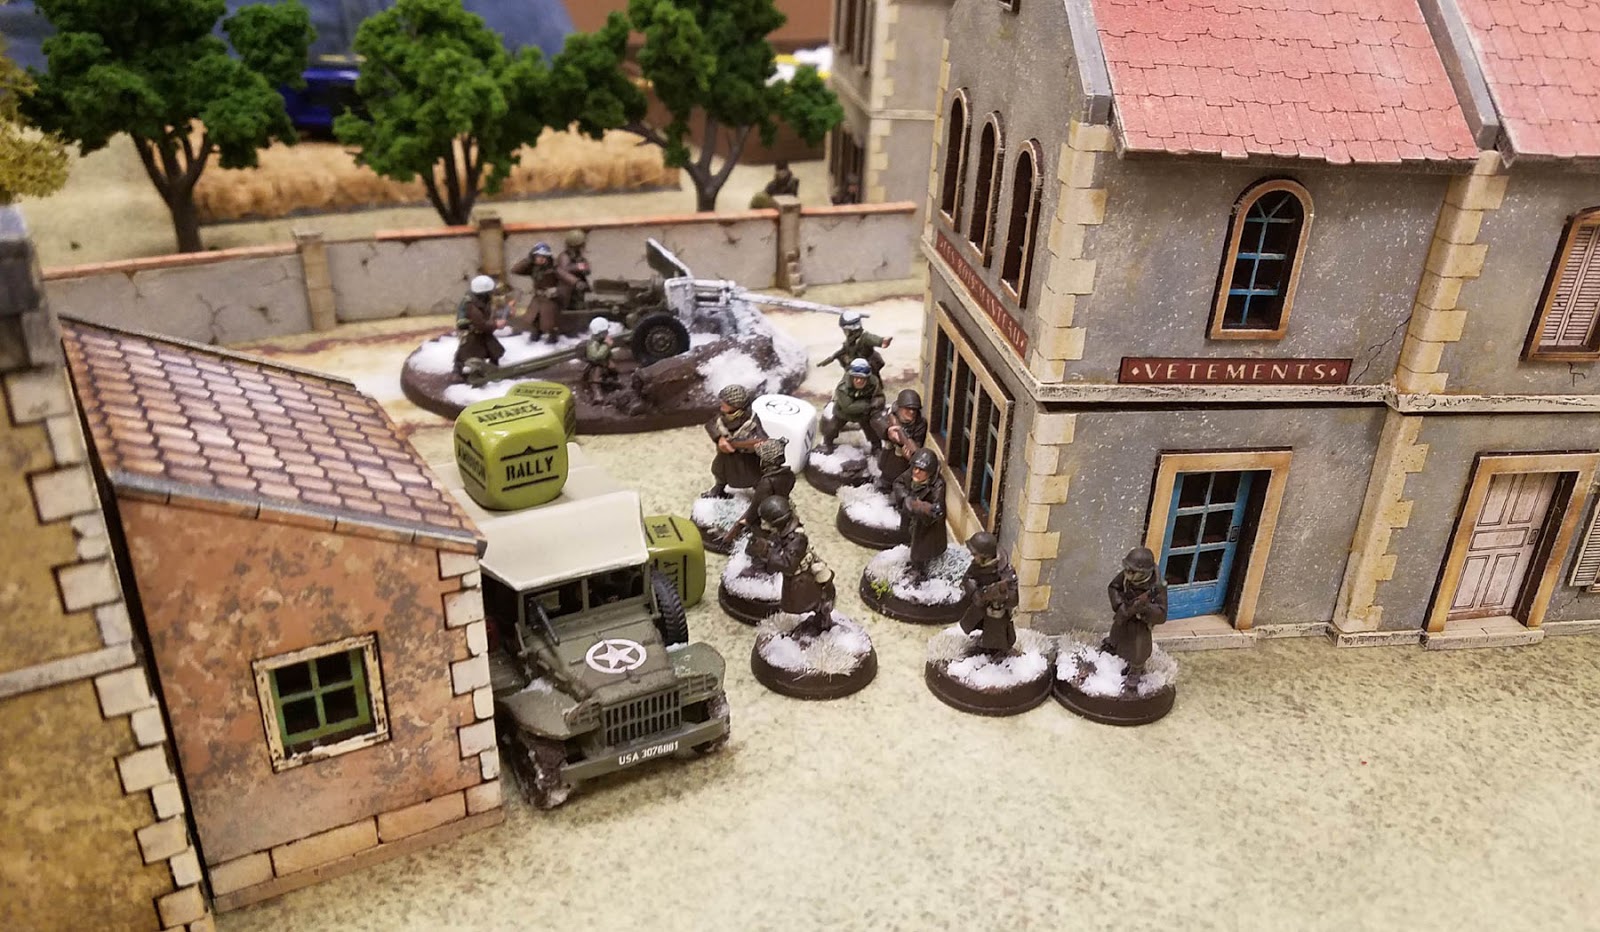
Here you see the lone US infantry unit.  They are taking up a position in the central square, which was the the objective of the primary mission.


The dueling ambushes did yield some casualties, and this destroyed tow was the first.  This left an Anti-tank gun and its crew stranded well out in the open.  While I fired at it quite often, I didn't actually want to kill it off completely.

You can see those American units in the distance, which sat in place for several turns, as their line of sight was completely blocked by that rather large gun!!


The few US infantry units present took up positions around that central building.


Even one of the AT guns was set in that central zone to block certain back alley approaches.


The building closest to the German deployment zone had the forward artillery observer and the officer inside.  Fortunately I was able to keep the artillery pieces rather busy, so they could not blast the building out from under them!


At a certain point, however, I was going to have to make a move against this central structure.  I brought up the sub machine gun armed unit, along with the officer, and anything else that could move.

I also fired my mortar into this area to grind down the artillery crew and force the transport out of the area.


My Secret Mission on the left flank ran into a Quad MMG halftrack, and it did not take long before pins and casualties started to rack up.  Had I known that even getting 1 man to that board edge would have gotten me 1 point, I might have taken an even more aggressive approach.

All this time, I had to avoid many ambushes from beyond the tree line.


Pins and casualties begin to mount from repeated mortar strikes, and pot shots from the MMG team and other units.


The lone US infantry unit spent the entire game taking cover behind the central building, but enough of them would survive to contest the center, yielding yet another draw!

Sadly, I was not able to accomplish the Secret Mission, so I was left with the 12 points, and not the 17 I had played for.

Stay tuned for the final day, and Round 4!!


Sunday, December 2, 2018

Shiny Lannisters!


While I always anticipate having fun making the latest set of tutorial videos for my Army Painter series, this Lannister unit was going to be a particular treat for me!

I had painted a few Empire units with Sky-Earth Non Metallic Metal, but that was several years ago.  As soon as I saw the Lannister miniatures, I knew that this would be my chance to do something like this on an entire army!!


The five part series begins with basing of course, where I demonstrate how to incorporate tree bark and other materials on the individual bases and the movement tray as well.


The next few episodes cover the Shaded Basecoat, followed by the glazing and work in the Mid Tone areas.  Episode four really dives into the Sky-Earth effect on the helmets and weapons.


The final episode covers the completion of the Sky-Earth effect, along with freehand designs.

While it might seem incredibly difficult to create this look on an entire unit, it is possible!  The key is to set up the effect in those early stages, where the Shaded Basecoat happens.


I am working on a very interesting video for the Lannister cavalry units right now.  Extensive freehand on cloaks and the barding of the horses in addition to plenty of gold and steel NMM will be featured!


Here's a peek at the final segment of the series, where grass tufts and snow are applied to the bases and movement tray.  The entire series of 5 episodes is about 12+ hours long, and it covers all aspects of painting this Lannister Halberd unit.

I will be covering many more Song of Ice and Fire units and heroes in video tutorial form for the Patrons of my Patreon page.  Not only the rest of the Lannisters, but Starks, Knight's Watch and Free Folk!

The previous 3 Army Painter series have covered Age of Sigmar, Lord of the Rings, and Bolt Action.  I demonstrate many different effects, and various mediums. For instance, some of the Stark units will be done using oil paints.


All five episodes from the series have been posted for the Patrons... they are available on the Army Painter pledge level for $15.  Here's a link to the page:


Saturday, December 1, 2018

Incoming!!!


The second round of Operation Sting saw all kinds of mayhem!  The mission was fairly straightforward, focusing on objectives, but the "Secret Missions" added an extra layer of madness.

Mine happened to be holding a specific piece of terrain, and keeping the enemy a certain distance from it.


As you might recall from the first post, you had 8 of those Secret Missions to choose from for the 5 rounds.  Once you used one, it was not available for future rounds.  I thought this scenario would mesh with that mission very well, since I had to keep the enemy away from an objective located near that structure.


Here's my scratch sculpted objective marker, which was one of those objectives that needed to be held.


As usual, the static quad AAA launcher sat there and did nothing the entire game.


The mobile version was a little more active, although it had a lot of trouble hitting anything!


Just as I did in round 1, all of my Fallschirmjager squads were left in reserve, so that I could react to the US moves towards my objectives.  Yes, it was another game against US forces.

I will mention once again that it was really nice to have Axis vs Allied match ups in every round.  It is really odd and disappointing to have US vs US, or Brits vs French, etc.


This little bit of action here was a result of the primary mission being mixed with the secret mission.  That red counter is the objective which the US player was after.  However, that was also the marker that I needed to keep free of enemy encroachment!

My artillery strike had wandered just a bit, and of course it went off right in the middle of all these units.  As you might expect, I rolled one 6 after another on my own units, which is why you see all these blast markers.  I destroyed both of my transports, and piled up pins on my own infantry.

It was a complete mess!  The forward artillery observer has since been recalled to headquarters where Smiling Kesselring is not smiling too much...


This was not the only mayhem that went on in Round 2.  I don't have any photos of it, but on the opposite side of the board, a full unit of Submachine gun armed Fallschirmjager nearly lost to an isolated mortar spotter team!

This would prove to be crucial, because that unit would be slowed down in its approach to the vital "swing" objective.


Also, Gene was trying to accomplish his Secret Mission, which was to have his medic heal one wound.  As it happens, that finally occurred on one of the last rolls of the game.  I was trying to kill off the officer team which was holding the "Swing" objective, and had gotten the two wounds that I needed!  However... the medic healed at least one of them, and that objective would still count for the Allies.

The final result of that game was a draw, since the lone US unit in the blast zone was pinned out of existence.  Otherwise, I would not have been able to move them from that objective.

That's what I like about Bolt Action... you don't have to kill things to make them useless or leave the board all together.  I think there were at least 2 occasions where units were destroyed by pins in my 5 games.

Stay tuned for Round 3, where we see the most unusual opponent list imaginable!


Friday, November 30, 2018

The Lotus Leaf


As you know, I create a number of painting tutorials using Dark Sword miniatures.  Normally they are painted with Reaper Clear and Liner paints, or with oils.  I thought it might be interesting to paint one using the new paints from Slow Fuse Gaming and Creature Caster!


I used only these paints, as I really wanted to get a feel for their capacity for glazing, blending, coverage, and all the techniques that I normally utilize.  Sometimes paint has very different consistency, and you have to modify your approach accordingly.


Here are a few scenes from that video, which was done for my patrons this month!  I tested out the paints for freehand designs for the first time, and they did very well.  You can see that I was able to easily establish some delicate patterns on the cloth.


As usual, I did a segment on the basing and foliage.  The Green Stuff World shrub and flower tufts worked very well once again!


The final result of the video.

Not only did the transparent cloth work out, I found that I was able to wet blend very nicely, and blend the blueish tones into the skin colors easily.


In each video, I try to cover a few main topics.  I always discuss how the Shaded Basecoat technique allows me to make adjustments on the fly, and establish the 'core' of my color scheme quickly.

When you do so, it is much easier to make the decision to alter, add or eliminate something from your original concept.

I tried to demonstrate using a wide range of blueish tones, as well as freehand designs and transparent cloth.


This is just one of several videos available to the patreons of my Patreon Page at the $10 level!  Check that out here:


Thursday, November 29, 2018

Round 1: Operation Sting


Operation Sting was really an amazing event!  Two days, 5 games, and lots of action... Bolt Action.  As I had mentioned in a previous post, many of the players brought their terrain tables so that it spread the work load and created more variety in the types of terrain.

This is my Ardennes board which I brought along, with the TableWar mat.


I played virtually all of my games against US armies, and that was the case for Round 1.


This seems deceptively open.  Keeping in mind that forest are dense terrain, as are ruins and buildings, I knew that the anti aircraft based weapons would not be doing very much.


This turned out to be the case.  Most of the time the Quad AA was in ambush, and the mobile heavy autocannon was in reserve off board.


I knew that for the tournament, I would be relying on the Fallschirmjager to come in from reserve, even though there were not very many of them!


When the heavy autocannon did arrive, it could dictate where the Sherman would pop up.  Again, the ambush game applied.


The scenarios were out of the book, but with a key twist.  Each game, you had to choose a "Secret Mission" and attempt to accomplish it.  You had 8 to choose from, and each time you made a choice, that was no longer available for the tournament.

Each mission also had 3 levels... a 5 point, a 3 point, and 1 point.  In effect, these were the critical tie breakers.  You would get 20 points for a win, 12 for a draw, and 5 for a loss.  So, getting the full 5 points could really help with a draw, and even a loss.

As the missions were secret, it was very difficult for your opponent to prevent you from getting them, unless you were very obvious!


My secret objective was to hold a few pieces of terrain, and keep the enemy away.  There were more obvious missions, which will be covered later.  Also, I can say the aligning your secret mission with the Table, Scenario, and Enemy force was a challenge!  

For instance, if you choose to go after the enemy commander in a giant Soviet horde in an urban setting, you are very unlikely to make that happen.  Also, two of the 8 Secret Missions were impossible for me to accomplish, since I had no medic and no tank...

Speaking of scores, Round 1 ended as a draw, and I did manage to get my 5 points.  That meant 17 for the first game.  I may have mentioned once or twice that I was totally unfamiliar with this army, with no time to play test it at all.  In fact, I had not even played a game in months.  And that was my usual early war!

I had to make cheat sheets for the army, so that I could identify each unit easily.  Most of the weapons that I had seemed like science fiction compared to the basic rifles which I had been using all along.

Stay tuned for more, as I take you through 5 rounds of action!!

Here's a link to one of my early war battle reports.  I have 4 of them set in France 1940: