Sunday, November 27, 2016

Getting around in style


You saw a peek at this Hanomag last week in the overall shot of the France '40 German Heer army.


It was part of a trio of test vehicles, where I was trying to get a handle on the new Mig AMMO products, decals, and more.  Since each of these vehicles presented different challenges, I thought it would be an excellent laboratory! 
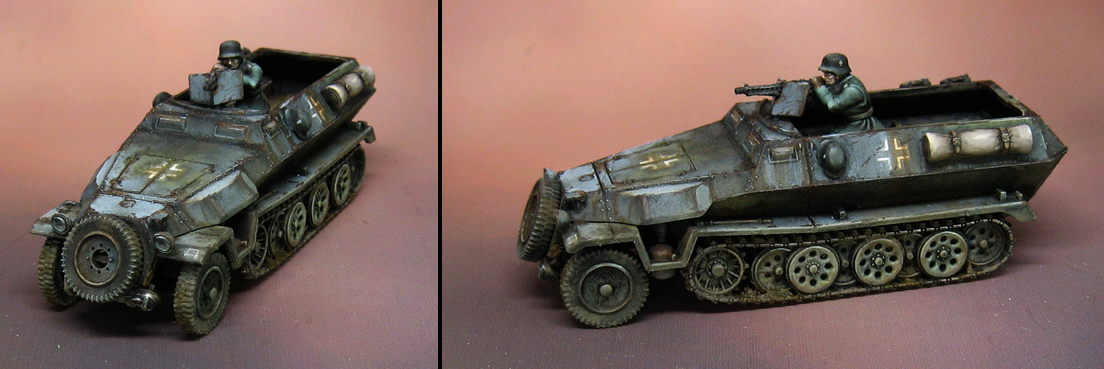

The research I had done on the Opel Blitz markings decided on what I would be doing here.  I was able to get some decal fix and sealer, which took a few tries to work out as I wanted them to.  I had to figure out how long certain products needed to set, etc.


Moving forward, the concept is to work on dozens of vehicles and infantry figures all at once using the oils and other pigments.  This will allow me to maximize the advantages of the longer drying time of those oils.  


I still have a lot more testing to conduct, not only on this early war army, but on desert, winter and urban settings.  Starting the process with the classic early war German Blitzkrieg force will make a prefect foil for the ever expanding French army.  Yes, I have not forgotten about them!  A lot more is on the way...


With each vehicle that I work on, more new ideas emerge for combinations of pigments and paints.  You won't be seeing the usual procedure for using the AMMO stuff... or the airbrush for that matter!


Here we go!  The first trio of vehicles, hopefully a successful first round of testing!


Saturday, November 26, 2016

Goats


This unusual figure presented a number of  color choice decisions.   It appeared to be more of a beastman style creature, so I tried to push the colors towards a human set.


I used earth tones and greens on other surfaces to stay in harmony with these skin colors.


I did tint the skin  color more purple in the end, adjusting on the fly with successive glazes.  This was done to initiate a Chaos element .


She's also here:


Friday, November 25, 2016

Skink Charge!


Next up is another of my favorite lizards!  Yes, the mighty Skink!


These little guys are just so active... I couldn't resist putting all of them in extra aggressive poses.


When I made my display board years ago, I created a few press moulds for the decorations on the temple walls.  These also made handy extra touches on the bases, especially when I needed to expand the base to make room for a wider footprint.


While the basic colors of this are "simple green", the gradations and muted stripes help to make him seem a little less cartoony.  When you are dealing with things this small, it's all to easy to make them start looking like hairless scaled zebras, so it is essential to approach the stripes in more of a transparent application.


Thursday, November 24, 2016

Bringing in the BEF


Here's a brief set of images that I shot while I was working on the BEF... the glazing phase.


Most of you should be very familiar with the concept of the Shaded Basecoat technique.  This involves working rapidly, across many figures at once, starting with lighter colors and working all the way towards highlights.  The subsequent stage is glazing, where those colors are shaded, tinted as needed.


This view shows the Brits looked in that Glazing phase.  I think that I had already done my glazes on the bases themselves.


The pictures will not be ideal, since the lighting and other work circumstances were done "on the road" away from the studio.  However, you can see in the overall image (and the insert) that the glazes can be removed once applied to control them.

This provides a great deal of efficiency and speed, since it takes a lot less time to apply several translucent layers as opposed to opaque layering.


These lads have some of those glazes applied.  I used a few different greens and browns in the glazes, which provided subtle variety from one figure to the next.  This is the equivalent of the Mig AMMO filters, which tint colors and also serve to 'blend' lights and darks together more smoothly. 


I tried to get you an image of a few unglazed figures next to ones that have gotten that glazing treatment.


More figures have been glazed.  I used a variety of companies paints in this task, mostly Vallejo washes.  They have a rich tone, with a little thicker consistency.  I also had some Secret Weapon washes, which are very thin and runny.

Mixing the Secret Weapon and Vallejo glazes together works well, and also cuts down on the shiny nature of the Secret Weapon glazes.


This progression of images gives a blow by blow on some glazing in action. I worked my way from one figure to the next, carefully applying the glazes, making sure to tint the original Shaded Basecoat and not just make it darker.


The machine gun team helmets are the focus of this image set.  I mixed a darker green glaze for the helmets, but I removed some of the glaze on the upper surface of the helmet before it could dry.  This is why I want to try using the oil washes for this stage, because I would have several hours to do this "removal process".


The artillery, machine gun and mortar teams now have their glazing.  They look quite different than they did in those early images!!


I will be sure to post more tutorial style articles on these figures as they progress.  As I have mentioned before, you will probably see me painting some in live Google Hangouts as well, so stay tuned!


Wednesday, November 23, 2016

The Ice Warrior


This figure is the first in a series of alternate color schemes for the Algoryn faction from Gates of Antares.  The goal is to create as wide a range of themes as possible, using both color and basing.


Since the original color is a deep red, I wanted to try something very different, utilizing an icy palette for an icy base!


The faceted armor reminded me of ice, hence the reason this particular theme crossed my mind first.


Some of the other concepts I'm working on include urban, lava base, jungle camo, and more... so stay tuned!


Tuesday, November 22, 2016

Wolf Pack!


Wulfen figures of all types are clearly favorites of mine, and these Norsgard versions are a great addition to my collection.  I had a lot of fun with these.


Each of them has a unique character, and the poses are certainly dynamic.


All of the bases were made with tree bark, and a smattering of Secret Weapon resin skulls were added.


There are also some different fur colors here.  I could not resist making the "Duelist" white!


The larger wulfen to the right of the image had more greenish tones worked into the fur, while the magic user had plenty of purple glazes.


To see more amazing figures from Norsgard, check out their website:


Monday, November 21, 2016

Manticore


This monstrous creature is one of the original sculpts by Raging Heroes.  I had painted this up for a possible Chaos Warrior fantasy army.


As with all things that pertain to Chaos, I wanted to have a Tzeentch theme, and this is why the sword was given the blue tint, and glow applied elsewhere!


There was also a design aspect to that choice, which was an attempt to create a little more interest in areas that might have been repetitive or monotonous.  Since many of the colors would be warmer tans and umbers, the brighter blue would offer a contrast in saturation and color temperature. 


Some of the middle tone colors were greenish grays, made by mixing that lighter blue with the sienna and tan.  The green colors provided a little more interest in the middle tones, and even the shadow areas.


I know that the texture on the wings was pretty heavy, and it would be impossible to make them look more like membranes or something semi transparent.  This was another reason I wanted to toss in that extra definition from the Object Source Lighting.


The rider was also interesting to paint, with lots of fun shapes.  His head crest also reminded me of the Tzeetch look!


He's also here: