Saturday, March 9, 2019

It's in the Bag!


For quite a while, I wanted to have a decent dice bag for our games of Bolt Action.  While there are plenty of options on the Warlord site, I was also hoping for something which could be utilized for other games or purposes.

This hand made custom leather bag from Armored Wolf did just the trick!


You can get an idea of the scale comparing it to the dice and surrounding figures.  Without a doubt, you can get plenty of order dice inside!


Since I tend to play larger games with a fair mount of order dice, having a bigger bag is handy.  Also very handy is the leather string which can close off the bag, just in case I don't have my usual dice carrying boxes.  I was able to fit 30+ order dice and 32 large regular dice into the bag with no problem at all!


The dice bags are a custom order, which means you can have just about any color combo you need.  Other elements can be added such as leather tooling for unit/army/national insignia, etc.  Here's the Etsy location where you can contact them:  https://www.etsy.com/shop/ArmouredWolf


Eventually I will have a bag made for my French forces, and probably another for my Winter Soviets.  As I mentioned before, this is the most generic bag that is available, at $55.


The dice in the image are from Dice of War, of course, who make dozens of amazing dice for anything you could possibly want!  I loved my Fallschirmjager sets that I used for Operation Sting last November.  You have seen me using them in my Battle reports all the time... here's an example from my YouTube channel: https://youtu.be/njN4D64zH1k 


I will be bringing this along with me to Adepticon so that I can use it for my Song of Ice and Fire tournament action!  The leather is just soft enough to close easily, but stiff enough to hold its shape even with a bunch of dice inside.  The bottom is flat and fully stitched by hand.


This high quality bag is really amazing in person, and I have seen super customized designs that blow your mind.  You want some shell casings stitched in... some tooled insignia or even shoulder badges?  Let your imagination run wild.  I certainly plan on it!


Thursday, March 7, 2019

Red Alert!


Episode 13 of Painting Dark Sword is now available to the Patrons of my Patreon Page!  I have been tackling a lot of color theory episodes of late, creating tutorials which focused on Greens, Blues, and even Yellows.

This time we explore Reds, and what is possible to create in that range.  It is not just a matter of cooler or warmer reds, lighter or darker, but of saturation as well.  I try to demonstrate the impact of highly charged colors vs something which is more muted by doing a little object source lighting in the process.


The base was created using the Green Stuff World texture rollers, and the brightly glowing runes were just too much to pass up!  I had used this texture for the very first Army Painting series, in which I used the fluorescent green to make those evil runes glow with mystical energy.

I also created some glowing eyes, which is a very rare thing for me.  


The Painting Dark Sword level is $10 on the Patreon Page, and signing up will also provide you with access to the previous 12 episodes!  There's much more on the way though, with all kinds of fantastic figures to work on.  Here's a link to the page: www.patreon.com/JamesWappel


Wednesday, March 6, 2019

I am Groot


These Malifaux Dryads were really interesting to paint, and certainly very different from the GW versions!

I was able to do some fun things with the muted tones... working in plenty of greens and even a few purples here and there to create some of that "hidden" contrast.


I think you can see some of that in these views.  To compliment those greens and purples, I also incorporated some of the Secret Weapon rust colors.


By virtue of the types of textures that I was dealing with, I could do a lot of glazing, which is fun.  These didn't just darken colors, but they also tinted them towards one shade or another.  Stay tuned for more!


Tuesday, March 5, 2019

More Skull and Bones


Last week I experimented with the Green Stuff World texture sheets for the first time, and the results were very good.  Those bases were sightly larger, and I was curious to see if those textures could be used on smaller bases.  

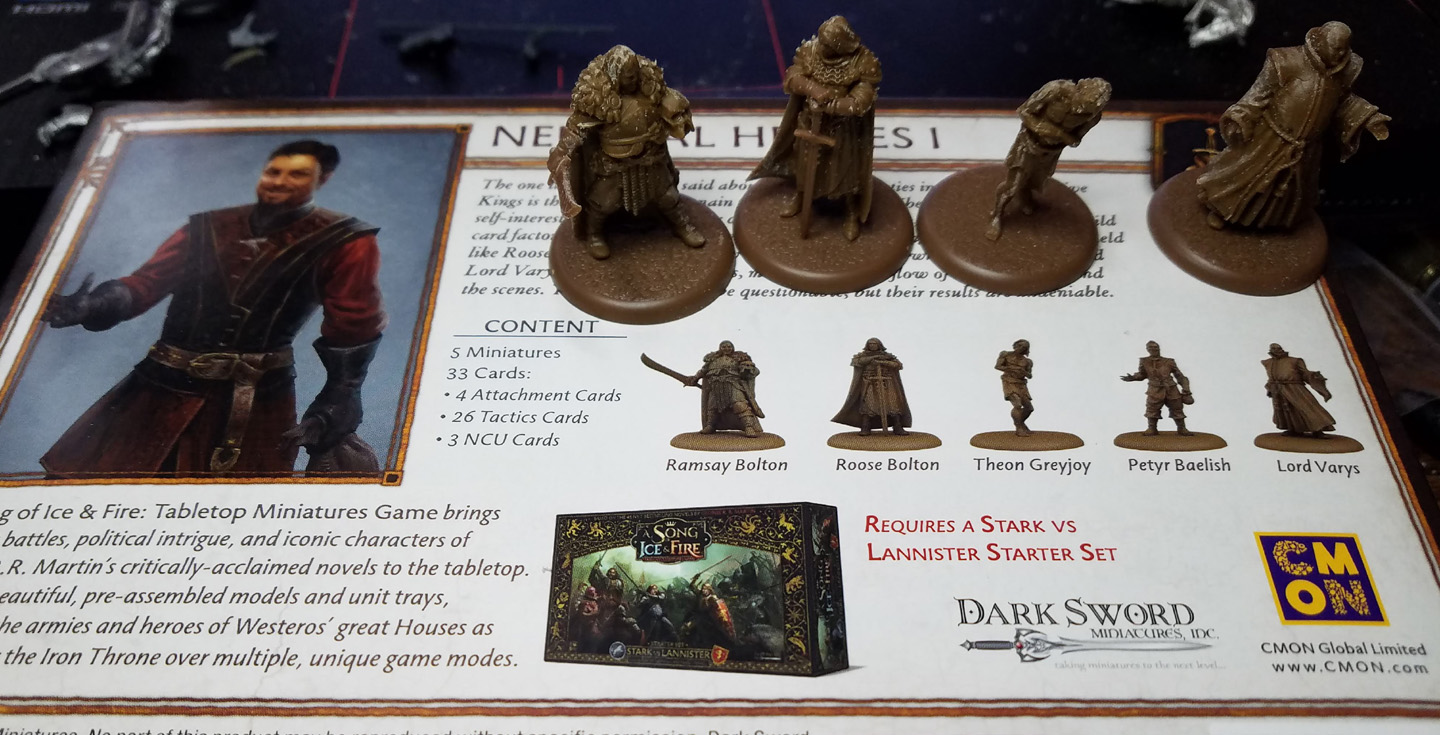
The Boltons and Free Folk Raiders seemed to be the ideal candidates for these tests!


In addittion, I tried out another texture roller sheet for the NCU's.  It is one that I had been saving for just the right miniatures and what better than Song of Ice and Fire!


I have many articles showing how I work with the Sculpey and the rollers, such as this:  https://wappellious.blogspot.com/2018/04/rolling-on-to-victory.html


Now to the skull and skeleton textures!  The Roose Bolton had to go on a base like this after I was shown a few scenes from a Game of Thrones episode...


I used a little bit of the oxide pastes to mesh the edges of the texture sheet with the cork and base.


I had to try it on one of the Savage Giants too!  You can see what the other type of basing looked like in a previous tutorial: https://youtu.be/1LvJv3dyjEw


The biggest challenge would be one of the units, since whatever I did with the bases would also have to work on the movement tray.


I discovered that the material could be snapped off in pieces far easier than I first anticipated.  I thought that you had to use a clipper or snip of some kind, but it turns out that there are some natural "break points" where it is thin enough to snap off a small piece without ruining a key texture.


Just as I would with the tree bark, I made several pieces that could go in the gaps on the tray between the figures, trying to maintain the same sort of texture that was placed on the closest figure's base.


A few types of cork also filled out the tray, giving some of the same poses a different look just by changing the height.


Once again, I employed some of the texture paste to blend things together.


Here's the movement tray and miniatures!  Ready for priming!  You can see how I have done the basing of a typical Song of Ice and Fire unit in this video:  https://youtu.be/INPfPLCTZcE


Basing episodes such as these are part of every Army Painting series on the Patreon page.  That pledge level is $15 per month, and brings you 15-20 hours of content!  Not just basing, but plenty of painting as well!


Here's a link to the page... I cover every type of material, technique or combination of those in every single tutorial! www.patreon.com/JamesWappel


Sunday, March 3, 2019

Live Horses


I know I have talked about this before... but I love the way the Song of Ice and Fire horses are sculpted!  So often I have had to paint "horses" that are more like large dogs cosplaying a horse.  Each of these is very unique, and the action poses truly look like running horses.


The riders are also well integrated, and the overall composition is amazing each time.


I will be working on some Bolton Flayed Men cavalry late tonight in another YouTube live session, so stay tuned for that!  I will be using oil paints once again, specifically the Mig Ammo Oilbrushers.


Here's a link to one of the YouTube Live sessions that I did using the Mig Ammo Oilbrushers: https://youtu.be/HB-nhuTmNbQ


Saturday, March 2, 2019

Confronting the Warp


While most of the figures I have been painting lately have been brand new Song of Ice and Fire minis, I still work on figures that have a much longer past.  This was certainly the case on the Confrontation minis!


This set goes back a long way... possibly 15-16 years ago.  What is interesting is the idea that in some ways, this style of sculpting did pave the way eventually to the kind of flowing, dynamic poses and sculpts that we see now.


I recall back in the day that Fimo was used a great deal in the sculpting process to create more intricate details that were not very common at the time.


Digital sculpting these days can allow for much more detail, but sometimes that alone is not enough.  It seems to be easier to get a more static looking figure than when you worked with physical materials.  When the priority is the tiny details, and the main pose is not the focus, a stiffer pose can happen.


Anyway, these guys were interesting, even if they were long in the tooth!


Thursday, February 28, 2019

Yellow Alert: Part 2


The latest Painting Dark Sword video is ready for viewing on the Patreon Page!  This episode builds from the principles first discussed in the original Painting Pyramid video called "Yellow Alert!"

You can even see the color swatch that I painted during that first video.  I expand on that here, right down to the basing of the figure.


The goal of the video is to show you how expansive the range of "yellows" can be, and that it encompasses far more tones and shades than you might think.


I brought out the Green Stuff World leaf cutters and flower tufts to show how you can carry that same color principle into your foliage and basing.


I even managed to sneak in some Object Source Lighting, but that was not the central focus of the video.  I added that so it was possible to show how 'yellow' can be the very bright color we automatically picture in our minds.

However, I wanted to demonstrate how there is a vast range of much darker colors that can be made from mixing yellow with something else!


I was primarily using purples and reds mixed with various yellow to create midtones and darks.  Purple and orange mixed together is a favorite of mine, as it gives you a wide range of saturated or unsaturated brown and mahogany colors.


I have a special pledge level for Dark Sword miniatures (Black Heart busts are part of this pledge level too!) on the Patreon Page.  Each episode tries to tackle something different.  A different technique or color theory principle, a new material, etc.


This is available to my Patrons right now, at the $10 Painting Dark Sword level!  As you can see, I am already up to Episode 12... and Episode 13 is on the way!!  Here's a link to the Patreon Page: www.patreon.com/JamesWappel