Monday, October 17, 2016

Let's get Muddy!


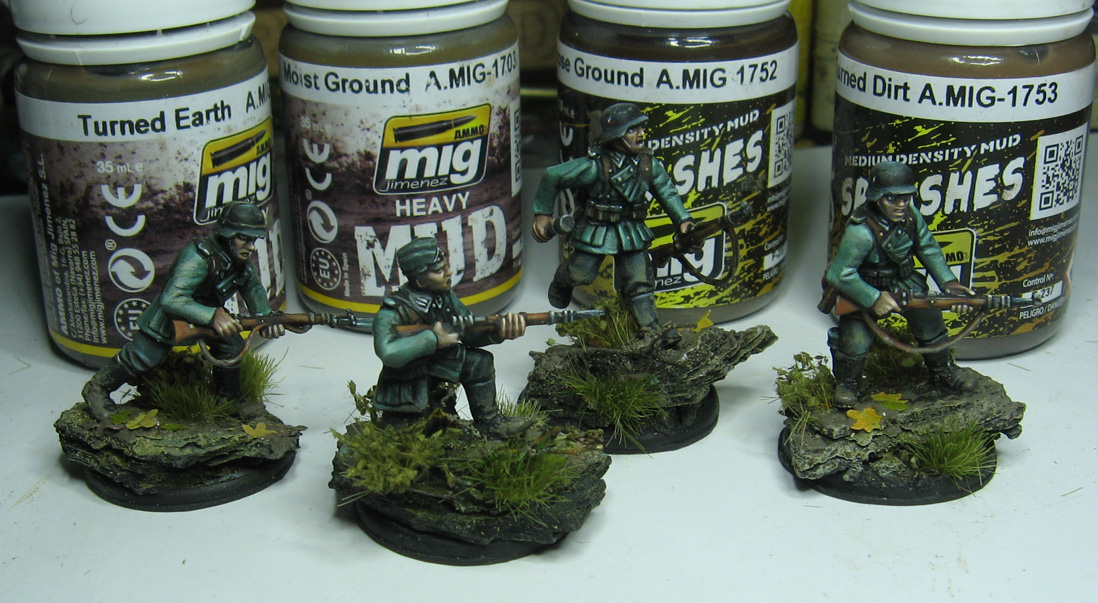
Ammo mud products are not just for tanks!  I have been using them on "regular" infantry style figures as well.  Here's a quick article that shows how I used the oil base paints on a few early war German Heer infantry.


I started out with a lighter mud splash color, as dried mud tends to be lighter than fresh mud.  I have a regular stippling brush and a home made stippling brush that was made from one of my worn out #8 round craft brushes.


I did some test spatters on the palette, which also thinned down the spray before I applied that to the figure itself.


I tried to focus as much as possible on the boots, with less spatter above that line.  Also, since this is oil based, I will have time to smear these out a little, and even remove them entirely if I don't like the result!  This is one of the chief advantages that I have been enjoying with the Ammo products.


All four have been spattered, so I will go in and refine that application, smoothing out some spots that are too harsh or got into the wrong area.


The heavier mud is next.  Take a look at the inset to see how thick this is!  You will have to stir it from time to time, but using it frequently also helps a lot.


The heavy mud was not only for the figures... it was intended for the base as well.  This ties it to the figure, and gives one more interesting texture to the base.


In some cases, I also applied it lightly to the clothes.  This can be very effective on kneeling or prone figures to make them look like they have been in their environment!


I had a few leaves left over from the Green Stuff World leaf punch experiment, so I added a few of those into the wet mud.


The leaves have been placed in areas where I won't be putting any kind of foliage, just to add a little color interest to the base.  I can add more of less if I want.


I have a few different foliage tufts, which are from Gamer's Grass (Kings Hobbies and Games.com).


I really love the added dimension that the bush tufts add to a base!


When we are back from Reapercon, I will take the finished photos, and do several more articles on this subject.  Stay tuned!!!

Sunday, October 16, 2016

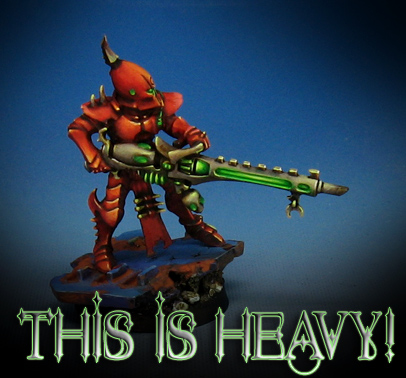
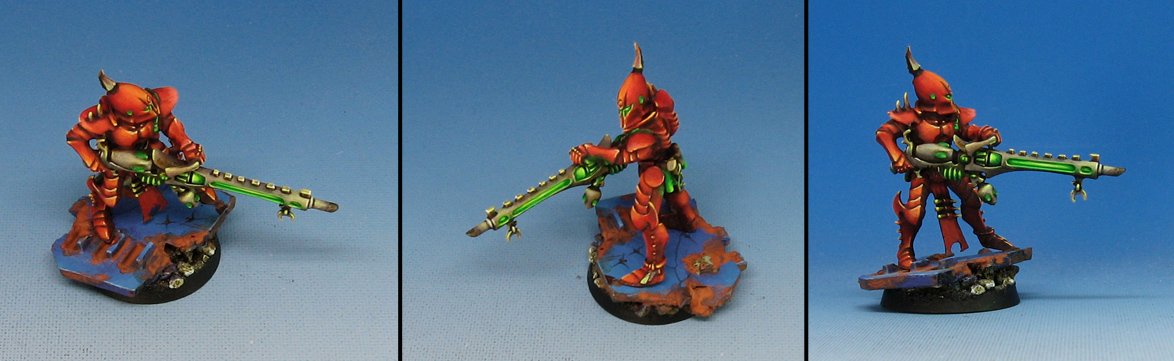
This is heavy!


It's been so long, I forgot that I had done a few heavy weapons for the Dark Eldar army.  I probably never got to use this in an actual game, since I only used the army briefly around Adepticon a few years ago.


This is one of the few Kabal Warriors made entirely from the more recent set of kits, as opposed to all the converted combinations of very old bitz!


He's also here:


Saturday, October 15, 2016

Pipe and Spear


This little guy was part of the massive Skink and Kroxigor unit that I used to call the Skink Tank.  I believe there were 36 'regular' Skinks to go with the four Kroxigors.  To complete the unit, a champion, chief and priest were included to add mischief!


I remember a few dramatic moments for this unit.  Twice the "stand and shoot" reaction of all the poisoned javelins killed a greater Chaos Demon as he charged the unit.

It had a less spectacular moment when it tried to cross through a river of blood, which was part of the great campaign for the Temple of Blood.  Anything which went inside that moat around the Temple would be killed on a roll of '1'.  And yes, I managed to roll 18 of those dreaded ones on 42 dice.  

That's how we roll in Lustria! :-)

Pics of the unit:


Friday, October 14, 2016

Drone Wars


This is a collection of sci-fi style bases for the Gates of Antares drones.  I needed something relatively simple, but intricate enough to hold people's interest, since the figures on them are nearly invisible when you look at those bases ;-)

I used a variety of plasticard, sprues, sculpey, and even pieces of MDF from laser cut terrain.


These drones accompany various units in the game, so most of the bases are also designed to match the intended squad.


The heavier sculpey bases were used where the metal drone was leaning over a little more as a counterweight.


This set of bases was made using the Happy Seppuku moulds, all by pressing sculpey sheets into the moulds.

I will have a number of basing videos at Reapercon, including several sci-fi basing techniques.  Here's a quick preview video:


Thursday, October 13, 2016

Hot Coals


While there have been a few additions to the Bombshell Babes line since this lady was released, it's still a favorite!  I thought that putting some lava effects could take advantage of the drama of the pose.


Like all the Bombshell Babes, there is plenty of character, but there are enough blank canvas style spaces to allow the painter to do whatever effects or color scheme they want.  There are times where figures are so heavily weighed down by built in freehand designs, it can lock you into one theme.

Not so here, where I had plenty of areas to do freehand if I wanted, or do various markings on the skin.  Since I was going to have the dramatic lighting of the lava, I thought it best to keep things more simple on the figure itself.

This was also an exercise to illustrate that it is possible to reflect light on a surface that is also very light!  To make this work, shadow areas must be carefully placed to create the contrast needed to make a glowing effect.


Color temperature and saturation are other methods of establishing contrast.  That is, the lava colors are extremely pure and bright, and very warm.  The colors on the figure are more muted, and generally 'cooler'.

I enjoy painting lava effects so much, it just had to be part of the video series!  It's one of the 53 different subject matters I will have with me at Reapercon, so come and get 'em!!


Here's a link to one of several posts about the glowing effect videos.  This one shows the process of the "You Might Even Say it Glows" video, showing how to make glowing fire elementals, etc.:


Wednesday, October 12, 2016

Risen from the Dust


Here's a collection of chariots which I made for the Tzeentch tainted Tomb Kings army a few years ago for an Adepticon tournament.  I had a lot of fun converting and painting these!  I also learned a great deal about a number of new techniques and materials.


I had never used the Vallejo fluorescent paints until this point, so each figure was a new learning experience.  As you will see in these images, no two skeleton warriors, horses or chariots were painted in the same colors.  In fact, the colors vary greatly on one single element, which created a monstrous challenge!


I ended up making several painting videos as a result of this project, and all of those new techniques that I discovered and developed.  One of those was "Painting Demon Marble", on which this entire army was based.  The design you see in the smaller inset was the icon of the army, and it was painted on a few key bases.

Once all the bases in the unit were placed side by side, the overall image was revealed.


Even the placement of the horses, chariots and crews was complex, to ensure that everything would fit and "rank up" on the movement trays.  To make that task even more difficult, the command figures of standard bearer, champion and musician had to go in very specific locations.  Many shifts in this placement had to be made before I drilled any holes into the sculpey!


This image gives you an idea of how the armored blankets were done on the skeletal horses.  I made one original, cast it in a press mould, and then used green stuff to replicate the texture over and over.  A sheet of tin foil gave the blanket the added strength to keep its shape during the whole process.


I have never taken any pictures of the individual chariots, so these images are very special to me.  They also showed me how much work I had put into every figure!!


All the subtle color changes and shifts had to be as random as possible to match with the story of the army, but still follow certain rules of color placement and theory.


As you look at each image from these various angles, you will see that even the wildest colors are balanced by more muted, darker shades.  Also, colors are not "isolated", meaning that they are repeated over and over again on the horses, crews and the chariot itself.


Every so often, there is a tiny hint of the "untainted" original color... a little bit of wood or even a hint of gold.


You can read all about the story of this army, the creation of the huge display board, and much more in the Tomb Kings army section of the blog...


Tuesday, October 11, 2016

The Colonel


I have a handful of Artizan Designs Wild West minis, and each one has plenty of character.  This one reminded me so much of Colonel Sanders, I could not resist this particular color scheme.


As with all limited palette exercises, maximizing mid tones is very important.  This is where you can tint colors the most, such as a grey that is more tan, or more greenish, etc.  Mixing a light flesh tone with a dark grey or even a black will get you a far different tone than mixing black with a sky blue, for instance.


I attempted to get some yellows into the mix as well, especially on the hat.  You can see even more of the blueish grey on the pants, although there is also some greenish grey.  A similar set of light and dark shades were done on the base.

One of the five "color theory" videos I did as part of the kickstarter focused on grey, showing how 'grey' can be more purple, blueish, yellowish, and so on.  And yes, it was called Shades of Grey.  I will have that at Reapercon along with the rest of the video collection.


He's also here: