Friday, May 24, 2013

Rivet Wars at the CMON Expo!


Ted Terranova, the creator of Rivet Wars, was kind enough to allow me to use some of his images that he took at CMON Expo last weekend.  Here we have a few of the images he snapped of the sample Rivet Wars figures I painted for the kickstarter.

It was very interesting to see them in a new context after a few months!


Some Blighter vehicles...


And then there were these shots!  Don't they look nifty in this terrain?!


So cool!


Ted did a great photography job on these :-)


Here is something fun as well, a dice tower!


There were lots of intro games going for Rivet Wars... here are a few images to give you an idea what it looks like.


It is very fast paced, and quite deadly.


It also looks great.


I was bummed that I didn't get a chance to try it out.  Perhaps next time around...


The cards are filled with Ted's fantastic artwork!


An there he is on the left!  Ted is a great guy, and you will enjoy his game... he's worked very hard on it, and continues to do so.  Many thanks to Ted for allowing me to try out Z Brush on his setup this Monday.  What a fantastic program.  It made me very jealous!  It has some incredible possibilities.  Ted has certainly done some great things with it!


More of Painting with fire: The Rothand Studios Golem rises!!


OK!  Sorry for the delay, folks.  It's been one of those types of days.

Anyway, I don't think I have ever shown any pictures of mixing the Secret Weapon pigments together, so I snapped a few as I was doing some final work on the Lava Beast!!


You can see that the lighter greens have a distinctly different color temperature...


Which will make a difference when they are each mixed with the black to make an ashen look to the outer ends of the hands, shoulders, etc.


Once I had each mix set, I brushed it on to the ends of the fingers, shoulder spikes, and the base.


I also used some of the black to darken down some areas that I thought should not have any lava cracks showing through...


I shot some pictures on a neutral grey background.  Here is one of them.


This set was done on white.  Since my grey background is much larger than the white, I was able to get some different angles.  In this post, I will use the white backdrop, and show the grey set tomorrow...


This guy really is massive.  The base is 100 x 100mm square.


He is very solid, however, so you won't have to worry about him breaking! :-)


I think you could use this as a K'addai Destroyer in a pinch.


I will also try to get some size comparison shots for you tomorrow!


So, if you want to get your hands on this, go see the good folks at Rothand Studios... and check out their kickstarter!


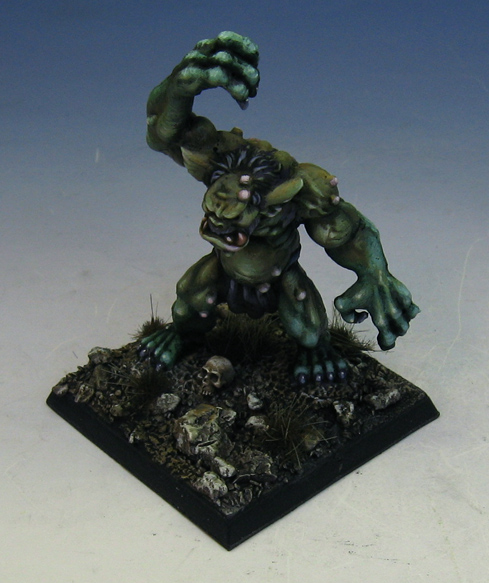
It ain't easy being green


This classic Reaper Miniatures troll is the figure for the "Painting orc and goblin flesh" video.

It had a nice variety of surfaces, and gave me the opportunity to do what I needed in order to show how to get a better variety of skin tones.


My goal is to help people get beyond green, followed by brown wash. :-)  With a little bit of color temperature shifts, you can get a wide range of colors, making your greenskins more intersting... be they grots or nobs!


I had fun painting this guy, and I am pretty sure you will too!


Thursday, May 23, 2013

Painting some Zombicide figures at CMON Expo


Well, you don't need me to tell you about Zombicide. :-)  Heck, everyone else knew about it long before I did!  But, there are probably a lot less painted versions of the Z-Cide figures floating around.  

I will be posting a few images of some paint and take figures I did at the CMON Expo.

Cathy, Randall, Sabrina, Rhonda, Eddie, myself and others had lots of fun painting around the table all day and into the night.  I painted most of this zombie lady during those paint sessions.


When we returned home, I added the newspapers and the skulls which are from Secret Weapon.  Those skulls are fantastic, and they come in a nice big baggie.  You will see them on many of the Painting Video figures.  It can be hard to come by extra GW skulls, and I have just about exhausted my supply.

So, Secret Weapon to the rescue!


Cathy also brought something back home, despite the looks it got at the airport as she hauled it on the plane as a carry on. :-)


It is pretty wild to think about how many figures are in this box!


Some of my extras that I painted at the CMON expo will likely find their way onto the bottom levels of my new army board, down in the underhive!


The character cards were fun, and the board sections are really amazing!  I had never seen any of these items in person before.


They look like dancing bears right now, but eventually they will be painted.  I know Sabrina painted a very cool Bruce Willis at CMON Expo...


Counters!


More zombies to come!!!


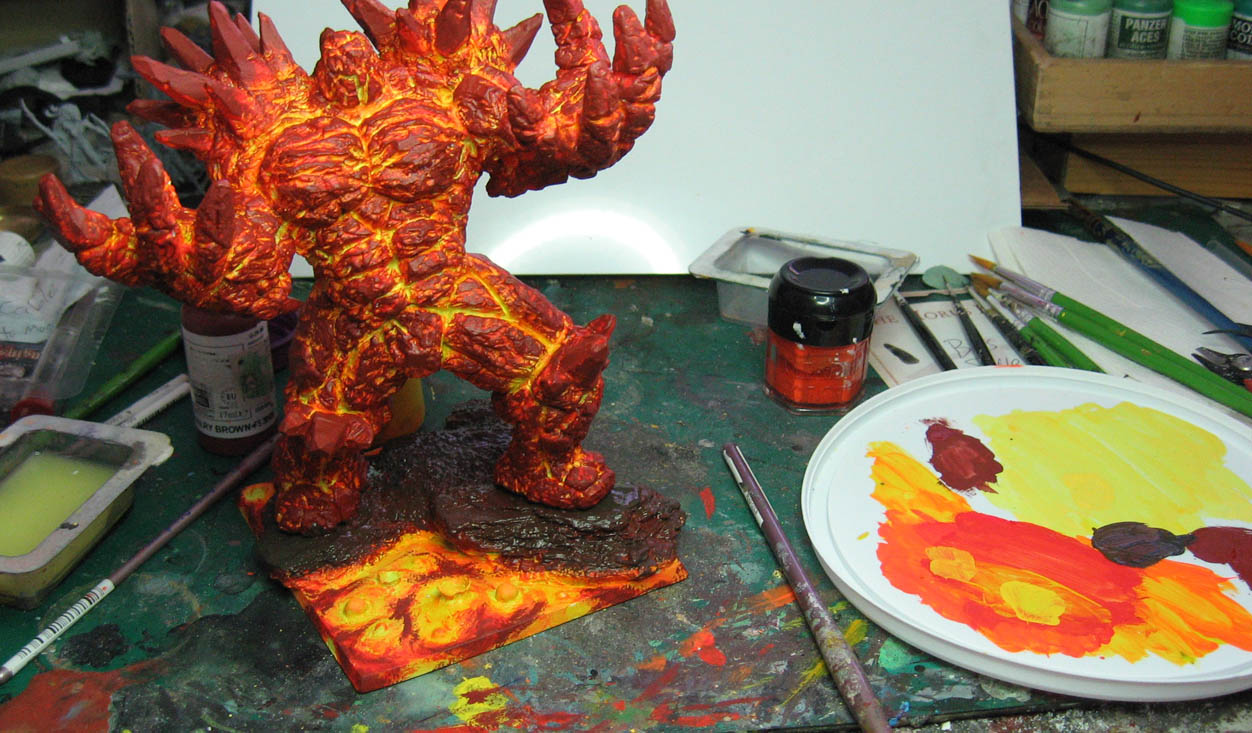
Painting with fire... the Golem continues.


We proceed with the Fiery Golem!  At this point, we have gone through all the stages that involved the fluorescent paints.


Abima, Master of Fire, has led you well thus far!


The next color applied is Vallejo Cavalry Red.  Just as with the other layers, this one is placed with the large filbert brush, and allowed to mix a bit with the previous layers.


The entire miniature gets this treatment...


Next, I mixed a chocolate brown color with a blue-green so that we can start to cool down this lava!  The brown keeps the mixture from getting too grey too quickly.


You can see how this is not just darkening the non-hot lava areas.  It really does cool down the surfaces that are in contact with the air...


Once that is applied everywhere, we have to think about our darkest shadows.


Here is a closer view...


And from another angle.  I also took some orange glaze and toned down some of the brighter underlying yellows here and there, so that certain sections would stand out more, instead of everything being equally bright!


I used some dark washes of hard body black and blue-black, especially on the base and the biggest chunks of "cooled lava".


The end result of that series of washes and glazes...


At this point, I start to mix in a seafoam green color with some black in order to get a cool grey.  I concentrate most of the lightest lights on the base, the fingers, and the shoulders.


Stay tuned for the final conclusion!!!

And to the Indegogo campaign: