Sunday, March 13, 2016

Time for Glazing!


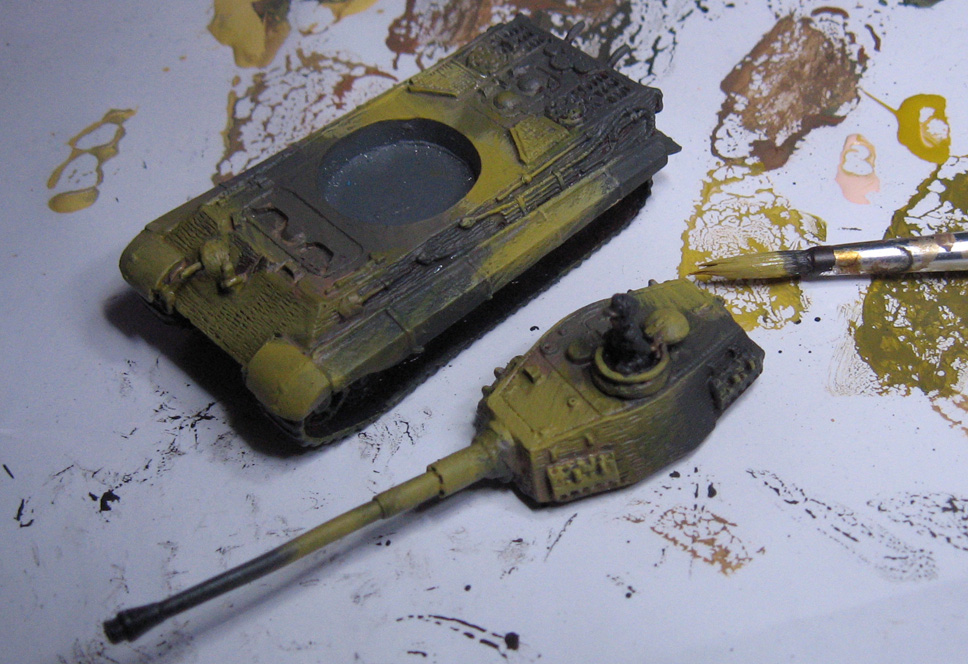
Once I was done with the shaded basecoat phase, utilizing the "Primer Painting" technique, I had both sections of the Tiger ready for glazing.

Several different glaze colors are out on the palette... black, blue, green sepia and a few others.  These will be mixed together both on the palette and the miniature itself.

Another note: when I am glazing vehicles I don't exert as much control over the glazes, since I want more random color mixes to occur.  This creates some interesting variations that I can then turn into some kind of weathering.


Over the greenish areas of the camo pattern, some darker green glaze is applied.  I'm using the larger #8 round brushes, so it all happens very quickly.


In this image, you can see that an umber/sepia mix has been applied into the tan sections, but is allowed to mix in randomly with the previously applied greens.
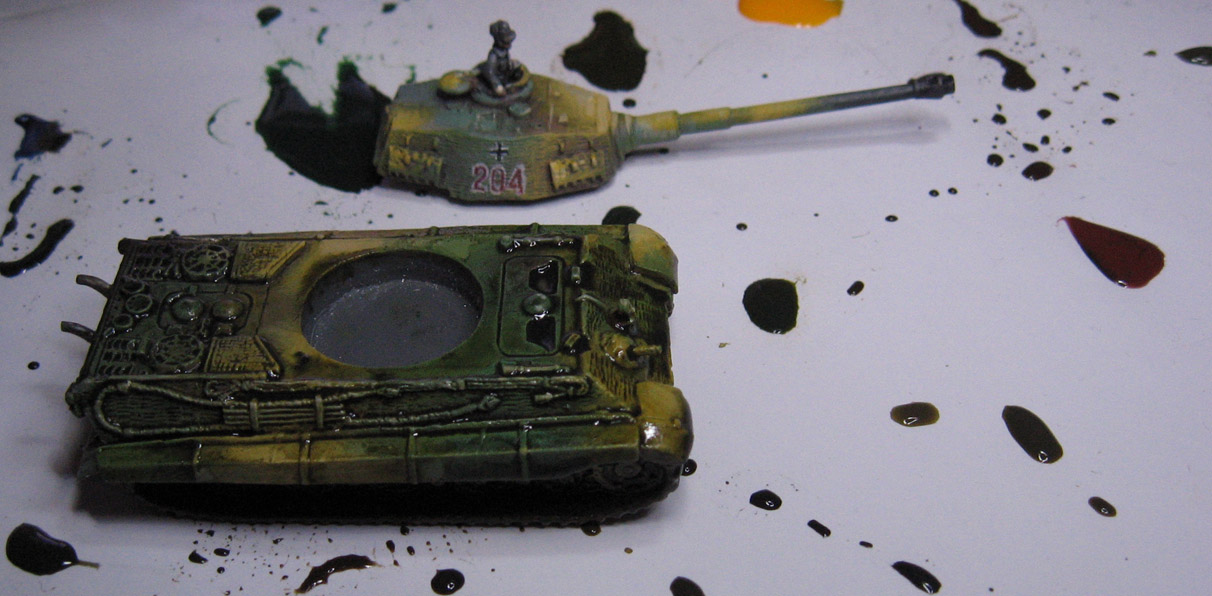

The same concept works on the turret.  There were a few times where more black was mixed in with the green, which is as much of a tint as it is a shade.  It's an easy way to get some variety in the greens, instead of having to paint endless layers of lighter and lighter colors.


Just as I did with the hull, the glazes on the tan sections of the pattern are mixing with the greens.


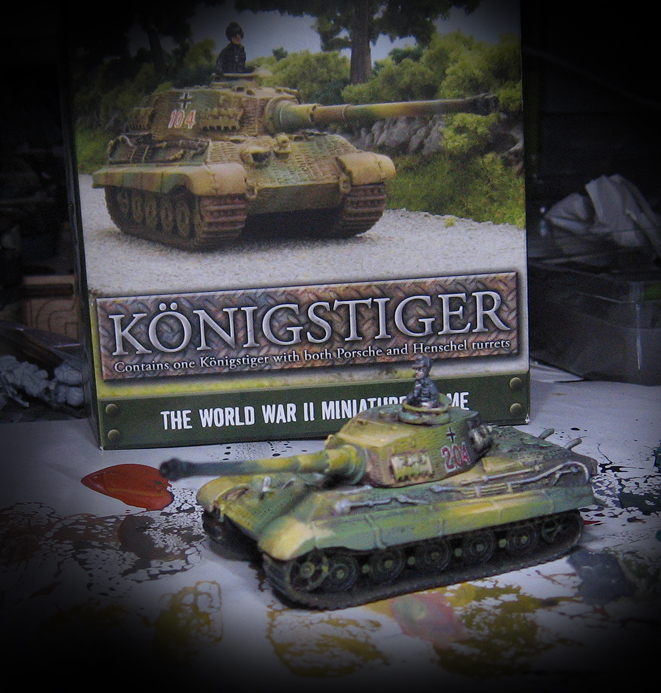
Here's a quick view of the first layer of glazes.  More can be added to make deeper darks, or tint colors further.  This all takes a lot less time than all those layers of opaque colors, and there is less to remember in terms of "recipes".


I used one of the new Secret Weapon colors to apply some very dark shades, and begin to indicate where there might be paint chipping, stains, soot, and so forth.


I think you can see a lot of this on the rear of the hull, where I wanted oil stains and exhaust scorching.


I did the same process on the turret, using some of the pooled glazing colors as an indicator of where to 'build' on the staining and chipping.


I also added more dark shades to the commander figure.  This image shows how painting the insignia and number prior to glazing darkened those down nicely.


The view from above.  From here, I will work those middle tones that I mentioned earlier.  

I will also be adding some rust and other weathering effects.  In fact, all that will be covered in the final exciting episode, so stay tuned!!!


Painting With Primer


I think it's been a while since I showed you an example of "Primer Painting" as I like to call it.

Normally, I would be mixing in regular paint with my primers, but that's starting to change as more companies produce primers that have a color to them.

In this instance, I will show how you could use the new Badger Airbrush series of primers to do this will all primer.


There are many additional benefits to this, as all primer on the first few layers of your painting will make metal figures in particular more resistant to the dreaded Silver Curse!


I had already painted on a layer of red and black primer mixed together for the "Red Lead" primer.


I started mixing some of the green and black together for the underside of the main hull...


Since this is not seen all that often, these layers of "Primer Paint" would be the sole application in this area.


For the various camo shades, I mixed in some of the red and yellow.


Keep in mind that this is all part of the Shaded Basecoat technique, starting with middle tones and working lighter.  As you can see, I am focusing in on the tan/yellow part of the pattern.


Some of the green/black primer mix is now placed in between those layers of yellow.


At this stage, I began to mix in regular paint, which will start to beef up the saturation of the colors.


Most of the primer areas are still wet, so the 'real' paint is mixing in with it.


There is already a big difference in the tan areas, so the same concept was applied to the greens.


The green sections of the camo pattern are now brought up to the lightest lights.  From here, all these colors will be glazed, tinted and shaded to get some nice dark tones.


When I'm working on vehicles that have markings, I will add them in at this time so that they will also be tinted and shaded along with the rest of the vehicle.


A simple number and insignia will do the trick!


Stage one is complete!  This is the introduction to Primer Painting, made easier by the new waves of primer colors which are emerging.  I have also used Vallejo colored primers, which mix in very nicely with the Badger versions.

Next up, the glazing stage!  Stay tuned.


Saturday, March 12, 2016

Siren Sisters


Here are some amazing new figures from Siren Miniatures.

Meet Nadia and Ingrid, the Sisters of No Mercy.


These are actual assembled figures, not renders (I dusted some light gray and white paint on them so you could see the shapes a little better).  The detail is as amazing as you would expect from Siren, which means they will be wonderful to paint!  For such dramatic poses, it was also relatively easy to get them put together.  Always a plus!!


I think I will try to stick to the color schemes of the concept art, since that should make for some interesting side by side photos!


As a scale reference, the base is 32mm.  These ladies are perfect for a number of systems.  I think they could even be interesting characters for a Wild West Exodus scenario.  They could play the role of foreign assassins from western Europe who are sent to kill Dr. Carpathian, or something similar.


Another reason that I wanted to stay with the concept art colors was the fact that the sculpts stayed quite true to the concept.  So, once painted, I will do a set of side by side by side images, from concept, to render, to unpainted figure, to the finished result!

Be sure to visit Siren Miniatures on their facebook page:


I'm Staying Right Here!

 
I initially used this as one of my Captains in my Lord of the Rings Galadhrim army.  The base was sculpted with Apoxy Sculpt.

 
Eventually I used some Reaper elf figures to represent any command characters, as it was a lot easier to distinguish them in the inevitable scrums!

 
He was certainly one of the more dramatically posed Galadrhim elves... perfect for the Knights of the Blood Rose.


Friday, March 11, 2016

Running on a strong platform


I thought it might be fun to see some of the new Salamander figures with my old scratch sculpted Engine of the Gods, which will now be my Ankylodon battle platform!


The portal section can be removed from the howdah if I am doing the blowpipe version.  I don't know where I have the two pipes that I made for this machine, but they are somewhere.

There are two stands set up for them right behind the head crest.


The Dino is made from sculpey, Apoxy sculpt and green stuff.


It was very fun painting each side of the portal!!!


Here are some images of the scratch builds!!!


I used some of the older Skink archer figures as crew, since I had to fit five of them in the howdah, as well as the Skink Priest.


Now for some closer views to see what this looks like next to the heftier Mantic Salamanders.

My original Lizardman army had no Saurus in it at all, as it was meant to be a Temple Restoration crew.  Lots of Skinks, Kroxigors, and the Engines.  Some moved the heavy stuff, while the Skinks restored all the glyphs, etc.


It should be quite the Monster Mash once I have the second Fire Drake finished!  Having three big beasties backing up large Salamander units should be fun.


Of course, I still must find a way to include Stikki Wikkit!

Here's his story:


I am quite sure at this stage that I will be using the Firebolt version of the platform, at least to start.


I'll be showing more of the old Lizzies that will be moving on to become part of the Salamander army, so stay tuned!!