Showing posts with label Happy Seppuku moulds. Show all posts

Tuesday, December 12, 2017

Urban Combat


Among the many Bolt Action armies that are under way, the Winter Soviets have offered me a fun new basing opportunity, and that is winter urban basing!  I did a bit of this with the winter American army, and I will post a link to that how to post later in this article.


I had a few new supplies on hand this time around, and I had learned some new and improved ways to make the sculpey bricks that were also used in that first round.

The larger bases such as the anti tank rifles were a lot of fun, and I tried to make some scattered floorboards, and an indication that the bricks were piled up for cover and as a stand for those very long guns!


The accompanying team members also got a similar basing treatment.  Here's a link to the original basing article:


There were a significant number of kneeling poses in this winter set, which made me feel like I had to do some small broken wall corners!  Some of these were made with sheets of sculpey pressed in Happy Seppuku moulds or with Green Stuff World texture rollers.

I also made some brick by brick using those new kind of sculpey bricks that I mentioned earlier.


The same bricks are scattered here on these bases. along with more pieces of baked sculpey that have the cobblestone texture.


Some of these simpler bases will have a bit more snow on them.


After a few sprays of Stynlrez primer, you can see how all those materials tie in together!


Here's an image with some of those textured sculpey sheets.

I will be doing more fun things with basing on the Patreon Page this month, so be sure to check that out.  I am hoping to offer some basing kits to subscribers...


Sunday, February 5, 2017

Urban Warfare


Just as I was about to finish off the basing on the winter American army for Bolt Action, I thought that it would be nice to have a follow up to the original step by step article.

This was a more urban style of basing, with cobblestone roads and broken walls.

I rolled out some Sculpey sheets using Happy Seppuku Moulds and Green Stuff World texture rollers.

Here's a link to the original article:


I also made another set of bricks, which was just a sheet of Sculpey cut into rows.


The advantage of the Sculpey bricks is that I can break and chip them very easily.  Then I can build a wall, or make a pile of broken bricks.


The brick texture could be used for either a wall or sidewalk.  If I wanted extra texture on the wall, I could take some white stucco texture and place that over the bricks.


Here's and image that shows those little bits of bricks chipped away, and then made into piles.  Keep in mind, snow will be added later, so I didn't want to get too crazy with extra textures at this stage.


I thought it might be fun to introduce another element to get the village ruins look, so I tossed in a few "boards", in the form of coffee stirs.


It was a simple, rapid fire answer to introducing some variation across all the bases.


I liked the broken boards so much, I added them to the MMG team.  Again, it was one extra level of texture that was easy to add, but makes it seem like they have set up shop inside a shattered building.


All set for primer painting!!


These lads will join the Winter Germans in the Battle of the Bulge, so stay tuned!!!


Sunday, January 8, 2017

Hex Based


Hey folks, it's time to check out another Isorian, and another base made from Happy Seppuku moulds.  I was looking for something fun and unique for these Gates of Antares figures, and this seemed to do the trick.


As I have mentioned in other posts, I had a lot of fun coming up with this color scheme.  The transition of the colors on the figure, along with the object source lighting, were a great change of pace from the vast majority of muted, limited palette figures I paint these days.


Here's a better look at the base.  I will be doing some more specific basing articles on future Gates of Antares posts, so stay tuned!


Saturday, November 19, 2016

Moulding the Future


It was great to see the good folks from Happy Seppuku at Reapercon, as they were showing off their new products and designs.  Here I have some images of the 'classic' moulds, along with some peeks at the newest versions!

Here's a link to their website:


These casts were all done by rolling pink or grey extra firm sculpy over the moulds in a relatively thin sheet.  I need to do a new round of basing, so it was time to get raw building materials!!


These industrial and sci-fi versions are going to be used for more Gates of Antares bases.


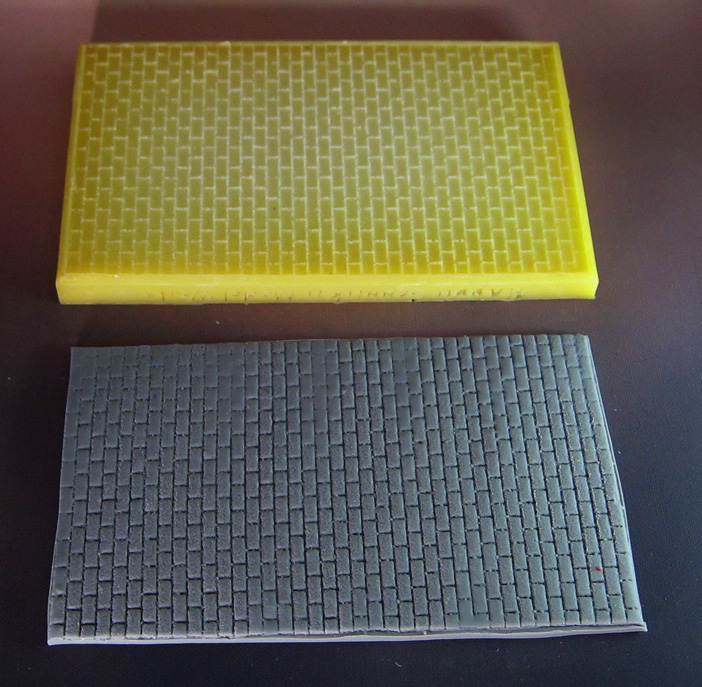
This brick pattern will be excellent for both roads and as broken walls.  The idea is to create a vertical piece, and cover a portion of it with stucco paste while leaving some of the brick texture exposed.  I'm hoping to create a destroyed village wall in the process!


This pattern will be fantastic for roads in small French towns, or city sidewalks.


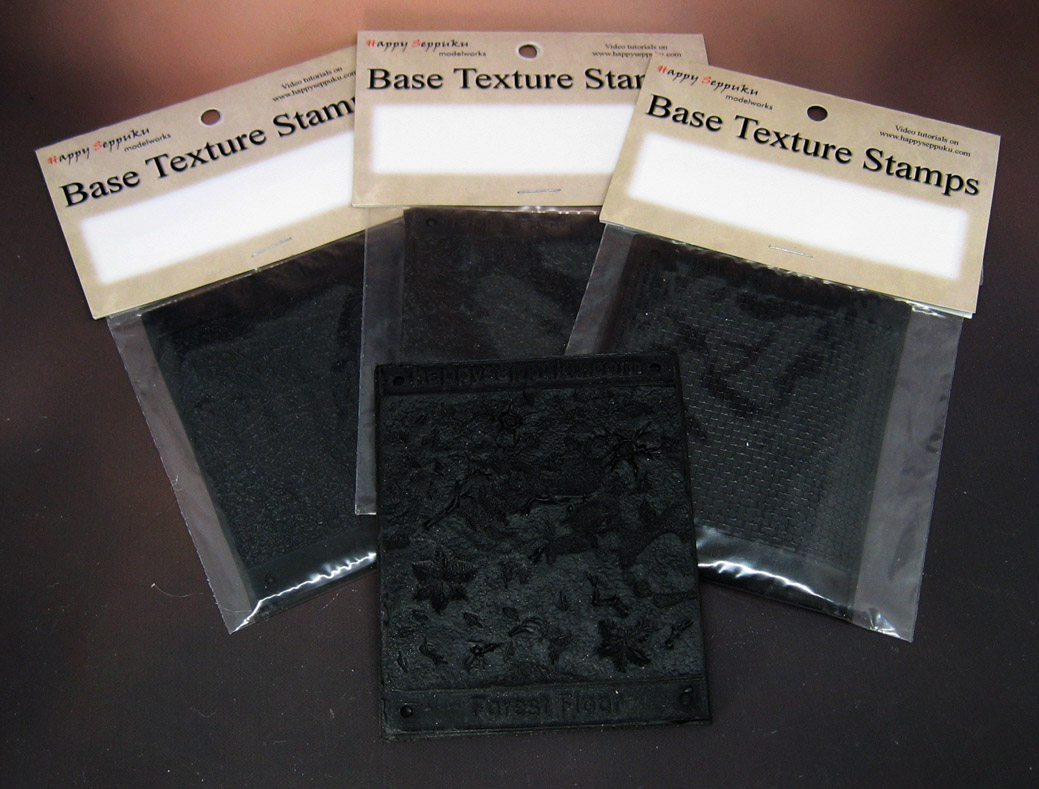
Here are some of those new texture stamps that Happy Seppuku was showing off at Reapercon.


I can't wait to try these guys out!!!


The latest round of baking yielded bases, sheets of texture from Happy Seppuku and even Green Stuff World.  A new roller just arrived, so stay tuned for some fun with a brand new texture!!


Wednesday, August 31, 2016

Let's Get Happy!


It's been a while since I have used the Happy Seppuku moulds for non-sci-fi basing, but my current projects made these two moulds just perfect for the task at hand!

This is the brick and cobblestone texture, pressed into the usual white sculpey.


I want to make a few different village/urban style bases for the winter Americans stuck in Bastone during the Battle of the Bulge.

These textures are nice and easy to 'break', as they have so many natural fault lines!

Here I broke off the edges to roughly fit the base.  I'm leaving a little extra space for broken bricks and even snow piles.


Once I have the overall shape, I cut out a few of the bricks with my wood carving tool.


This is repeated on a few other bases... but I want to save the brick texture for something else...


Most of the bases are going to be made from the cobblestone texture, so that the brick sheets can be used for the remains of upright walls.


Just as I did with the bricks, I tried to cut out a few missing stones, especially around the corners.


This U.S. MG team will be taking some cover behind the remains of a brick wall.  Broken bricks and some snow will also be placed on the periphery of the base.


Whenever I bake sculpey sheets, I always take my exacto knife and cut out some rows of bricks.  I make a variety of sizes, all the way up to large stones of cinder blocks.


I chipped away at the brick wall section, using my large bricks as a curb.  It's best to chip away at the corners of the bricks to make them look a little less fresh.


The basic setup of the base is now ready for the final touches, such as the piles of broken bricks around the edges.


This Vallejo paste will be a perfect medium in which to set those bricks.


As I mentioned previously, it's best to chip off the corners of the bricks before you place them.  If you are building an entire wall from them, you could do that once all the bricks have been glued in place.

Some lights sand and gravel is added to help keep them where I want them.  It's important to remember that snow will be put on top of most of this.


I kept working around the edges of the base, putting bricks in as random a pattern as possible.


A little sand and gravel over the top, and this is just about ready for painting!


I will be adding the same kind of broken brick textures to the other small bases too.  Once these are painted and the snow added, I will do another post to show you how those look!  Stay tuned...


Tuesday, July 14, 2015

The Age of Iron


Here's some paint on the latest steampunk style bases.


These were made by pressing sculpey into Happy Seppuku moulds, and by adding some sprues and plastic gears.


Normally I make the conduits the same color as the metal plates, but I wanted to try something a little bit different this time.


This was a fun set, and there are many more to come.  Those will be incorporating the leftover pieces from Burn In Designs kits.


The plastic gears are a fun element, and they look really interesting with a miniature on the base.  It gives you eye something to compare the figure with in terms of scale.


These bases were designed for miniatures with larger footprints.  That seems to be the case with a lot of the Z-Brush engineered miniatures.


I might still go back into these with some weathering powders, but that will wait until the weather would allow me to dullcoate those!


Stay tuned for many more of the Age of Iron bases!!!