Showing posts with label Reaper Miniatures. Show all posts

Tuesday, June 11, 2019

The peacock and the skull


Here are a few bases that I created in very little time utilizing some Green Stuff World basing products.  First, we have the Mandala texture roller... here's a link for you: http://www.greenstuffworld.com/en/textured-rolling-pins/868-rolling-pin-mandala.html


In combination with a few layers of cork and placing some Sandy Paste in the gaps, this Dark Sword figure is all set for painting!


Cathy will be painting this on her live stream in association with More Than Dice a Podcast.  She streams every Tuesday through Friday from 3pm Central to 5pm.


I think she will be going with a peacock motif, using the wonderful Jade color from the Pro Acryl series!


Cathy will also be painting this Reaper figure, which was based with the help of the Green Stuff World Crunch Times skeleton sheet and some additional skulls.


Once again, in combination with the cork and paste, those could be merged together quite seamlessly!  I have a tutorial video showing how those are used here:  https://youtu.be/ECA4rXwSAjU


Be sure to check out Cathy's live stream, where she will be working on a few different figures during the week.  Be sure to say something in the chat, because she loves the company while she paints!!!


Monday, April 8, 2019

Ancient BONES


The latest YouTube Live session had something very interesting... a combination of a Reaper BONES mini and some Green Stuff World texture rollers!


This was a test piece that I did for a more formal tutorial that will be created for the patrons on my patreon page.  I wanted to show a quick way to snazz up those BONES minis and get some nice results!  It will be part of a new pledge level regarding Reaper miniatures (a link to the page): www.patreon.com/JamesWappel


While my voice recovers from Adepticon, I will be doing a few of these live sessions.  In this episode, I talked about how the base was created, and I take you through the process of painting it.  Then I work on the figure itself, demonstrating some NMM, freehand, and the usual Shaded Basecoat & Glazing.


Here's a link to the live session!! https://youtu.be/uNH48XRMoak


Friday, February 1, 2019

Ice Band Cometh


We continue with the "Army of many companies", a warband consisting of figures from Mantic, Reaper and Privateer Press.

Some are very old, and some are brand new.  Here are some of the old...


I have painted a few of these several times over the years!  The Ice Queen is a figure that I used to film the "Painting the Blues Away" color theory episode.


Here's some of the new, which I believe are from Mantic.


The head was replaced on the left figure by a Games Workshop head.


The new and the old side by side... Mantic and Reaper.


More of the warband, including a large critter from Mantic.


Creating a warband such as this out of many figures from different manufacturers can pose a real challenge, due to the wide variations in sculpting styles, etc.  Finding those 'commonalities' is even more difficult when the age of the sculpts varies so much!  These must span 15+ years.


It was less of a challenge for me, since I have been cranking out the "Army Painter" video series!  Each of those units requires a different approach, and along the way I have learned a LOT.  I try to find new approaches in each series that I do, and Series 7 is already in production!

These are usually 5 episodes long, and have roughly 11-12 hours of tutorials in them.  I show the entire unit from start to finish... from basing to final details.

That $15 pledge also provides access to all the other tutorials done that month, including the Dark Sword figures, basing episodes, and other general techniques.  It's all right here:  www.patreon.com/JamesWappel


Tuesday, November 13, 2018

Stark Choices


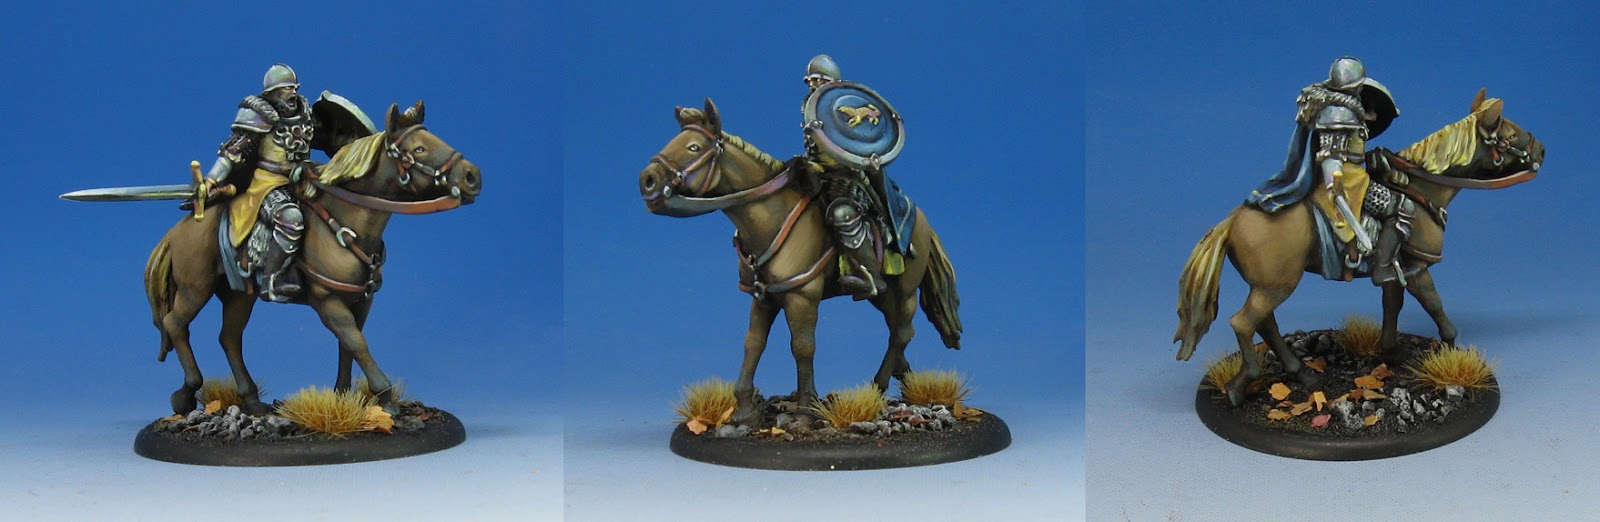
I think most of you know that I LOVE painting horses!  So much, in fact, that I did two different painting tutorials as part of the Painting Pyramid series.  One covered Appaloosa and the other Dapple Grey. 

I love painting horses even more when they are sculpted this well, and the Stark Outriders from the Song of Ice and Fire miniatures game definitely are!

With so many nicely sculpted muscles, I was able to do some very fun color shifts in the shadow areas.  I am not sure if you can see it, but you might notice that the shadow colors are not merely a darker tan shade.  In fact, they are green!


Because there is such a predominance of blue, along with yellows, having that green in the shadow areas is not very noticeable, and registers as grey to the eye instead.  This is not the only place where the green was used.  I also placed in on every metal piece as well.

These fun subtleties in shadow and mid tone areas are not very difficult to work out, ad adding them creates so much additional depth to the piece.

As the Song of Ice and Fire miniatures are a slightly larger scale, this also means you have a bit more surface area to work on.


I will be doing a number of Cavalry tutorial videos for the Patreon Page.  While some will be for the Army Painter series, you will also be able to get access to some for the $5 pledge level as well!

These would also cover specific breeds of horses, such as the two Painting Pyramid videos that are already available to the patrons... here's a link for you!


Sunday, October 14, 2018

The Great Stag


This Reaper Miniatures Great Stag gave me a chance to balance cooler grayish browns against more saturated, warmer browns.


You can see this in the shadow areas of the fur. I believe the color in question is Secret Weapon Miniatures Woodland Brown.  This same color was used in the 'mane', so it made sense to carry that through the rest of the figure.


It is even more important to have this kind of variety on a figure which could potentially get very boring to look at if you stayed with simple variations on one tone of brown.  While the shading from light to dark would still be interesting, it would still appear somewhat artificial and static.

While the shadow colors are still brown, the warmth and intensity of the mid tones make the color appear more greenish.

These are the kind of subtleties that are discussed very frequently in my tutorial videos.  There are a few different pledge levels available on my Patreon Page, even a basic $5 pledge that gives you a chance to check out the Painting Pyramid episodes, as well as a large portion of the new content being created!

You can see that here:


Thursday, September 20, 2018

Of Stone and Sand


Time for another fun base created with the Green Stuff World texture rollers!

There is a bonus piece to this base, and that is one of the nifty resin statue pieces, which is something new from Green Stuff World.  It is a package of various broken statue bits, which now come in Aztec and Celtic ruins too!

Here's a link to the Egyptian pieces:


As usual, I had the Secret Weapon weathering paints and Reaper Liner paints on hand.

Here's a post that reviews how I use the rollers: 


Starting out with the Brown Liner, Engine Grime and Sandy wood, I did a few glazes across the surface, making sure to alter the colors in the brush as much as possible.  These are designed to "interact" with each other, and do a watercolor style wet mix on the surface.


You can see how some parts are more sandy colored, and others more grayish.  This creates an "aged" look without lots of extra work!


I also wiped away some of the excess glaze colors, which revealed the texture a little more.


I did a similar process on the statue piece, using glazes to tint and darken various portions.


I continued to darken the stone around the edges, using very targeted glazes of the Enging Grime and Brown Liner paints.


Once the darkest tones had been established, I could go back in with a lighter mix of colors to pick out some more details.  I used a Maiden Flesh to lighten the Sandy brown and the Engine Grime (a grayish color).


You can see how matte these colors dry, which is part of their design!


In no time at all, you have a very nifty base!


Here is the figure which will stand on the base.  It is a large metal figure from Reaper Miniatures.  I will try to make a painting video for him too!

Speaking of videos, here's a Facebook Live session that I did with the texture rollers:


Sunday, September 16, 2018

Scale and Fire: Part 2


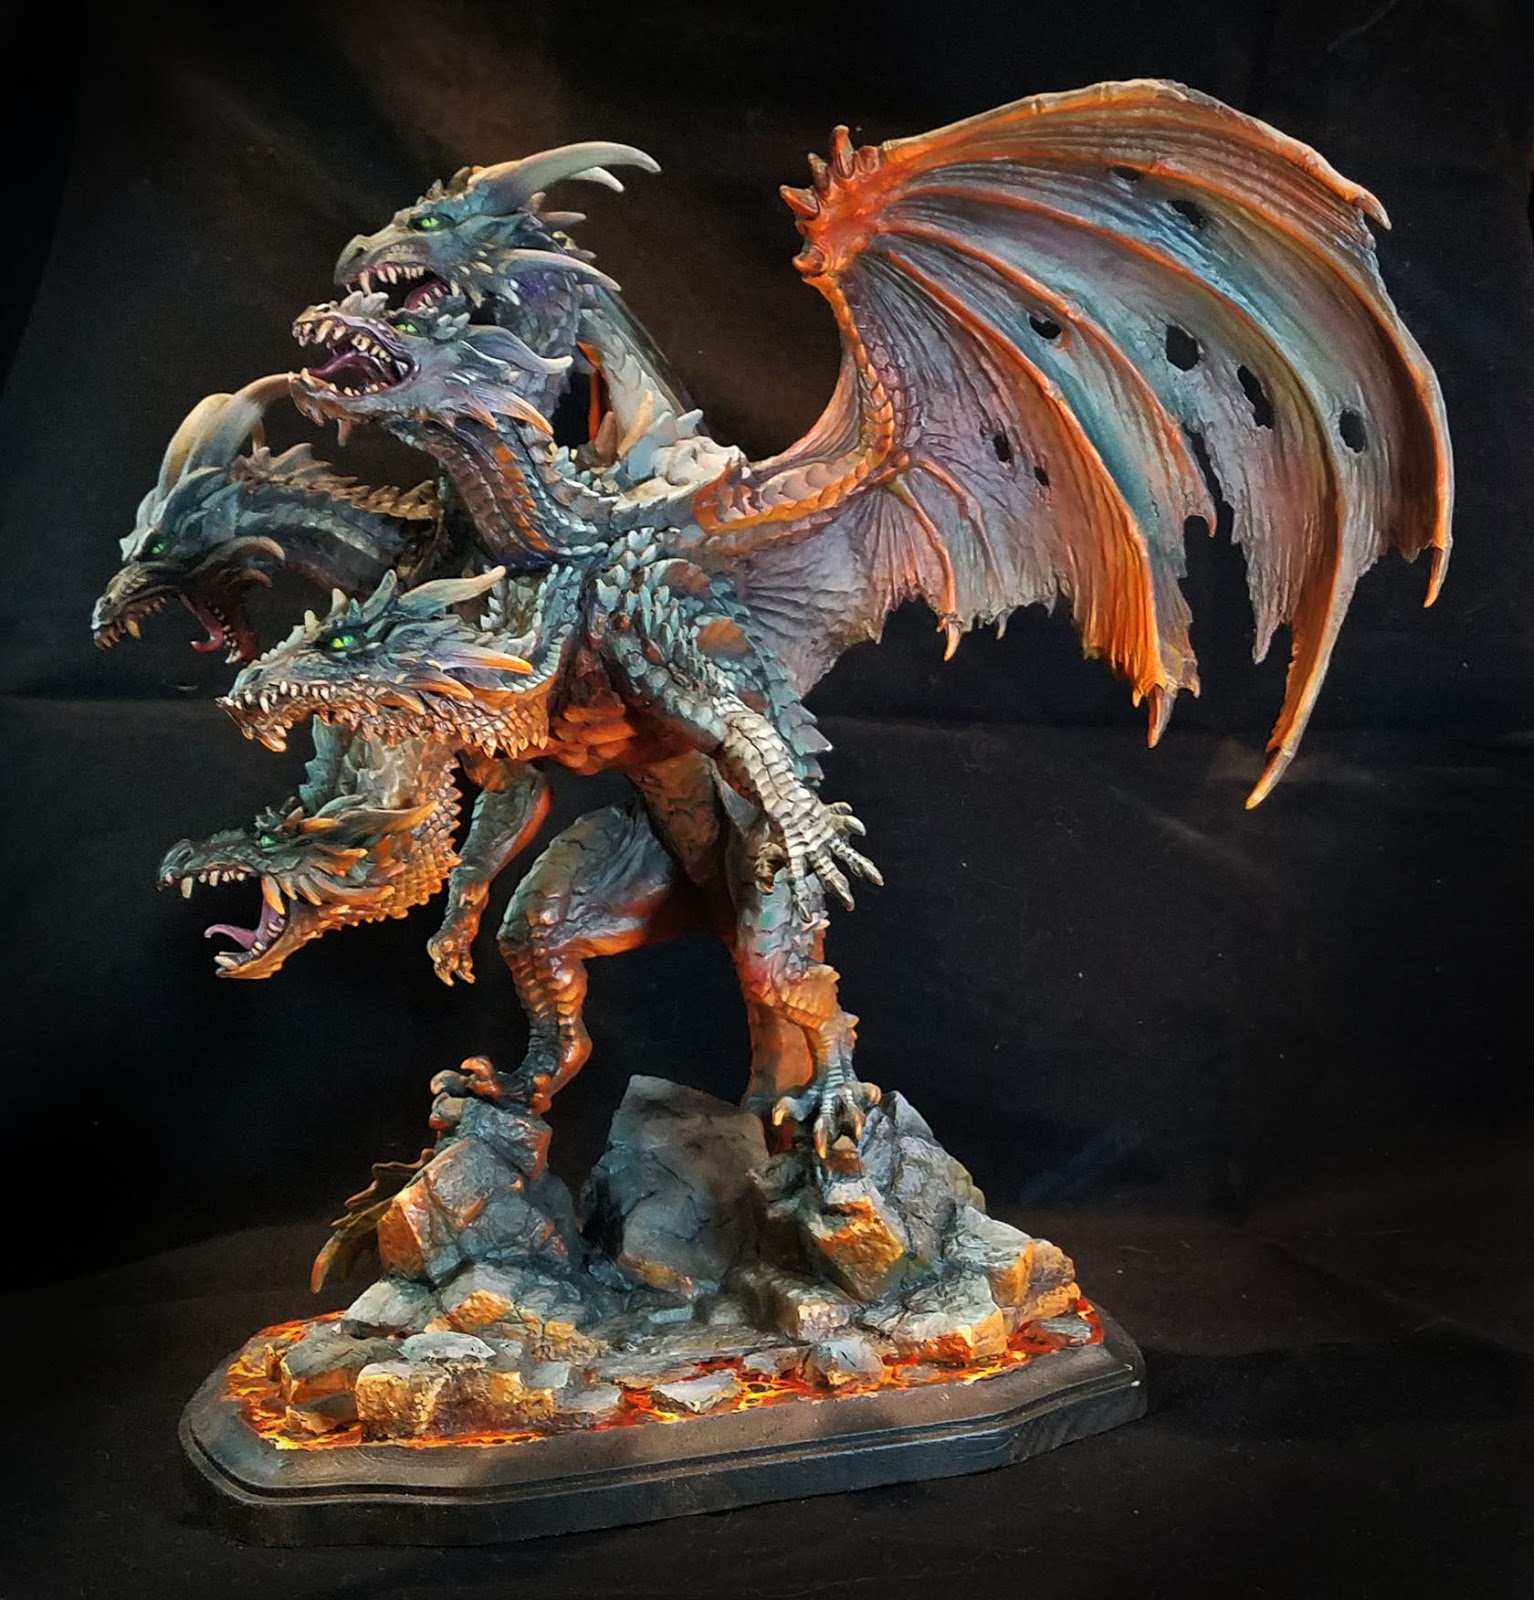
Time for some more images of the gargantuan 6 pound dragon!  As I mentioned in the first post, much of the initial layers were done with a Badger airbrush and Stynlrez primer.  Not only are there 12 colors of primer, you can expand these even more by adding some Ghost Tints.


I also wanted to mention the basing, which was a wooden plaque with some carved pink foam bits added to continue the original BONES base across the lava.


I added a bit of texture to the foam to match the original pieces, and once that was painted, you could not tell the difference!


The same Vallejo Fluorescent paints were used on the base, in combination with the Reaper Clear and Liner paints.  The yellow clear mixed with the orange fluorescent worked well for the lights, while darkening the orange with the Clear red and Red Liner paints made for some expanded value patterns in both the lava and the scales.


One thing to keep in mind about the fluorescent paints is that while they are pretty thick, they are very translucent.  This is what gives them the extra brightness.  There are absolutely no opaque properties to the paint.

So, you can almost apply this as a "glaze", even without thinning the paint at all!


I used this as an advantage as I was able to use my larger brushes and spread out the fluorescent paints very rapidly over rough surfaces.  While it was not a dry brush at all, the result was similar in a way.  However, I was not left with the usual scratchy/patchy brush marks that normally occur with true dry brushing.


I ended up deciding on a bright green for the eyes. This also had to do with the "color harmony" that I mentioned in the first post.  Most of the grayish mixes were created with Clear green and Clear Purple mixed with a lighter color, and having the eyes be a mix of Clear Green and Yellow meant that the lava and the grays were being tied together in a way...


The reason I like to make my own ray mixes is that I have far more flexibility in how  they are tinted.  Having a little more purple in the mix means that I can have some very nice grayed down tones that will appear more purple when you look at them more closely.

I love grays so much, I made it the subject of one of my five Painting Pyramid videos called "Shades of Gray" of course!


If I had more green in the mix, that became a very nice contrast to the deeper reds of the lava reflections.  This also meant that I could have a bigger range of grayish colors on the faces, giving them a little more depth than simple lights and darks.

Deep purple shadow colors against lighter greenish grays makes the faces come alive, as opposed to looking like a colorized photo which has light and dark, but no real color variance.


I hope that you have enjoyed my little discussion on colors here... that is as much fun as talking over the "Arc of History", and I will go on and on about it to anyone who will listen!

Stay tuned for much more!