Sunday, September 20, 2015

Appearing from nowhere


A new day dawns for the Warrior Nation with the War Priests and their deadly summoned creatures.


The Apparitions are made of deadly energy, which cannot be killed or harmed.


The Apparition itself can dish out a number of attacks in close combat.


I tried to create the energy effect on the Apparition figure in a similar manner to the Chief Raven Spirit by working "inside out".


It was far more difficult to paint it this way, as getting the lightest colors down into the recesses is very tough!


Much like painting flames, I wanted the source of the energy to be the brightest point.


The War Priest was a more standard type of color scheme by comparison!


So, there you have it!  I will take one set of group shots with these figures alongside the Chief Raven Spirit.  Stay tuned!


New BONES in the Old West


Let's have some fun with BONES!!  I don't know which campaign this BONES figure belongs to, but she was one of a number of BONES minis that works very well for western themed games.


Just as the Flames of War vehicle was painted in the midst of dozens of other projects, this lady was given a dash of color here and there, depending on what colors I was using at the time.


You might recognize some of the greens in the coat :-)


Saturday, September 19, 2015

Tank Busters


Now for something quite different!  I've been holding on to these for a while... some Flames of War miniatures.  As you can see by the lead image, this is a much smaller scale than the typical 28mm that you usually see here.


While I am working with one color group or another, I always have something on hand that would require similar shades.  This greatly enhances efficiency, and allows me to make progress on many fronts at once.  "Assembly line" style is not enough by itself to accomplish the needed work loads.


Also, this tiny vehicle was painted exclusively with the 'giant' #8 round craft brushes, even the smallest details.


These types of figures also give me a bit of relief from the constant bombardment of similar miniatures or genres.  Doing these very unrelated projects offers a fresh perspective, and a bit of a break from the norm.


Providing such breaks is essential for preventing any kind of boredom or burnout.  I had an incredible amount of fun playing around with the limited palette on this as I painted a number of bases, fur cloaks, etc.  I believe the total time on this was about 100 minutes.


Jump around


Here's a fun figure from the old War Crow line.  I know that Corvus Belli does the Infinity line of miniatures, but I am not sure what happened with the 'fantasy' theme figures.

We used to paint a lot of War Crow figures back in the day.


This one is called Kisawa Hana, and she also has a little gnome buddy!


She's also here:


Friday, September 18, 2015

Queen of the Jungle


Meet Tepeyollotia, Amazon Queen, from Bombshell Miniatures!  She's part of the new kickstarter campaign, which is under way right now:


As I mentioned the last Bombshell post, these figures have plenty of dynamic action to the poses, but not a lot of separate pieces to deal with.


You can see that I had some more fun with the paper foliage again!  The base was a piece of mulch that I found in my front yard.


I'm looking forward to painting many more Bombshell Babes!!


Let It Snow!!


Now that the painting phase is complete, it's time to add that snow.  For this session, I wanted to use the Secret Weapon crushed glass method.  I have the crushed glass, realistic water, and a few other items which will be tossed into the mix!


The normal mix consists of the crushed glass and the realistic water, both from Secret Weapon.  A tiny bit of blue weathering powder will be added for a touch of blueish color.


A little spritz of the snow flock will also be added, but not too much!  To make this mixture flow well over the terrain pieces, it was important to have plenty of the Realistic water in the mix.


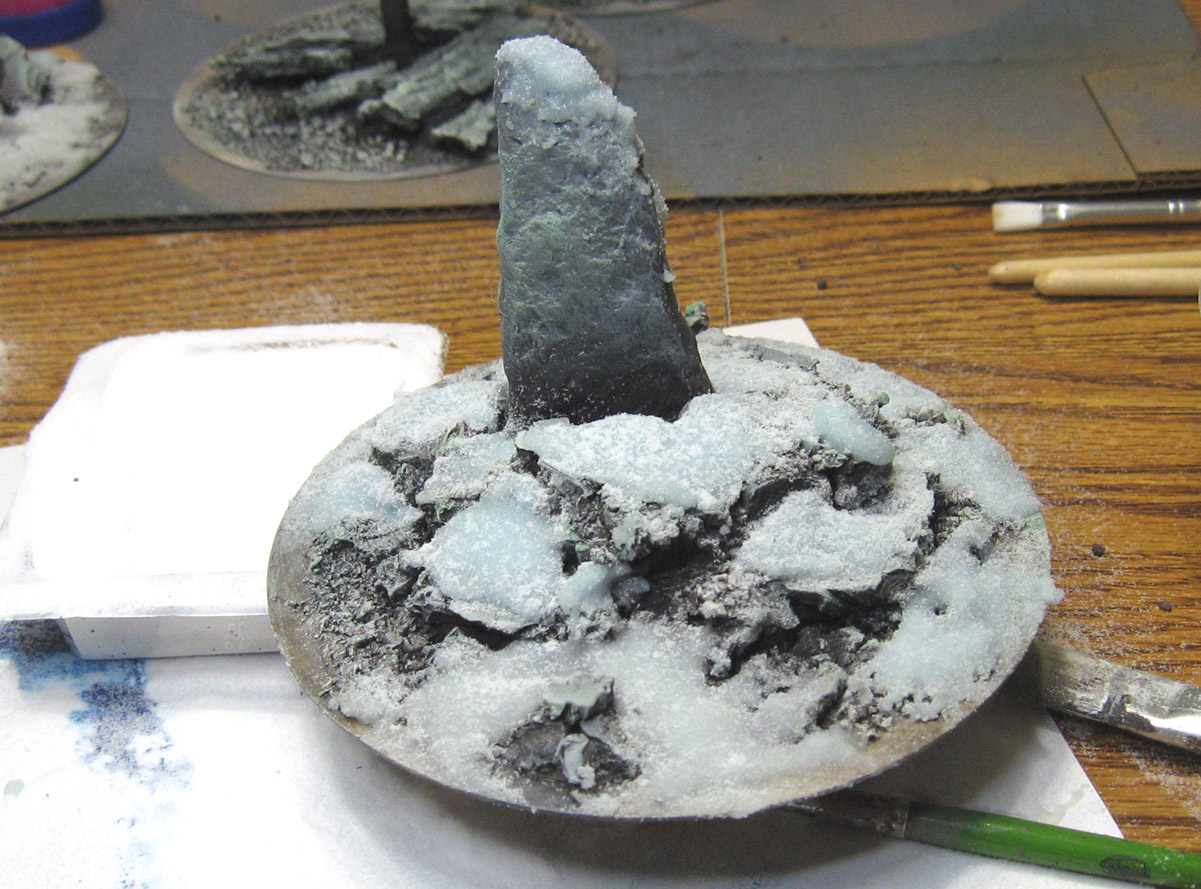
Once mixed, the snow slurry is spread out over the rocks.  This is going to have some gaps in it, because I still want to see my rocks!


After I applied the mix, I sprinkled additional snow flock for a bit of fluffy texture.


You can see that I am working my way around the stand, I consider if there were some areas where I might have more melted snow.  Should this be the case, I would add more realistic water to my mixture, as that really does look like half melted snow!


When you get just the right mixture, you can apply these drifts of snow pretty easily.  The crushed glass gives it a surprising amount of 'body'.


The slight blue tint is designed to play off the warmer tones which were painted onto the rocks.


I think you can see the hint of blue quite well in this image!  These will be used as terrain pieces with the snow base figures you've seen posted here so often.


The standing stone base is the one I've really been looking forward to completing.


This method of snow application worked very nicely with the cork rocks and the sculpey standing stone.


One more view of the different ingredients of the recipe... Realistic Water, Crshed Glass, snow flock and a hint of blue powder.


I made the mixture a little more watery (as in adding more realistic water) so that the snow would stick to the branches more readily.

There are a few more layers and other effects which I will be testing on these terrain pieces, so stay tuned!!


Thursday, September 17, 2015

Winter's Coming


Following up on the earlier terrain posts, I have a few images here showing some paint being applied to those particular pieces.  I'm starting out with a neutral gray.


This is actually a combination of craft paint and primer.  Both of those mediums have great 'flow', especially on rougher, more absorbent surfaces such as these.

Nothing terribly complex, very basic colors.


Since I will be putting the snow over the top of this, I want to make sure that there are enough "warm" colors beneath that snow.


Plenty of that brown is included in the mixtures, particularly when I'm painting the soil/dirt sections.


You can see that the gray in this image looks a bit red.  That's because I never cleaned out my brush, so a tiny bit of the brown is also being mixed in.  This means that the gray is a bit warmer by default.


Back to the standing stone, and some lighter grays.


I added a little bit of yellowish brown for a few touches on the dirt sections, as I wanted a little more color variation.


You can see that the gray also gets affected by the addition of that yellow ochre color.


It really worked well for some lighter shades on the fallen tree.


The rocks on the standing stone are really "standing out" now!


The same light color is worked into all three terrain pieces.


I went lighter still for some more contrast on the standing stone piece.


I have been adding seafoam green to all of my miniatures over the last few years, and even more so on my bases and terrain pieces.  That is introduced now to provide a little more color interest.


This green would ordinarily be considered a 'cooler' color, but it has enough yellow in it to almost make it seem like fine moss growing on the rock surface.


Just a bit of that seafoam green provides a touch of color, instead of the usual dead gray.


Almost ready for snow!


The view from above.  I think you can still see the hints of yellow, reddish brown, and that slightly contrasting seafoam green.

Next up, step on of the snow!  Stay tuned.