Monday, October 27, 2014

Cleaning out the sewers...


Back into the cesspool with Secret Weapons Sewer Works base set!


A great set, with a ton of variations.  Plenty of 30, 40, and 50mm versions.  Fantastic for Warmachine and Malifaux!


As I mentioned last time, you won'r have to worry about finding a place for your minis to stand on these...


These shots will show that greenish water effects that I layered in after the initial applications.

I mixed the fluorescent yellow with a green glaze into the Secret Weapon Realistic Water.


Ten wonderful 30mm designs!


I love the 40mm versions... with critters!


Lots of fun stuff going on!


Find them here:


Target practice


We return to the Lawmen, and another Long Range Hired Hand.


I have gotten pretty used to the mob of close combat Hired Hands, so emphasizing these lads will be interesting!  I have a feeling they would benefit a great deal by hanging round with Pat Garrett, the shootinist boss of the Lawmen.

I guess we shall see what five of these and Deputy Berenger can do alongside him!

With a trio of Interceptors as well :-)  Yeah...


Sunday, October 26, 2014

We have the power!


Here's a quick slap of paint on the RJ-1027 power station.

Hopefully most of you saw the building of this, which showed how random junk can be put together in no time at all to make some very handy terrain!


It's all about frugality!  No need to spend tons of $$$ when the stuff you have on hand can help you make terrain that is not just fun, but add to your games as well.  

Fighting over objectives like this make a lot of sense in the Wild West Exodus universe.


Let's review the elaborate materials required.  Old medicine container, left over plastic sprues, juice lid, a straw, and some plastic gears (the only thing actually purchased).


Remember the plastic sprues?  I filled in those two round ends with green stuff in order to make the pressure gauges. 


Let's get some Lawmen to guard it!


Don't mess with our power!!!


The Big Boys


Lookie here... two of those Thanatars.


Yeah, a metric ton of resin :-)


Fun times with the freehand though!


The most dreaded pieces of the whole deal... the evil culprits... the ammo feeds.

Thank goodness I found out a while back that I can paint the resin, and then hit it with a heat gun to make it pliable.  That allowed me to stretch and bend that double feed in place.


Not sure what those big guns do, but it must be quite a bang!


It still shocks me just how big these are every time I see them.


Just imagine... that tiny figure is on a huge 60mm base, 'cause it's dreadnought size!!!


Saturday, October 25, 2014

Mighty handy with that shootin' iron.


Or, mighty mean with that RJ 1027 :-)  Here's a long range hired hand from the Wild West Exodus Lawmen.


I have been going more close combat heavy with the last few posses... I am hoping to get a few additional items to make more of a long range version.


I think that more long range hired hands might work well with the three Interceptor posse (or even four!)... we shall see.


Get your mind out of the gutter


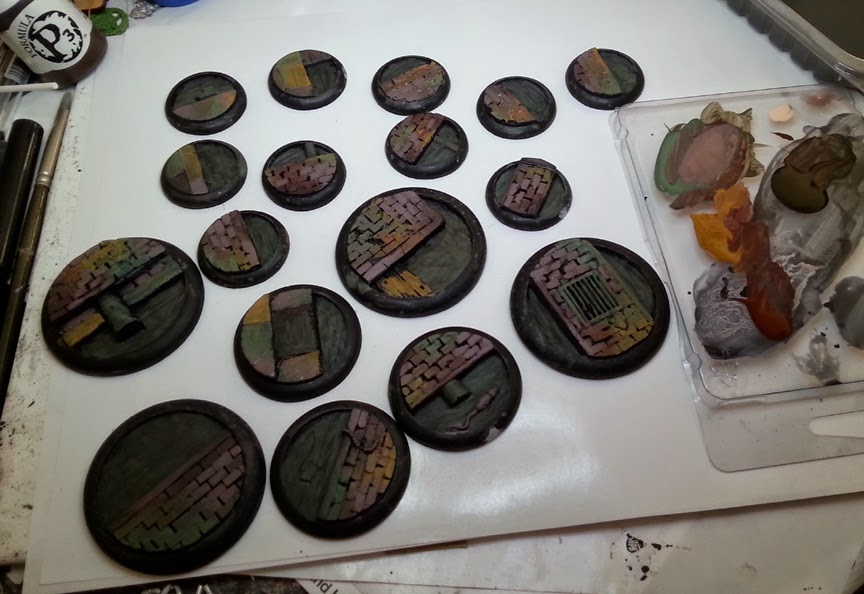
Huzzah!  The Sewer Works base set from Secret Weapon are mostly complete!

Humble beginnings...


Followed by some rapid applications of color, mixing right there on the surface of the base.


You can see that I had some simple green, yellow and red out there... mixing the green with the red to get a nice grayed down color for the cobblestone/bricks.


Some of the green was also brought into the water as well.


All of the colors are lightened up slightly.


I picked out a few bricks for emphasis.  Glazes will be applied over many of these surfaces.


Some of the yellows and greens are also lightened.  You can see that some areas are still left a bit darker than others to create some interest.


While I didn't want to get too crazy picking out 'waves' in the water, I still tried to bring out a few of them, especially where something was actually in the water, such as the rat!


I decided to go with some metal colors for the sewer drains, to get a little more color in them.


Prior to glazing and tinting, I used some Reaper Brown liner paint to clean up some lines...


After the initial glazes, I wanted to see what the water would look like with the shiny texture.  Out came the Secret Weapon water effects!


That was mixed with a few variations of fluorescent yellow, green wash, and sepia wash.

The idea was to 'suspend' some of these transparent pigments in the realistic water, creating more of a polluted appearance.

After the first layer, I went back in with an even more intense fluorescent mix in a second application.

Finished pics tomorrow!


Friday, October 24, 2014

Spending time in the Big House


We return to the Alcatraz of Wappelville.

To get a little more texture on the adobe walls of the jailhouse (and hide the joint with the door/plug), we need to add some type of gesso or other material.  There are a number of these products available.


I chose to use some flex paste to do this.


You can see that it is applied unevenly to build up more texture in some places... especially near the exposed brick!  Scumble the brush along the surface.


This is the result we are looking for.


All four sections with their adobe texture!!


I thought the roof could use some texture as well, so I brought out the black lava.


In no time at all, instant texture, and the surface is still flat enough for minis to stand on with no problem.


A cocktail of metallic paints was mixed to do the prison cells.


I typically use craft paints such as these, since they are more liquid, and flow over absorbent surfaces such as wood far more easily!  I also learned that air brush paints (like Badger) also work very well.


This is another reason to paint prior to assembly.  Since I could drag the brush from one end of the piece to another, the wood grain was a snap! As you can see, I varied the colors as much as possible.


Using the big brush and those free flowing paints, I was able to get all the colors to wet blend with each other, making life a lot easier.


I used some of those same colors to paint the roof...


For the inside surfaces of the walls, I took that series of colors and mixed more of the off white with it.  Once again, I was scumbling the brush, which not only mixed the paint on the surface, but gave me some subtle differences in the wall colors.


I wanted the interior walls to have a dirtier, aged appearance.


And a little graffiti! 


I will do a little of that in all four cells, and add a few more finishing details to the interior!  Stay tuned.