Friday, April 18, 2014

A hell of a tank...


At long last, I have painted that conversion bit for the Secret Weapon RAV 6 x 6 which you saw in earlier posts.

In this case, it would be the equivalent of a Hellhound, Devil Dog, etc.


If you recall, all I had to do was razor saw the rear section from the turret and magnetize the container bit.  It fit perfectly!  Of course, you could use scale barrels (which Secret Weapon makes!) or make you own from polystyrene tubing.


When you combine this bit with the heavy flamer option, it certainly gives the impression of the flame and chem spitting tanks of Imperial Guard fame.  Yes, I am still refusing to use the 'new' name. :-)


Another nice view of that bit.  I have some freehand that I will apply to it, but I want to get me numbering scheme more locked in before that happens.


This shows you how easy it is to switch out!


And voila!  A whole new tank.  It could be a Chimera, even a Leman Russ if you want (especially if you make something like the side skirts that I made for the Exorcist).


I love how easy it is to change the hull weapon, as well as the turret.


You don't have to add something like this to the back of the turret, but it was pretty simple, and it added so much!


I still do not call the beloved Highlanders by the new name...

Should you be displeased by a certain new vehicle that begins with the letter "T", you could certainly think about using the RAV 6 x 6 from Secret Weapon.


Next, I will show the Immolator version!  Hot stuff coming from the Sisters!


The original conscripts


I snapped a few series of pictures of the conversions that I used as conscripts for the Adepticon army.  I can't remember if these are from Wargames Factory or Warord Games... but the original minis were the Ancient Celts.

By adding a few spare Imperial Guard bits (not calling them by the 'new' name), they instantly became more of a 40k creation.


I gave them the striped pants to create the impression that they were not quite worthy of the tartans of their loftier battle brothers.


They still had their battle woad, however!


Thursday, April 17, 2014

Base of Operations


So, here we have some images of the step by step prop for the Shaded Basecoat class at Reapercon!

This images shows the first stage, and the final version with glazes applied.


This photo has the first three stages.  You can see that it starts in the lower end of the middle tones, but rapidly works its way up the value scale.  Not much attention is paid to "staying in the lines'!


Here's all five.  The basic idea here is to start lighter, work even lighter, and then shade and tint.  This allows me to start out with a very simple color base, and then get more complex colors with the glazes.  Far less colors to remember!

It's all glaze to match if you are doing multiples of figures.


Another set with the later stages.


And the full panople. 

Keep in mind, the class is not about painting a whole mini!  As I said before (and always say during the classes), it's just about trying out the concept yourself on a limited basis... rather than stare at me painting the whole time ! :-)


Galloping to the rescue


Brunhilde to the rescue!  Courtesy of Raging Heroes miniatures, she is one of their most interesting creations.


Some of you might recognize her as the miniature I used for the Gold Non Metallics video.  You can see why she was such a good choice, as there are so many different surfaces!


This allowed me to put so many different colors into the golds... purples, greens, and even reflecting the reds in the cape.


I painted the horse gray so that I could put even more greens into the armor, reflecting that cooler color.  Since metals are all in the reflections and the balance of hard vs soft edges, this one had it all.


There's a lot going on with this very heroic miniature.  As you paint it, you realize there are all sorts of details that are not noticed at first (or second) glance.


I have spent a number of hours over the last few months here and there working on this to complete it, since the video itself only left time for the demonstration, and not intricate details.  Finally, Brunhilde is in all her glory!


She's also here:


Wednesday, April 16, 2014

These definitely come in pints!


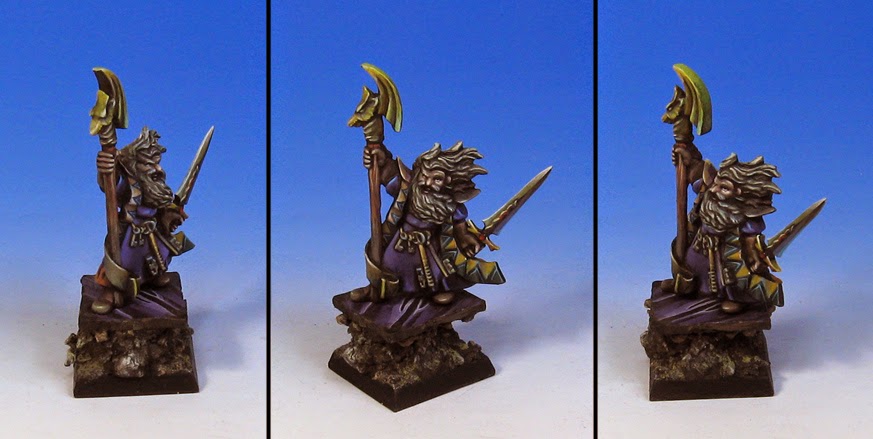
A little bit of dwarven mischief here.  A classic Reaper Dwarf adventurer!


I used the same set of colors that I had for the big ogre the other day.  It's always interesting to see how the same palette can look quite different on another figure!


He's also here:


Kerplunk goes Kagunk


All right!  Here we go... some finished images of Kagunk, Ogre Chieftan from Reaper miniatures.

As a reminder, this is one of the Bones minis.  Everything considered, they can paint up quite nicely :-)


This is being used as the figure for the Shaded basecoat class at Reapercon.  For those actually taking the class (if you are reading this), don't expect to be painting an entire mini!  That is not the point, and there is DEFINITELY not going to be enough time

The idea is to give you an introduction to the concept, without being too overwhelming right off the bat.  In fact, there will probably be time to work on one or two elements.  I thought the shield and a few other items might do the trick in the time we will have.


The Glazing class is supposed to 'piggyback' onto the shaded basecoat class, so much more of the glazing will be covered there.  As always, the Shaded Basecoat sets up those subsequent glazes.

The glazes are used to tint colors just as much as it is to shade them darker, as you can see here.  Much more green was added with glazing since the Shaded Basecoat.


And then a size comparison next to the standard 28mm archer that was just completed.  He's one big hombre!!!


Tuesday, April 15, 2014

You won't see these any more...


Here's something old timey!  Many moons ago, GW used to sell booster packs that had 8 miniatures inside.

There was a Space Marine set, an Undead/Vampire set, and 'Adventurers Set' that had mages and fighters... even a Chaos and a Skaven pack.

I believe this is the last of the Wizards that I have.  The Chaos set has been used to fill out Blood Bowl teams.


These were interesting to paint.  At the time, they were very unique compared to what was being offered.  The vast majority of all GW minis were metal when these came out, so they were even more unique.  The plastic made it easier to convert!


If I can find the pictures of the other members of these sets, I will try to gather them into one post for you :-)

He is also here: