Tuesday, January 29, 2013

Look what just arrived! More Raging Heroes!


Look at the bounty that just arrived from Raging Heroes!  Yes!  A new supply of figures for the miniature painting kickstarter.  

There's a new supply of Blood Vestals, as well as some new Orc Warboss figures for the shaded basecoat video!

The figure in the lower right is Khan- Urkhan.


This picture gives you a better look at Syl-Iriah, Spirit of the Wood.  Both the Heroic and Legendary versions, with all these extra options!  Lance, Harp, magical staff, bow, and long swords.

A truly amazing miniature!!


And Cyberwolves.  Very nice stuff, which could make a very fun tutorial on fur, don't you think?


These are the most recent additions to the Raging Heroes line.  Meet the Kurganova Sisters and Charlie!
Kommander Malinka, Kaptain Ivanka, and Admiral Olga, along with all sorts of extras and options!!


And then we have the Von Konigsmark Sisters (Hildegard, Gretchen, and Brunhilde) along with Walter!
Once again, lots of options and extras!!


Of course, each one with spectacular detail, and excellent casting quality.  I can't wait to start prepping these for the videos!!


The rest of the Imperial Fist terminators!


Here we go!  The rest of the terminators!!


Lighting a candle for you...


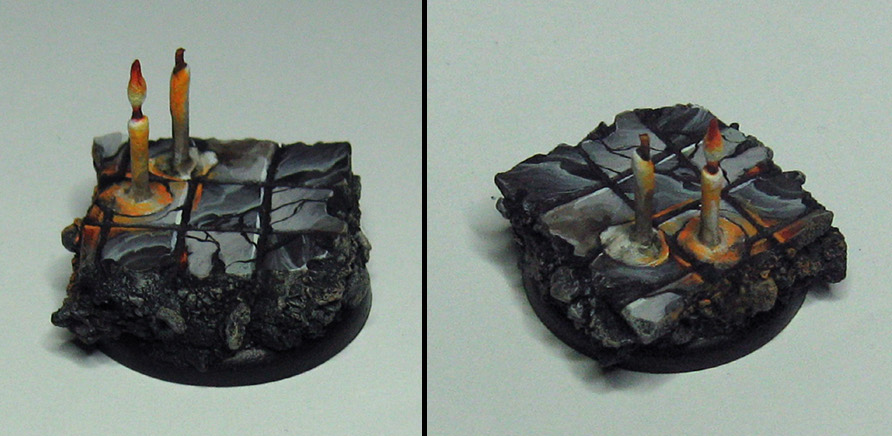
Here's something fun for you.  It's a little exercise in making candles for your base.

I started out with a typical cork and sculpey base, but I wanted to make some candles to snazz it up.  I took some polystyrene tubing, and glued that to the sculpey.  An even thinner tube was placed on the tips for wicks.


To create the effect of melted wax, I used some liquid green stuff.  You could also use flex paste or even wood glue as a substitute.


I added a flame with a bit of regular green stuff...


Time to paint!  The image on the right shows the Vallejo Fluorescents in action.


This stage shows the marble tiles being painted, and some more shading on the candles.


The base is just about ready for some darker glazes!


Once the darker shading was complete, I added some orange highlights.  Now it's all ready for a miniature!!


Here's a video that I created for the Rivet Wars kickstarter:


Monday, January 28, 2013

Individual shots of the Imperial Fists terminators


As promised, some of the individual terminator shots.  There was definitely a wide variety of wargear!

The group shots showed how I was trying to make each one unique via freehand designs, such as the storm shields and the icons / numerals.


The bases were provided by DragonForge Designs.  They are outstanding, with perfect quality every time!


The teal glow on various pieces of wargear was fun to paint, and also provided a nice contrast with all the warm colors!


This was my favorite storm shield design.  If you have seen the Imperial Fist Storm Raven, you will recognize that design!!


The rest will be shown tomorrow!  Stay tuned...

Here's something fun!  Rivet Wars just posted the quick video I did for them.  This is very scaled back from the ones I am making for the kickstarter (those are 40 minutes longer, with text, etc.), but it does give you a bit of a taste:


Fist bump time! Terminator Squad finished!!!


Yes!  Now this is the moment I love... getting to attach finished miniatures onto bases!


After seeing them on stick for so long, it is always very striking to see them on the bases for the first time.  By the way, the bases are from DragonForge...


One by one, they are attached, building to final completion...


I don't think I have ever taken an image of this stage.  In fact, I know I haven't.  So, you are seeing history :-)


And now for some group shots!  I will post the individual ones as they are processed.


These guys were way tougher than I thought they were going to be, due to massive sculpting and casting issues.  I certainly learned a lot...


I hope you have enjoyed seeing the process of painting these guys.  It is always interesting to look back at those early stages when you get to this point, and see what it took to get here!


Again, I will post the individual shots later.  I did an experiment with some new lighting, which I liked a lot, and will become a permanent thing.  It was a bit of an accident, as a fallen/shattered light made the experiment necessary!


More on that story later! Stay tuned...


As always, the techniques used to create these guys are on the painting video kickstarter:


Something to shake your Fist at :-)


At last, we arrive at the closing stages of those Pre Heresy Imperial Fist terminators!

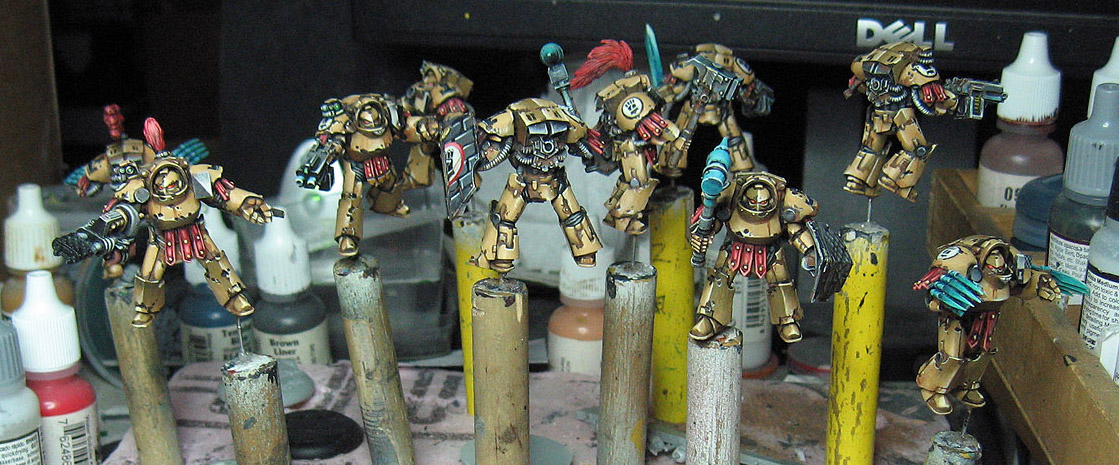
When you last saw these, I was working in the lightest yellow colors.  That's about where we are in this image...


These next few images show the last couple of layers, where the final highlights were applied.  In addition, I worked on the reds.


After the reds were completed, I went back in to a lot of the symbols and icons to clean them up and get those finalized.


That left a few big tasks left to do, and the first would be the teal colors on the lightning claws, Thunder hammers and swords.  I worked on both the lightest and darkest colors to create more definition and smoother transitions...


Just about there!  I did a bit more freehand, and enhanced some of the weathering.


Here's a close up image of one of the final yellow highlights.


Stay tuned tomorrow for the pictures of the finished results!!!

This group needed several painting techniques, starting with the Shaded Basecoat.  I also had to do the yellows, lots of glazing, and some OSL, as well as freehand designs.  I have videos covering all those topics in the painting kickstarter program here:


Sunday, January 27, 2013

It takes Two to Tango...


As promised, the pair of Fiends!  It was very easy to match all the colors (mentioned in the previous post), since it was such a limited palette.  Keeping those initial colors so basic made matching them a snap.  Here I am adding the gold/brass to the second fiend on the right...


The plate has most of the colors that were used.  As usual, I as using a large, flat brush to put down this stage.


These pictures show most of the pieces with all of the lighter colors applied.


So, the next step will be glazing and shading these guys darker!  Lots of fun coming up!  Stay tuned...


This Shaded Basecoat technique, as well as the glazing stuff coming up, are covered in various videos as part of the painting video kickstarter!

Here's the link: