Wednesday, October 19, 2016

Deadly Serpents


There are a number of Tomb Kings units which have not gotten their new sets of photos... including my Necro Knights!  I had a lot of fun painting these guys.  The bases, however, were by far my favorite element of the entire unit.


Most of you have see the other units from the Tomb Kings, such as the chariots and the skeletal horsemen.  I didn't do any conversion on these, which is the only unit in that category. :-)


There were a lot of tiny details on these, which made putting all the Tzeetch tainted colors on them more challenging.  As I have mentioned before, I didn't want to paint these in traditional Egyptian colors.  I saw other nicely painted Khmeri which were green or purple, so I felt like I had to go way outside the boundaries!


That's why you will see all the color variations, especially where there are 'metal' surfaces.  The idea was that once the Taint occurred, all of the gold armor turned to quicksilver, and essentially became every color of the rainbow!


I did the same glowing green weapons that I have on all the other units.


These views show you a little more of the base.  I have an entire article showing how this was painted:


I never took any individual shots of these guys, so I have been looking forward to these!!


This one was the unit champion.


I think they look even scarier off the movement tray!


Like all of may armies, magnetization is key!  The larger bases are not as easy to process, but it is well worth it.


They are also here:


Tuesday, October 18, 2016

Ready to drop the Hammer!!


Here's something massive!  It's the Sledgehammer artillery piece made by Victoria Miniatures.


It comes with six crew, including engineers, spotter, commander, and so on.  I believe that the artillery piece is hard plastic, which the crew is resin.


If you pin the crane, it wings in its cradle very nicely.  There are also a few shells and cases that come with the set.


I used a variety of Ammo oil paints to weather this giant gun.  The panel line washes and regular washes worked very well on the wheels and other hard to reach recess areas.  As you can see, there were a lot of those!  


Dealing with all the rivets was made easier as well, especially the large number of tightly packed rivets.  Oil paints have more capillary action than acrylic washes, making them ideal for this task.


Various heavy mud and splash effects made the lower sections of the artillery piece seem as if it belonged in its environment, as I used the same paints on the base too.


The view from above shows the aft deck of the gun, with the crane and shell holder along with the engineer elevating the muzzle.


Most of the pieces were painted separately, and then assembled after weathering, etc.  That made things a bit tricky, as I had to keep in mind what angle to do the shading, and where gravity might effect simple elements such as weathering.


The closer images will show you the streaking effects a little better.  I have some additional posts coming up with shots of the crew as well.


The crew really give you an indication of how big the gun and its carriage are!


Even though most of this is grey, I tried to get as many different shades and tones as possible.  Some areas were more blueish, others tinted more towards green.  I also used light flesh colors  on a few highlight areas to get a warmer grey.


This view shows you some of the leaf punch leaves on the deck of the gun, which gives it a little more interest with all the drab grey!


It was a lot of fun to paint the crew, as all Victoria Miniatures are. :-)


Stay tuned for much more on the individual crew!  And this will be shown live at Reapercon too... see ya there!!


Monday, October 17, 2016

Let's get Muddy!


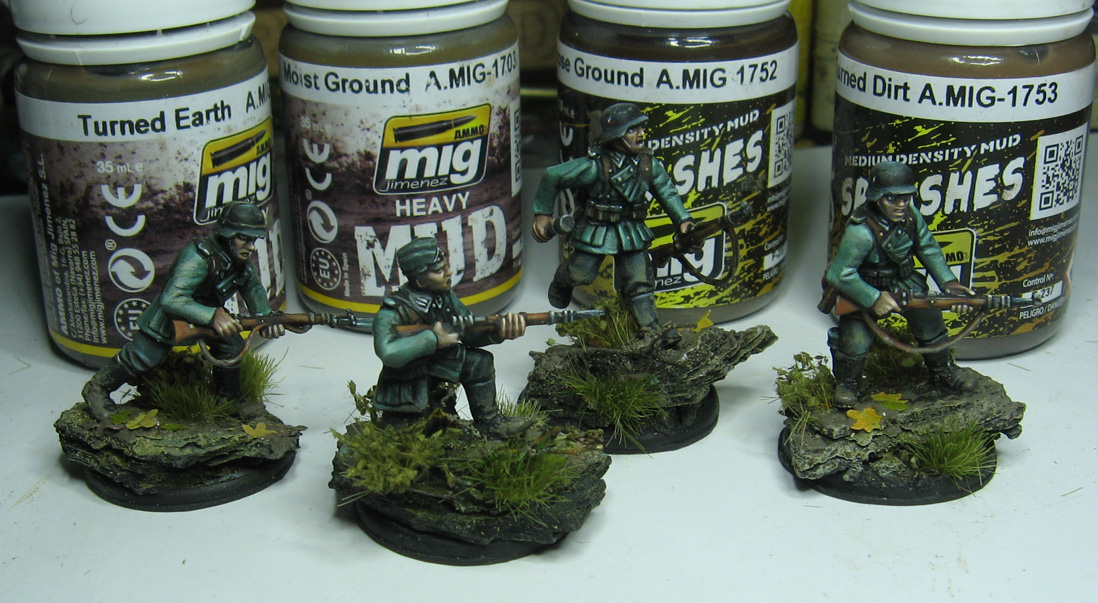
Ammo mud products are not just for tanks!  I have been using them on "regular" infantry style figures as well.  Here's a quick article that shows how I used the oil base paints on a few early war German Heer infantry.


I started out with a lighter mud splash color, as dried mud tends to be lighter than fresh mud.  I have a regular stippling brush and a home made stippling brush that was made from one of my worn out #8 round craft brushes.


I did some test spatters on the palette, which also thinned down the spray before I applied that to the figure itself.


I tried to focus as much as possible on the boots, with less spatter above that line.  Also, since this is oil based, I will have time to smear these out a little, and even remove them entirely if I don't like the result!  This is one of the chief advantages that I have been enjoying with the Ammo products.


All four have been spattered, so I will go in and refine that application, smoothing out some spots that are too harsh or got into the wrong area.


The heavier mud is next.  Take a look at the inset to see how thick this is!  You will have to stir it from time to time, but using it frequently also helps a lot.


The heavy mud was not only for the figures... it was intended for the base as well.  This ties it to the figure, and gives one more interesting texture to the base.


In some cases, I also applied it lightly to the clothes.  This can be very effective on kneeling or prone figures to make them look like they have been in their environment!


I had a few leaves left over from the Green Stuff World leaf punch experiment, so I added a few of those into the wet mud.


The leaves have been placed in areas where I won't be putting any kind of foliage, just to add a little color interest to the base.  I can add more of less if I want.


I have a few different foliage tufts, which are from Gamer's Grass (Kings Hobbies and Games.com).


I really love the added dimension that the bush tufts add to a base!


When we are back from Reapercon, I will take the finished photos, and do several more articles on this subject.  Stay tuned!!!


Sunday, October 16, 2016

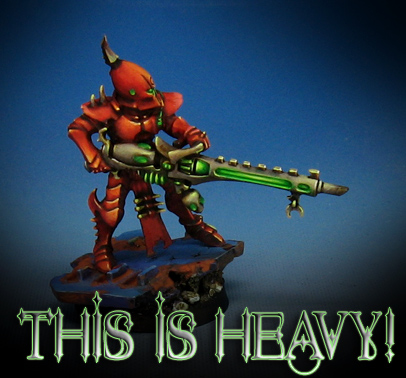
This is heavy!


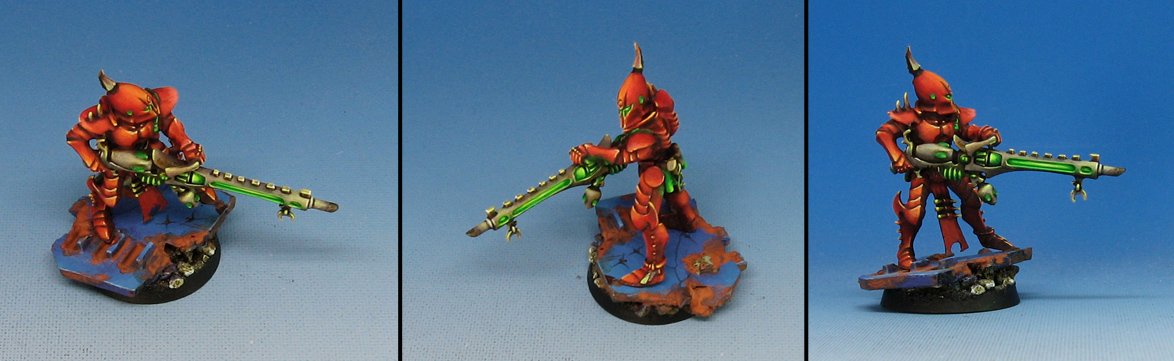
It's been so long, I forgot that I had done a few heavy weapons for the Dark Eldar army.  I probably never got to use this in an actual game, since I only used the army briefly around Adepticon a few years ago.


This is one of the few Kabal Warriors made entirely from the more recent set of kits, as opposed to all the converted combinations of very old bitz!


He's also here:


Saturday, October 15, 2016

Pipe and Spear


This little guy was part of the massive Skink and Kroxigor unit that I used to call the Skink Tank.  I believe there were 36 'regular' Skinks to go with the four Kroxigors.  To complete the unit, a champion, chief and priest were included to add mischief!


I remember a few dramatic moments for this unit.  Twice the "stand and shoot" reaction of all the poisoned javelins killed a greater Chaos Demon as he charged the unit.

It had a less spectacular moment when it tried to cross through a river of blood, which was part of the great campaign for the Temple of Blood.  Anything which went inside that moat around the Temple would be killed on a roll of '1'.  And yes, I managed to roll 18 of those dreaded ones on 42 dice.  

That's how we roll in Lustria! :-)

Pics of the unit:


Friday, October 14, 2016

Drone Wars


This is a collection of sci-fi style bases for the Gates of Antares drones.  I needed something relatively simple, but intricate enough to hold people's interest, since the figures on them are nearly invisible when you look at those bases ;-)

I used a variety of plasticard, sprues, sculpey, and even pieces of MDF from laser cut terrain.


These drones accompany various units in the game, so most of the bases are also designed to match the intended squad.


The heavier sculpey bases were used where the metal drone was leaning over a little more as a counterweight.


This set of bases was made using the Happy Seppuku moulds, all by pressing sculpey sheets into the moulds.

I will have a number of basing videos at Reapercon, including several sci-fi basing techniques.  Here's a quick preview video: