Sunday, April 5, 2015

Perched on The Edge


We continue with the Grand Experiment!

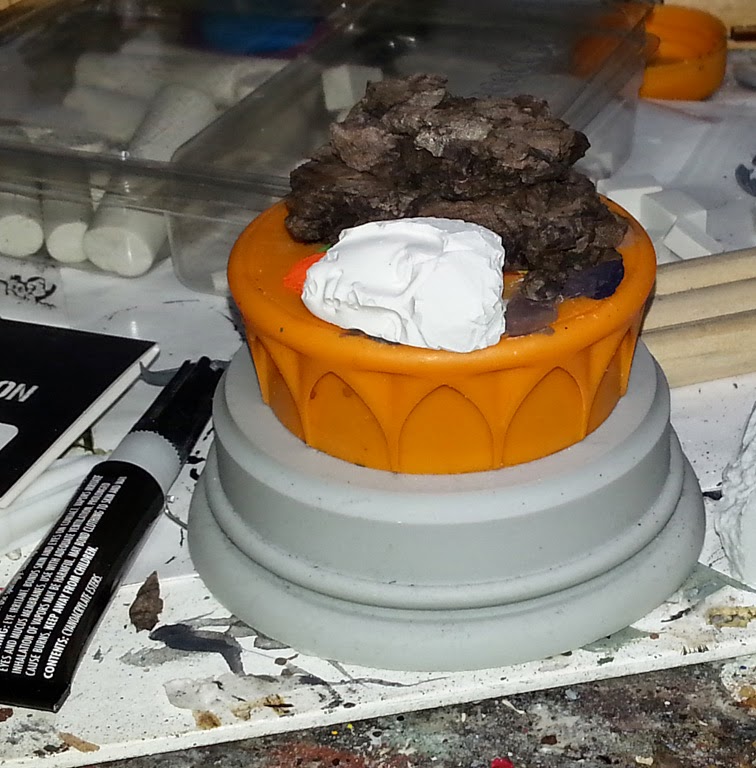
This picture gives you an idea of what will be standing on this base... that lovely figure from Awaken Realms "The Edge" line of miniatures.


All of a sudden, that base and plinth looks a lot less huge. :-)


Ah ye, another favorite from Secret Weapon Miniatures.  These come in several sizes, which is fantastic for scaling up from space marine to dreadnought, or if you need to work in a larger scale all together, such as 54 or 75mm.


Shell casings placed.


I continued the broken blocks onto the edge of the plinth for a bit of aesthetics and to help lock the upper section in place!


Normally I would have brought out the oxide paste sooner, but for this experiment/demonstration, it flowed a little better.


As many of you know, I use the oxide paste to fill large gaps, and to strengthen parts of the base.  For instance, a lot of paste is applied to the underside of the overhang.  This will keep it from breaking or cracking.


The ballast and gravel add texture, and additional strength.  I have a number of articles in the basing section to show the pattern and sequence with which I apply the various sizes.


Here's that sneak peek at the miniature.  I am still working out color schemes for it.  

This is one of those pieces that will decide all those questions when paint is applied.  Many changes will likely be made throughout the shaded basecoat process.

Such ability to explore, alter, and rework is yet another attribute of the shaded basecoat technique.


Where did they go?


Hmm... looks like I forgot to post these images!  I think it all got lost in the insanity that was Adepticon.


That is, the entire first 3 months of this year.


So here it is... 27 cavalry!


I thought these were posted, but I can't seem to find the post anywhere.  If it is a repeat, my apologies!


To be honest, there was so much work on all these guys, I think they deserve a second go around!!


Saturday, April 4, 2015

Never run away...
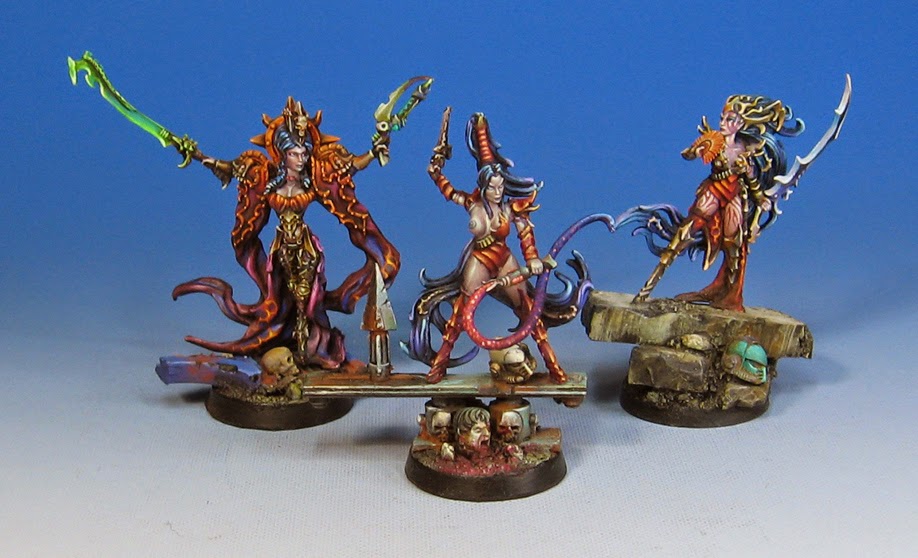

Another Vestal from the Dark Eldar Army.


I also had a bit of fun with the base, playing around with color as much as anything else.


Since there were so many warm reddish colors on the figure itself, I experimented with lots of subdued greens on the metal surface of the upright ruined base structure.


The lab remains open


Despite all the mayhem of the last several weeks, experimentation must continue!

I wanted to try a combination of a few Secret Weapon products.  First, we see the very nice resin plinth from Secret Weapon.


I wasn't exactly sure on what I wanted to use, so I had a collection of items on the table, including some sculpey that was pressed into those Happy Seppuku moulds.


I decided to put some sculpey bricks on the base, as well as a power generator sort of thing, which will provide a possible light source on the figure.  This way I could light it from below, and that would be very fun!


More bricks are put down.  Each time, I take the pristine sculpey bricks and break off the corners.


The original thoughts for the base kept changing, as I started to focus more on testing out a new combination of materials.


The sculpey pieces are mostly in place... I wanted the broken pieces to tie into the statue head, which was yet another change.


And here we go!  Some brass etched pieces from Secret Weapon miniatures that are normally used on the turrets of tanks, etc.

I thought they might be interesting as high detail elements on sci-fi style bases, offering more tiny details than I could create with my polystyrene rods.


I even placed one bit on a broken piece.

Again, I will emphasize the experimental nature of this base.  The point is to push current methods a little further, and give new stuff a try.

Even if this experiment fails, as some have, it's a win either way, since I will have learned a lot.

I have created entire tables of terrain and done scratch sculpted miniatures which would never have been possible if I had not continued to try new things and push boundaries. 

Yes, you will have to get out of that comfort zone, which can sometimes be scary, but you might find some small technique that can become much bigger later on!!


Friday, April 3, 2015

Invested in Vestals


Here's the first of the Sci-fi Blood Vestals from Raging Heroes.


I made a few squads of these for my Dark Eldar army.


I had a few squads of five that rode in Venoms... they actually managed to hunt down some vehicles that way!


And with some characters...


Altar and priest


Finally time for the side by side and complete images!


Getting everything in the correct place on this was very difficult, and of course the instructions are minimal or non-existent. :-)


That leaves a series of best guesses... but at least he fits in there!


I have some powders that I will be putting in a few areas as accents.


Those will be in a few isolated areas... not really for weathering, but enhancing shadow areas.


I want to infuse a few complimentary colors in those darker sections.


The powders can also get into some deep crevices that brushes just can't reach.


Then a final spray and complete!!!


Thursday, April 2, 2015

The trophy wife


The trophy collection grows, one severed head at a time!

This is another Blood Vestal from my Dark Eldar army.  Obviously, they make some very fun Wyches!


You can see even from these images that the scale fits in very well with any existing figures from the other line.


And she looks great next to the other characters!  Also, she is part of the resin sets which come in a box of five miniatures.