Sunday, September 21, 2014

Here's your sign.


Before I started working on the Lawmen, I was wondering if I could use the tree bark and branches to create a Wild West era signpost.

As you can see, it was pretty simple to accomplish that!


A bit of primer...


Nothing fancy with the colors... I just applied a series of tans and grayish greens, working lighter than expected.


I have been loving the gray/green combination... not just on the rock surfaces, but even on the wood itself.


Everything is at its lightest shade, which means it's time for glazing!


The usual suspect from Secret Weapon.


Glazing and tinting continues.


The town of Wappelville!  Or, as Cathy exclaimed for some reason... Wafflemine.  I guess I better get some blueberries and syrup!


You will see my feared Lawmen protecting the Town of Wappleville from all who threaten Order.  Fear them.


Seeing red...


One more set of Red Box Games Marauders.


This one has a slightly different pose and helmet...


The gang as it stands now...


A nice variety of weapons!


Have at it, boys!


Saturday, September 20, 2014

More from Red Box


Tre Manor strikes again!  More Red Box minis.


Lots going on today.  More resin washing, more mould line scraping, more bases painted.  And more Red Box Marauders.  I do like the way the skulls are hanging from these guys.  It adds a lot without being too obtrusive.


And, as you can see, quite a variety of weapons!


Stay tuned for more!


Stowing away again...


As Cathy was about to start back up again with her Sherman Tank, I wanted to do some testing on the Sandbags that we got from Secret Weapon Miniatures.  Here they are out of the package.


One thing I learned by experimenting is that you want to soak them first.  This not only, "fluffs them up", but it will give the outer fabric the proper texture.

I also suggest trimming down the two flattened strips on either end.  After putting them on my RAV 6 x 6, I realized that was something I wanted to do!


When you place them on the surface, it is a good idea to swab them with lots of wood glue or elmer's glue.  This will force them to keep their shape.


As you can see, I had used a variety of bits.  Some were GW, others from Reaper, and even some 1/45 scale that I had found years ago.


I also placed a Victoria Miniatures Highland Guard as the tank commander... and as a passenger!


If you check out some of my previous posts on the Secret Weapon RAV 6 x 6 vehicle, you will see just how many different weapons there are!  Options galore.  I think there are ten different gun options for the turret.  Ingenious!

Even the hull mounted weapon can be exchanged from heavy bolter to heavy flamer.


I was priming a ton of other things at the time, so I decided I would prime this as well.  I decided to tint my primer, which is something I do quite often.

The gray primer is from Badger Air.  I used a few other colors to move it in the direction of desert theme.  This works very well.  Even better with Secret Weapon resin, which does not have any of the hated and loathed mould release that plagues me on most other company's resin.

This makes life so much more ple\asant... thanks Mr. Justin! :-)


Here we are about to mix it all together for some "primer painting", as I call it.


And yes, you can brush on the Badger Airbrush primer.  I do it every day.


It's fun to see the crazy quilt of colors begin to become one!!!!


Yay!!  All set for painting!!  Not sure when that will happen... probably the next time I have these colors out on the palette.

This is going to be a fun tribute to the British Crusader tanks of WWII, painted in the same camo pattern you saw me use on the Memoir '44 tanks.

Since we have the Highland Guard as the crew, why not go with a Desert Rats theme?  It will also give me a chance to really go nuts with my Secret Weapon weathering powders.


Friday, September 19, 2014

Marauders!


Or at least that's what comes to mind when I see them.  I believe these are from Red Box Games.


Tre Manor would be the sculptor, I think. :-)


These are interesting, to say the least.


Stay tuned for more!


Big, Bigger, and Friggin' HUGE!


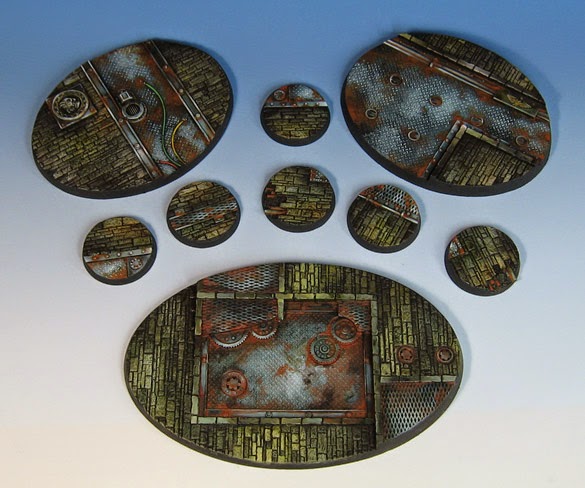
Okay... more pictures of bases for you!  Yes, they are all from DragonForge Designs.  Very nice to work with, as always!!

These 'tiny' bases are 40mm.


I am also working on 25mm versions as well. :-)


Then we get a bit bigger... even larger than all the 60mm bases you have seen!


And then really huge!


I really enjoy the layering on the bigger bases.  Some nice subtle ways to have variation in the height of the bases!


And a size comparison with one of the 60mm bases...


Thursday, September 18, 2014

When Barbarians attack


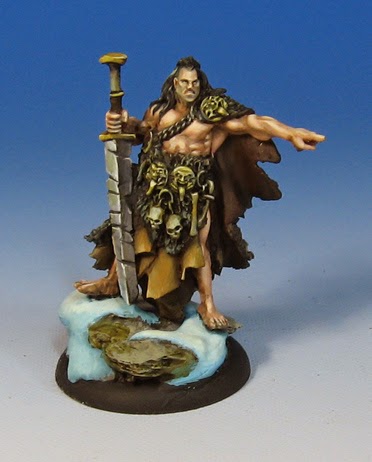
Here are some closer shots of the barbarians.  These were resin figures.


As I mentioned yesterday, it involved retrofitting some older painting styles for me.


I had to limit the amount of flesh tone variations from what I do now, as I had to match what was done before :-)