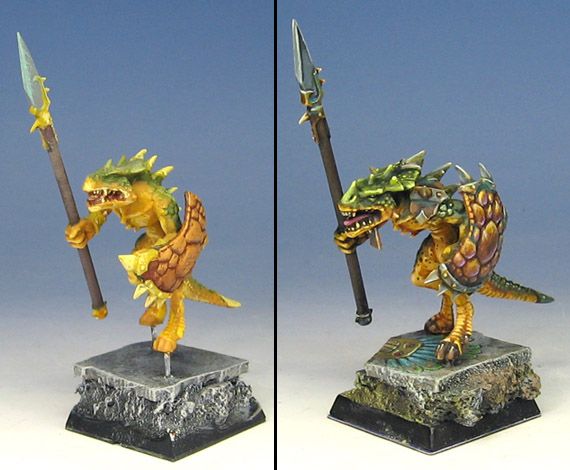
OK, here is another one of thoe step by step guides I have been promising! For those of you who are not into Lizardmen, I will try to make the information as clear as possible to understand and translate to other types of miniatures.
Here is a quick images of the "Steps". Sometimes there are many more steps, sometimes there are less, so don't take the number of images here as something definitive!
As I have often said, I begin with the "middle" tones, roughly halfway between lightest and darkest. I tend to use larger, flat brushes, like a 4-8 sable. These are ideal for the very controlled semi-drybrushing that I do in these early stages.
Here is the start. I lay out some very basic colors, a green and a yellowish orange, and slap those on the figure. I lighten those colors with an off white, either yellowish, reddish or blueish, depending on the color I need to lighten. That's where the flat brush comes in!
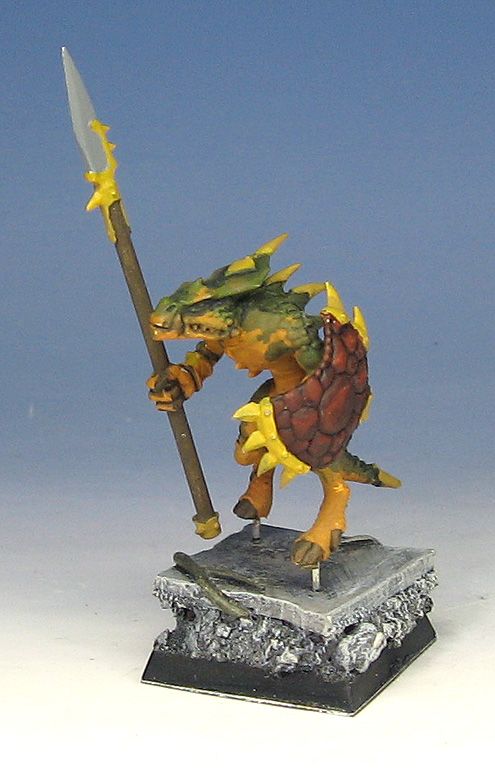
You can see how much lighter the colors are. I worked very quickly, covering the whole surface at once. This technique is more like painting a 2D surface, as opposed to the usual GW method of painting isolated sections of the miniature.
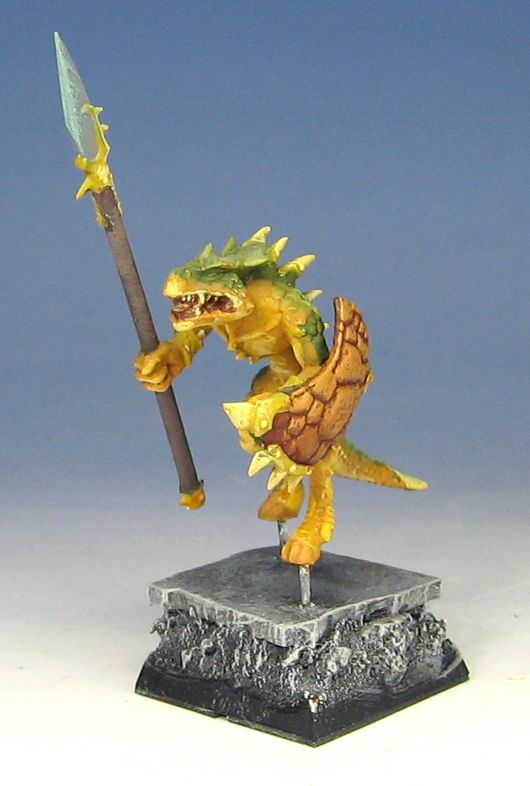
Step 2 begins the darker shading. It is very important to metion that a glaze is a very controlled wash. You are not slapping a huge vat of devlan mud on your miniature! Slightly worn out liner brushes work well for this stage.
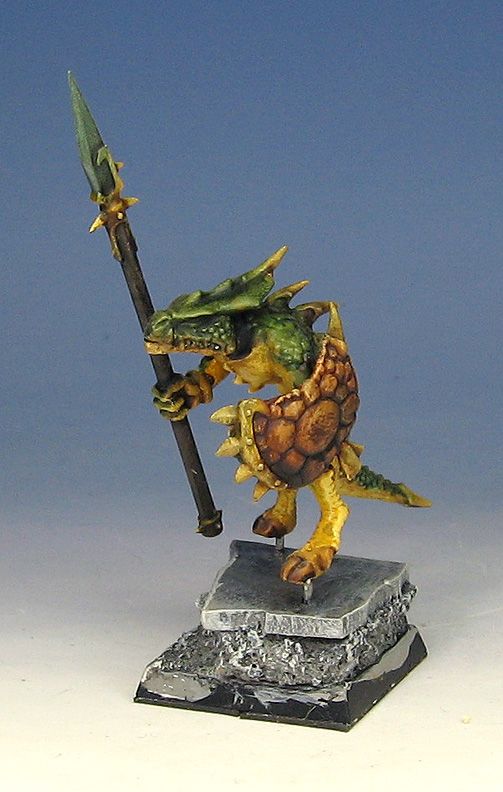
As I continue the darker shading, it is vital to note that I am using a very small brush to apply these layers, so that I can do so in a very controlled fashion. I use mostly GW glazes and washes, but I will also use Vallejo and Reaper versions. My first glazes are even thinned with water. They should not be 'runny' at all, but more like regular paint.
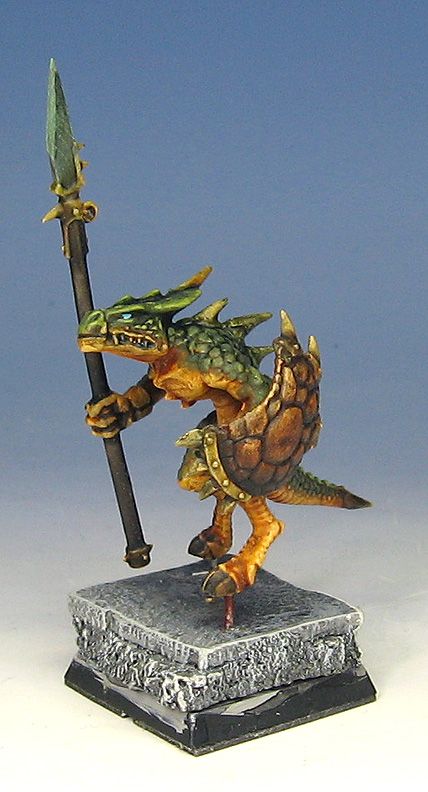
As I apply more layers of shading, the glazes and washes are more 'pure', and I even mix the glazing colors together to create darker versions...
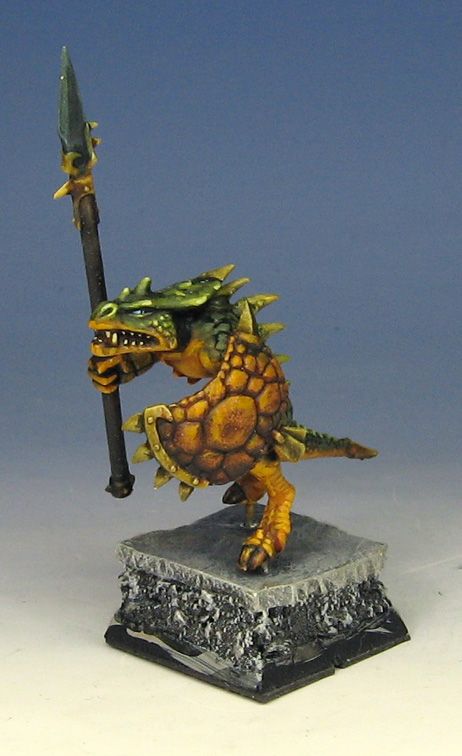
Once the darkest darks have been achieved, I go back in to pull out details, add more highlights, and create some color contrasts, such as what was done on the shield.
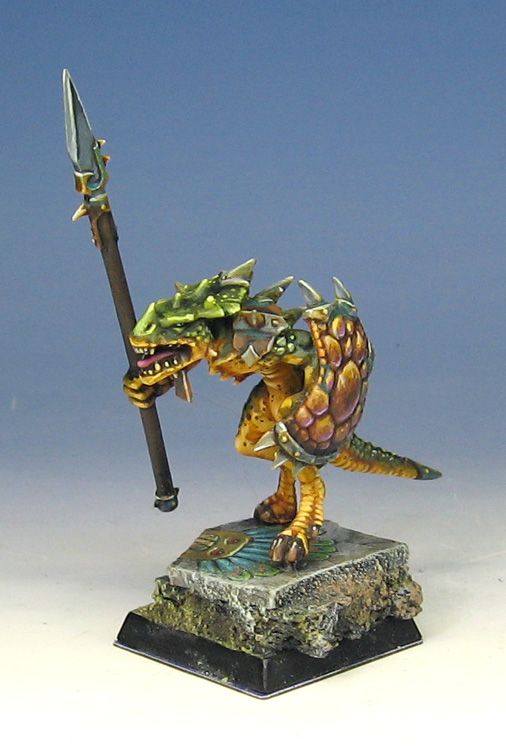
Here is the finished version:
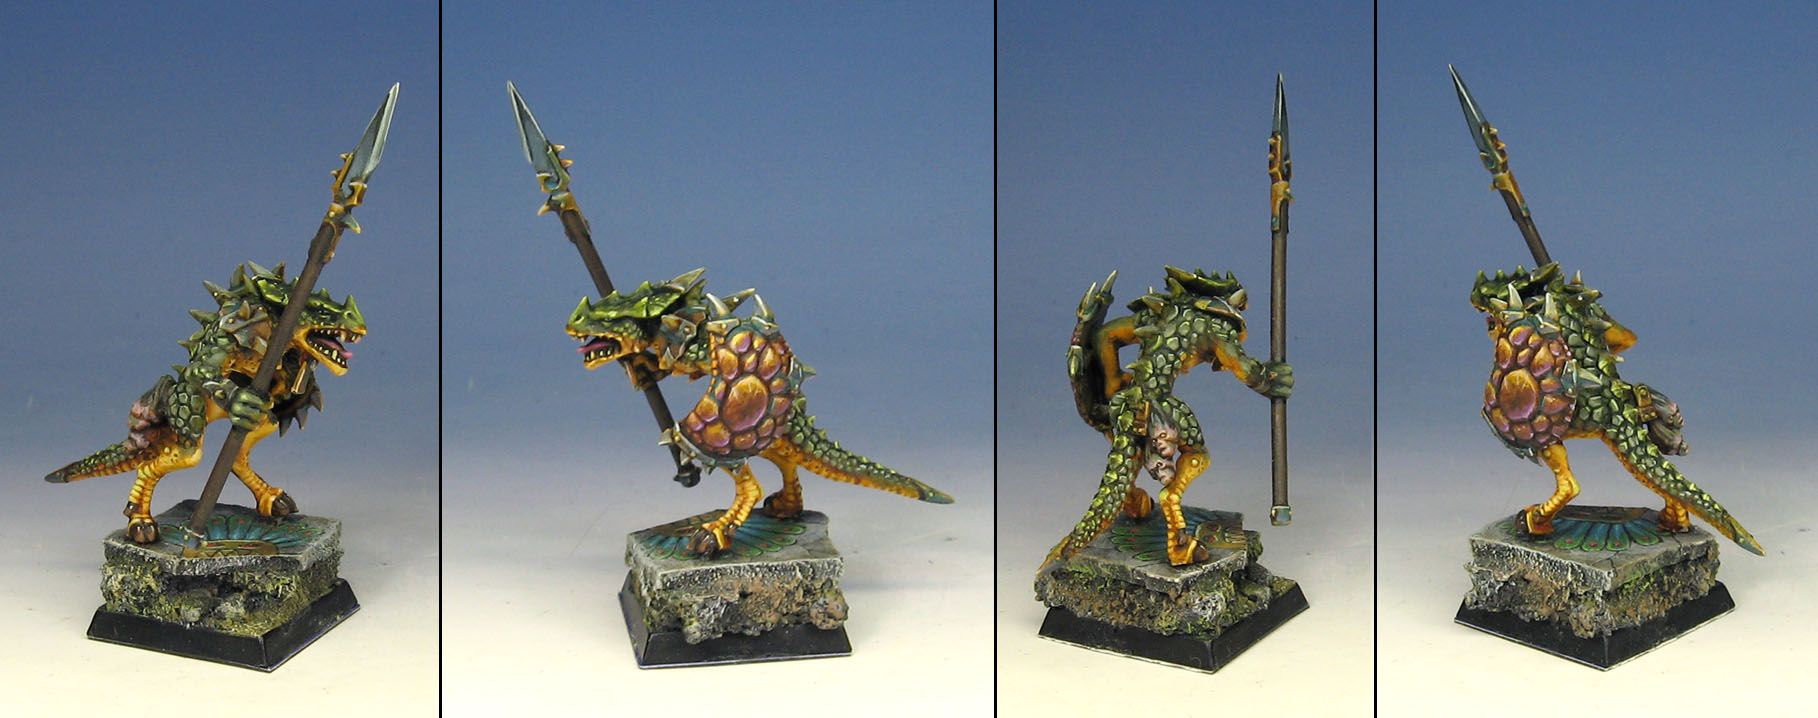
Again, this is not a hard and fast way to do things... it's just a window into how I work :-)
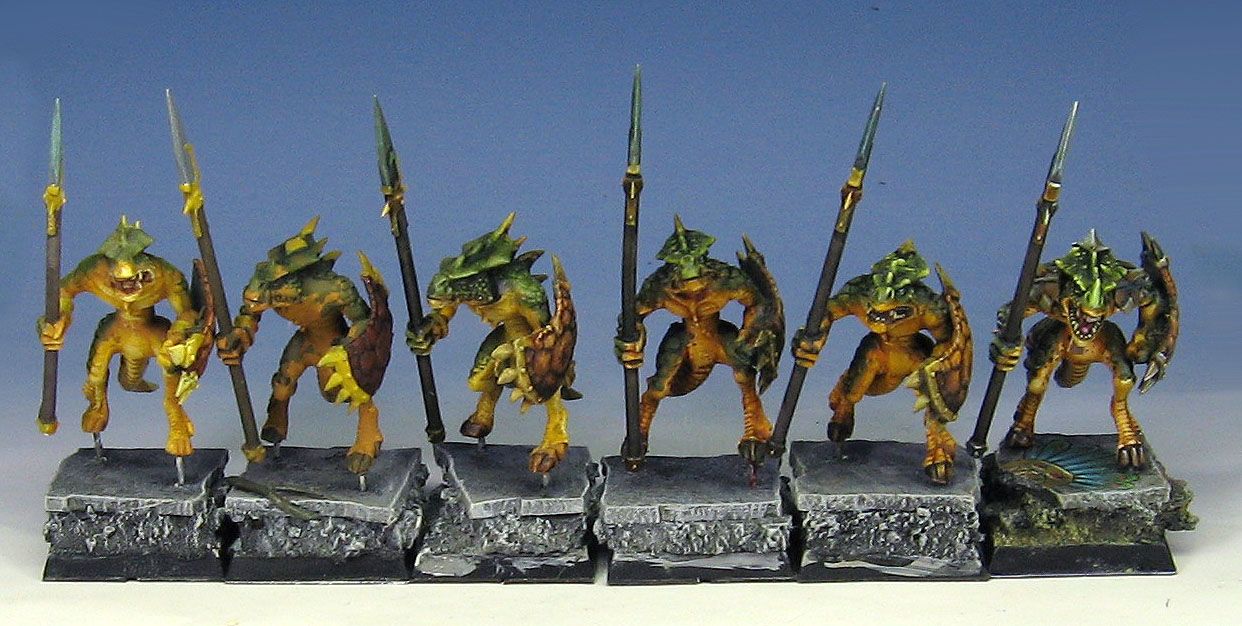
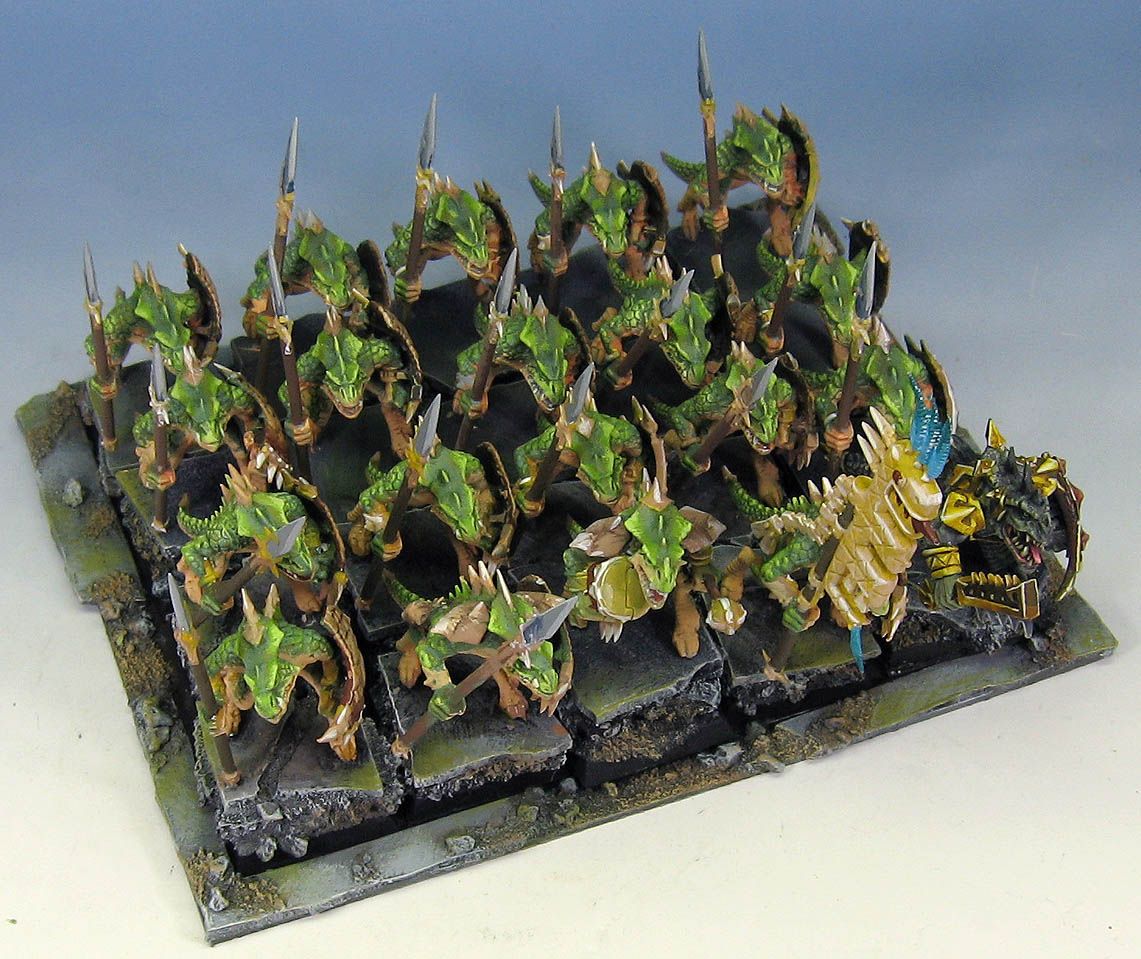
These images show a whole unit of saurus in progress using this technique:
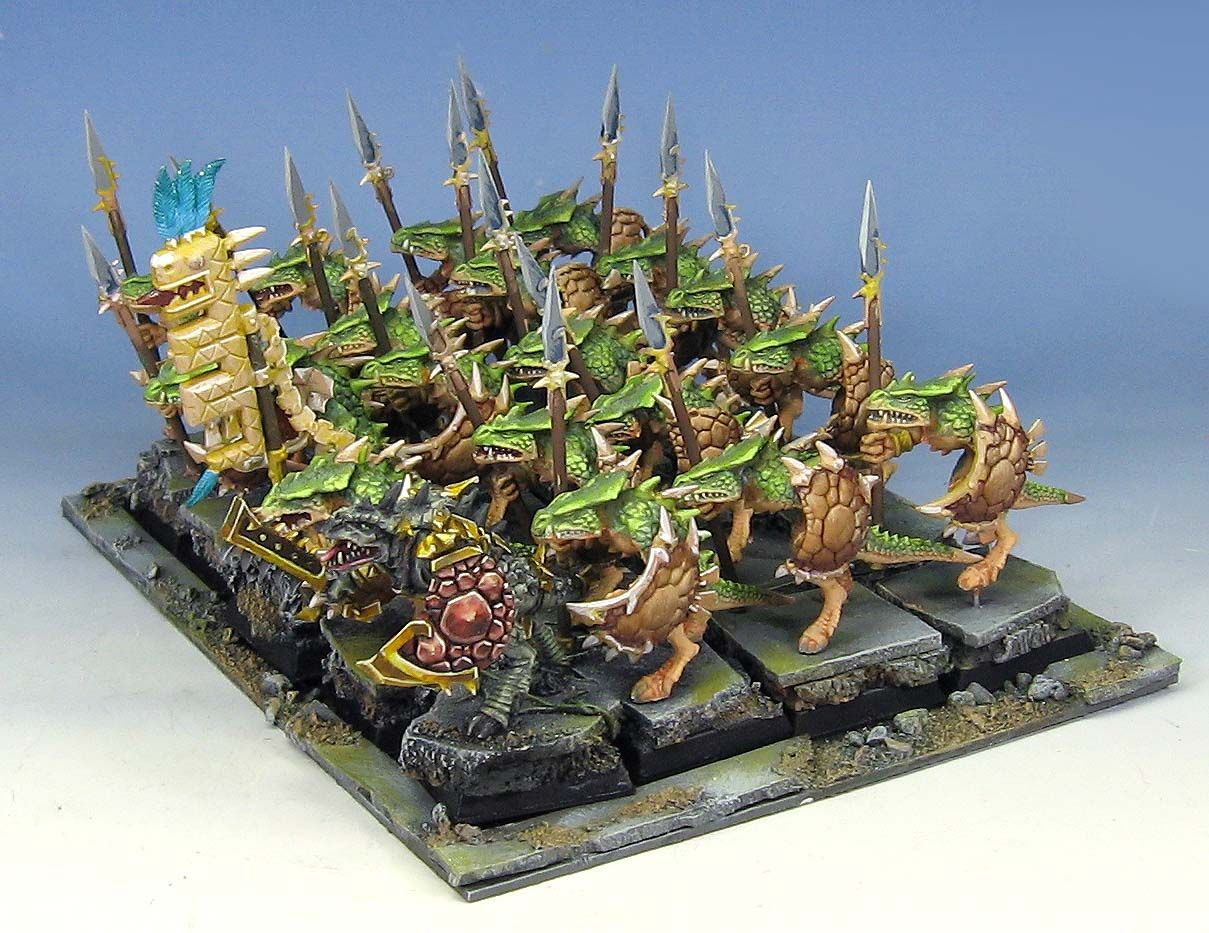
You can see that they are all in that drybrushed state, ready for their darker glazes!
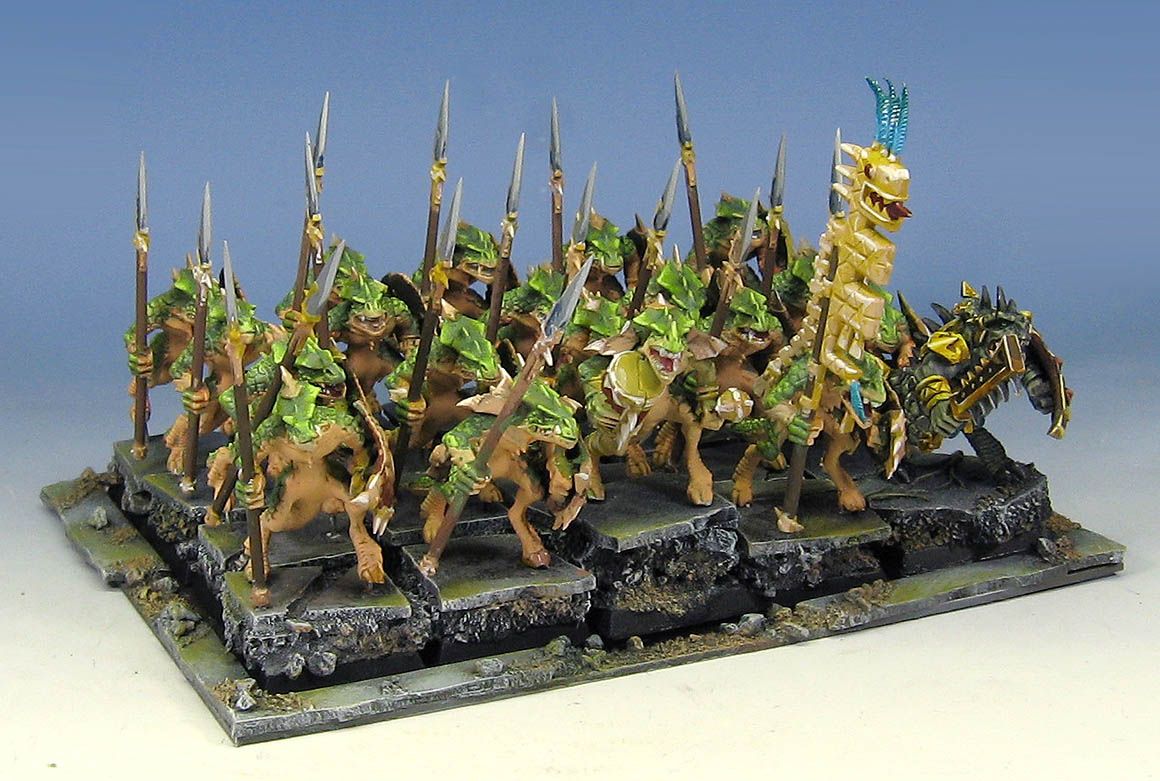
The advantage in this method is that I only needed 3 basic colors to start with...a green, the orange, and one yellowish white color to lighten both of them! All the rest is done with glazes, tinting as needed to match the final colors!
Damn, this is awesome. Thanks for posting!
ReplyDeleteHi Jim,
ReplyDeleteThanks for posting this as I have just been dumped with a whole lizardmen army and bloodbowl teams to do. And I suddenly have the feeling that I want to live under a rock in a hot place. Hmm maybe even some bugs for dinner?! Thanks again...
Rory
I am very glad this is proving to be helpful! The very first miniatures I ever painted were lizardmen for Blood Bowl, so I guess they will always have that special place in my memory! :-)
ReplyDeleteConsidering your skill I almost can't believe how much you pulled off from drybrushing. Amazing work
ReplyDeleteCan I ask, how long did it take to paint the unit of 24 please? I expect with washes and other projects it's hard to know, but you describe it and I envisage you take about 1hour or 2 to achieve this. I really am inspired and will give some practice to glazing as I rarely use it. Thanks
Doing that firsdt part of the shaded basecoat on the unit was between 2-3 hours. In the end, each individual saurus will take 5-7 hours to paint.
DeleteCheers!
Thanks for sharing!
ReplyDeleteHow does this technique transfer to models with lots of flat surfaces, like space marines/vehicles?
If you check out the "Step by Step painting a Predator" page it should do the trick :-)
DeleteThanks for the tutorial, this is an awesome technique. I'm hankering to try on a Stegadon I have who is in need of a paint job. Is there anything you'd note for applying this technique on a larger model like that? - aside from the obvious needs to apply more layers/highlights :P
ReplyDeleteSmae as above... the painting a predator page should be helpful. The key is to use bigger brushes. The LOTR elf steo by step shows how large a brush I will use even on the smallest figures...
DeleteI have recently discovered your work and you are my new personal hero :) Great work. I know I may be asking for too much but can you make a video showing you apply glazes and washes? (Both when shading and highlighting?) I too (try) to use glazes (mostly to highlight). But instead of moving the pigments around I mostly use the tip of the brush to place points on the model and layer my colors.
ReplyDeleteThanks for the kind words, and following the blog! Right now I do not have a video camera (or the software to edit them), so I am limited to photos for the time being. I do hope to eventually make all sorts of handy videos in the future, though.
DeleteI tried this technique out and it took me 15-20 minutes to finish up a 28mm primed mini. Never thought to glaze with my wash before. Thanks!
ReplyDeleteI am very glad that this worked out for you so well! That is why it is my "cornerstone" technique!
DeleteI love the scheme but could I ask what colours are you using for the base layers? The green and the orange.Also what glazes were you using? I really would like to use this scheme for my Lizardmen army.I had 2000 points dumped on me and I really need to paint them.
ReplyDeleteI could not say for sure what colors those were exactly, as it was a very long time ago!
DeleteAlso, I don't work in terms of specific colors from a jar of paint. I work with warm greens/cool greens, and warm reds/cool reds, etc.
If you used Knarloc green from GW, you could get pretty close. If you mix the GW foundation orange with a bright yellow, you should get that base color.
I also do not use the glaze colors individually, but mix them together. For instance, I mixed a sepia glaze together with a green, then mixing in some blue and black with that green to get the darkest shades.
The orange was shaded darker by mixing a yellow glaze with ogryn flesh.
One of the reasons I abandoned the idea of specific colors is that those tend to change as companies drop paints or change their lines completely, as GW did!
Still, I hope that info helps a little!!
Best wishes!
Hi there! I love your methods, I have just started a little wet blending, moving from wash/layer techniques and its great to see yet another way of doing things. Do you follow a colour wheel of sorts, or just paint whatever you think will look good? Looking forward to more of your coming work!
ReplyDeleteThanks! My approach is that of a 2D painter, since that's my training, etc. I use warm and cool colors, high and low saturated colors, etc., to create the lighting effects and center of interest, kind of like I did when I painted in 2D :-)
DeleteYou just made me fall in love with Lizardmen!
ReplyDeleteJust watch out for those tricksy skinks! :-)
DeleteJust listened toGarage Hammer and was wondering where I could get some of your videos?
ReplyDeleteThey are available for download on CMON, but you can also get them directly from me. You can drop me a line on facebook at James Wappel. :-)
Delete