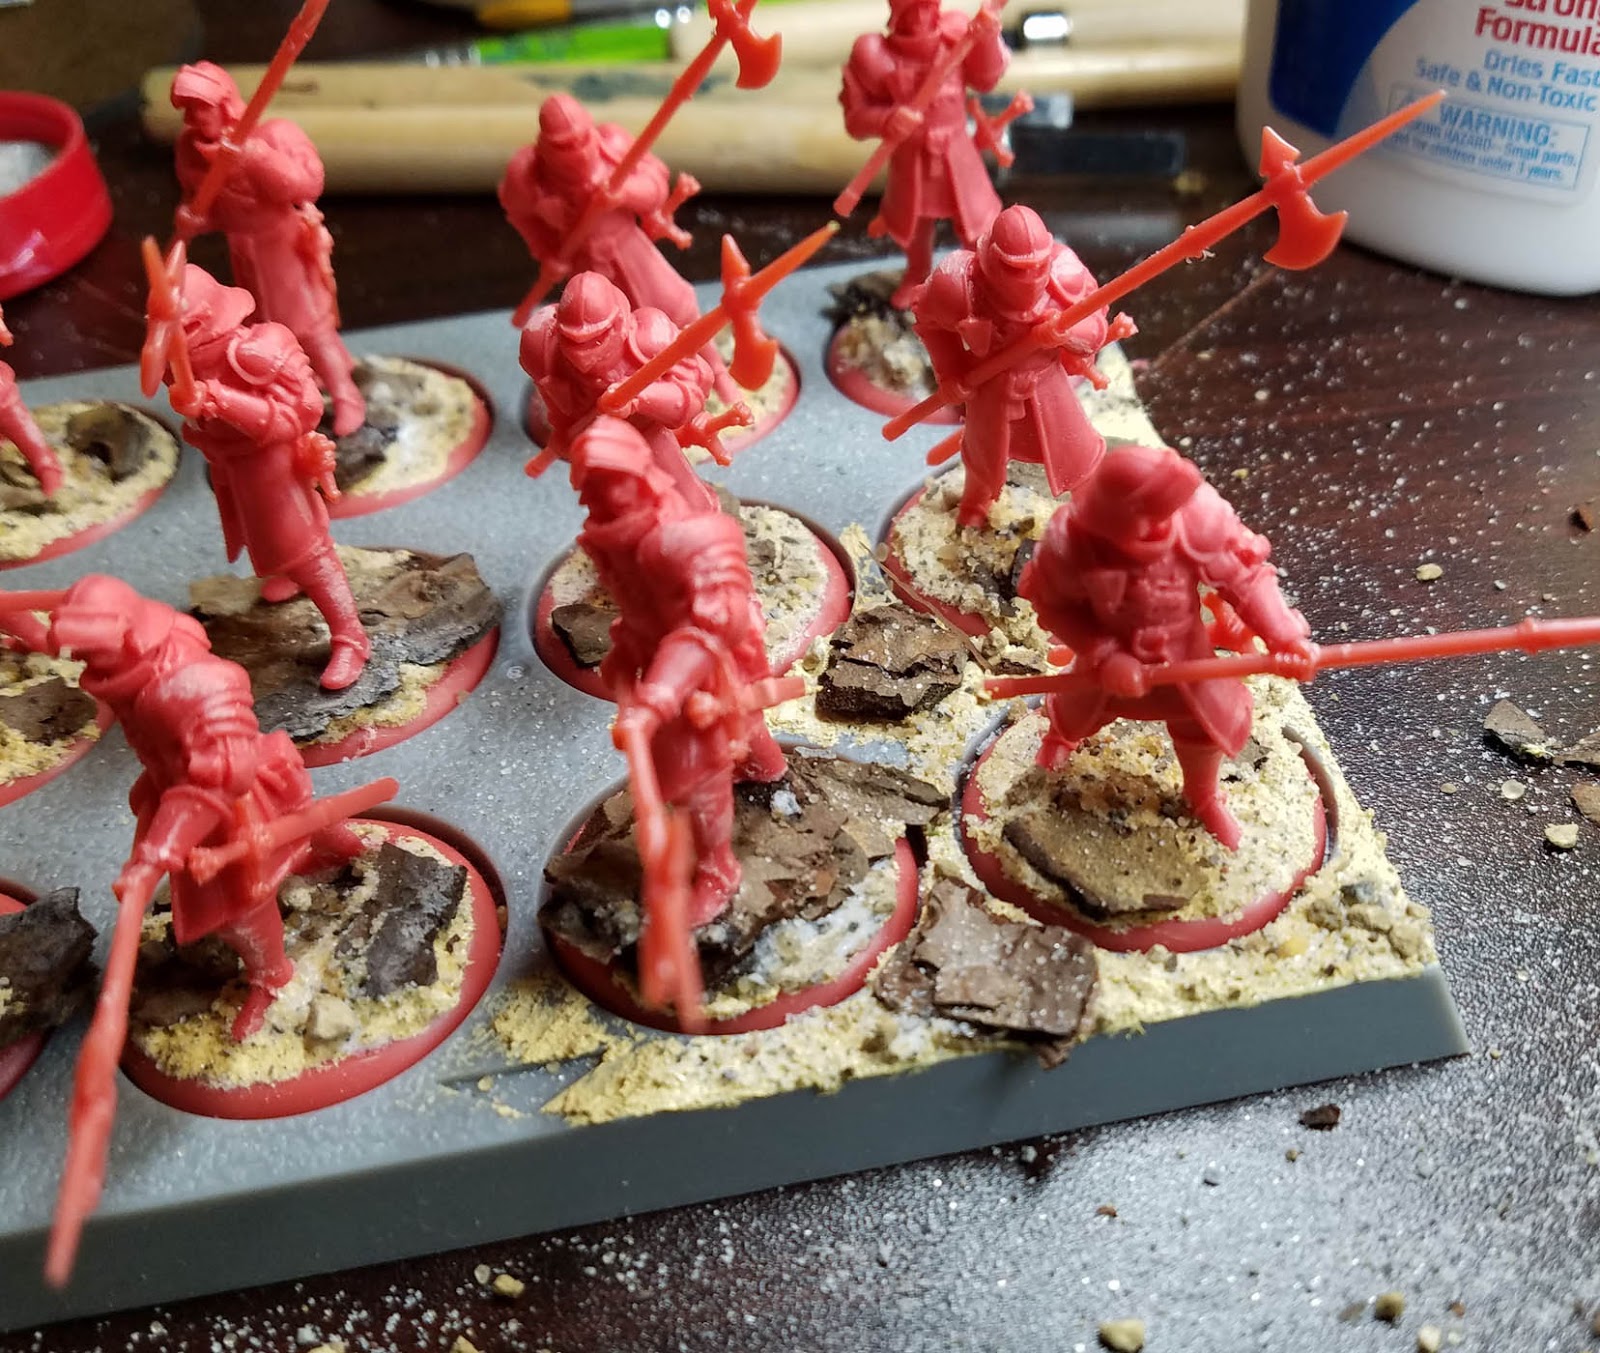
As soon as I saw the Song of Ice and Fire game (and how the figures interacted with the movement trays), I knew that it would give me a chance to try my "Bark and Branch" basing method on something completely new!
In the past I have either multi based units for Kings of War, or made decorative square bases for Warhammer armies that fit side by side on a tray. This would be very unique, as I would have to match individual round bases to fit in an overall tray. An added challenge is to make it possible to 'drop in' the heroes or banners as well.
I started out with some of those characters here...
Once I knew I wanted to have that look, it was time for the unit itself. I positioned the figures into the tray, and started to get pieces of tree bark ready.
Just as I did for the special characters, I sliced off a few figures from their round bases with a razor saw. I always use a rubber Jeweler's block to make that process easier and safer.
A hole is drilled in the foot, and a pin in place. The oxide paste is used as mortar, like usual, and a drop of super glue as well to press the flat tree bark in place.
A bit of glue and oxide paste is placed on top of the bark so that I can add a few pieces of gravel and some fine sand.
The pin holds the figure in place on the base, and he is set back into the tray. I few more figures are also taken off their bases, but not too many. First, this will save some time, but it also gives each figure a slightly different height, instead of each one finding a convenient rocky outcrop to stand on!
To get the different levels, I used just the Oxide paste and some glue to place smaller bits of bark (usually what was broken away from the larger pieces) into that mortar.
I worked my way around the tray, sometimes putting almost no tree bark on a given base. The idea was to make it seem like there is a pattern to the rocks, instead of those perfectly even spaces out crops!
With all the figure bases complete, the next challenge begins, and that is matching the tray to the bases. It can be very easy to "lock" your figures in place, so you will need to be very careful as you apply your glue and paste.
As the paste can start to set up quickly, I mix a bit of white glue with it, and that extends the work time of the material slightly. You also don't want to get too much glue, gravel and bark into the slots, etc.
Where there are base that have a figure standing on a piece of bark, I try to arrange some bark around that surrounding area. Also, as the special characters tend to be standing on out crops, I try to have more pieces of bark on the front row of the tray.
You can see that I am working my way through the unit, until the entire tray is covered. There are some areas that have very little bark or even gravel. This is where I can either add snow or some kind of flock.
The completed tray!! I will be doing many more of these as I get the figures ready for playing. Tutorial videos will be created of this process as part of the Army Painter pledge level on the Patreon Page. In fact, next month's video series (about 12-14 hours of lessons!) will feature an Ice and Fire unit.
Each series begins with basing, as you see here. I will then take you through the process of creating color test figure, and then the rest of the unit.
My goal is to show you several ways of painting your figures, some in NMM and others using Metal Medium to create a TMM effect. Then I will paint other units in oils!
That is all available on the Patreon Page at the $15 level:


No comments:
Post a Comment