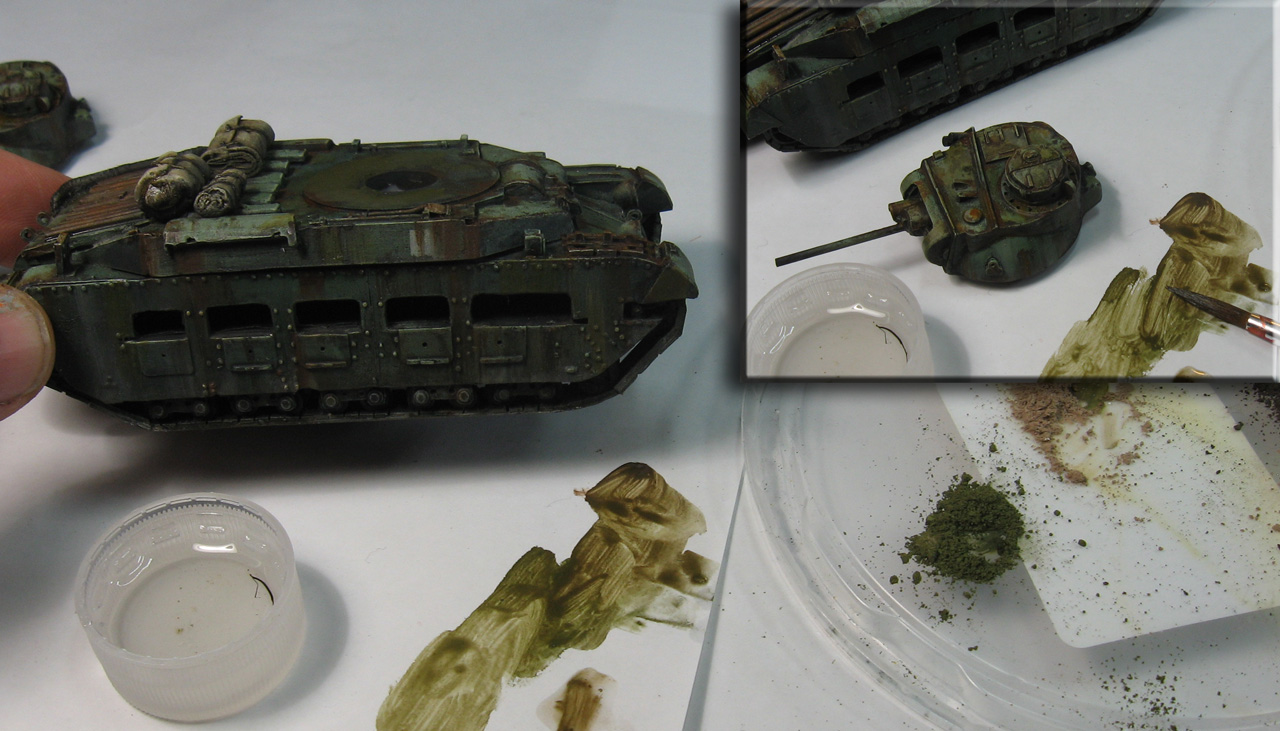
So, we enter the final phase of pressing buttons to see what happens! In the last article, you saw me mixing some unusual combinations of paints, such as the panel washes and other similar materials with the mud effects to create lighter, more opaque midtones.
This image gives you a nice look at the range of colors that I could create. These were mostly used on the stowage.
They were also used on a few other areas to create some added interest, but mostly to see how well they would mix together for future projects. A wide range of materials were mixed together as this image shows.
I was really looking forward to trying out the grease and engine oil products. There's only a few places where you should really use those on any vehicle, but they certainly make the effects convincing!
The consistency and appearance of the engine oil is just that, and when you a very 'dry' base under it, the effect is even more dramatic. Having the mud/wash opaque mix under the oil on the rear panel accentuated the oil effect in both color value and texture.
Now I had a semi-glossy material on top of something that was almost powdery/dusty in appearance... very cool!
One more view from above to show you how that looked.
The light rust wash is a fantastic color, and just a few touches of it here and there can really pop, especially next to all the muted greens.
There are only so many experiments that I can cram onto one tank, so I definitely wanted to try out the dry pigments! There's a wide array of colors to choose from.
I picked a few different shades, and set them up in a container lid so I would not get them all over the place.
I put some Pigment Fixer in a lid, and used that to mix in with the powders. As you can see, the dry powder instantly becomes a paint! I have done this a lot in the past, even using this technique to paint entire figures.
You can also mix the colors together.
The advantage of working this way is that your 'dry' pigments will be fixed to the surface, with no need to spray them later, etc.
I painted a few greenish streaks on some sections of the hull with this mix, toning down a few of the rust streaks from previous layers.
Now it's time to have fun with the powdery effect! I used a mix of the light and dark dust on the upper surface of the hull, making it collect in recess areas, as dirt would do. I also gathered up splotches of dust and dirt in the tracks and on the vertical sides of the hull (see insert).
OK... we have got a nice dusty look on the sides of the tank! This illustrates why you have to layer the effects. It would be very difficult to do the rust and grime streaks on top of this dust without spoiling the effect, which is why that's done first.
Finally, I wanted to add a touch of 'wetter', thicker mud on top of the dust. Since there will be even less of this material than the dust/dirt, it is saved for the final layer.
I mixed the various types of mud together, as I usually do. In general, the lighter color mud is supposed to represent dried mud, while the darker mud is 'fresh'. This means placing the lighter colors first, and the darker, wetter mud on top.
One last experiment! I wanted to see what would happen if I mixed static grass and other material with these heavy mud products. I had a few places in mind for this effect, and it worked out even better than I could have hoped!
With the success of the grass/mud mix, I could not resist trying out some parsley flakes! I wanted to use a thinner mud for this effect... using it to provide more color to the leaves besides green, and to help it adhere to the surface.
I wanted to scatter some leaves on the upper parts of the hull and sections of the tracks. I even used some of the pigment fixer to aid in this process. It thinned down the material, making it easier to apply. Hopefully it will keep it stuck to the surface as well!!
I'm trying to get the leaves to "pile up" on near vertical surfaces, such as the area behind the headlights.
Now to let it all dry... and see what happens. Stay tuned!!!


Thanks for the kind words, and for visiting!
ReplyDeleteOh my, that is a truly grotty tank now! :-) Some really interesting experiments there Mr W.
ReplyDeleteDo you use a special thinner or just regular turpentine?
I mostly used the thinner filters if I thinned it at all. Every so often I had a little of the odorless paint thinner handy :-)
DeleteThats one scabby tank. Great stuff, impressive.
ReplyDeleteThanks! It was very fun to test out so many different things! Many more vehicles to come!!
Delete