Pages

Monday, March 24, 2014

The rockets red glare


After numerous changes to the list here and there for a variety of reasons, it has been determined that there is only one Exorcist tank.  Time is definitely a consideration, as it took a number of hours to create this conversion.

Obviously, I used a Secret Weapon RAV 6 x 6 chassis for the basis of the vehicle.  Some of you might be familiar with the extra armor skirts that I created for it a while back, which I used for the Weathering and Battle Damage video.

Using some bits, some plasticard and polystyrene tubing, I worked furiously to get this thing completed.


There were some other things I had intended to do with it.. such as creating a driver (I had even saved some parts), but the clock has run out, and I have to move on.

Still, I think it gets the idea across!


There was something else as well.  I used up the last of my large gauge tubing on this turret, and there's no way I can get more in time.


I put a hatch in place of the driver for now.  Again, more stuff was planned, but I had to be able to get at everything with the brushes in a limited amount of time!


Some shots of the turret primed, which helps to eliminate all the distractions of the kaleidoscope of colors!  I am painting this now, so pictures late tomorrow night!


What's on the inside...


Time to get these walls a little higher!!  Here's where I left you in the last post.


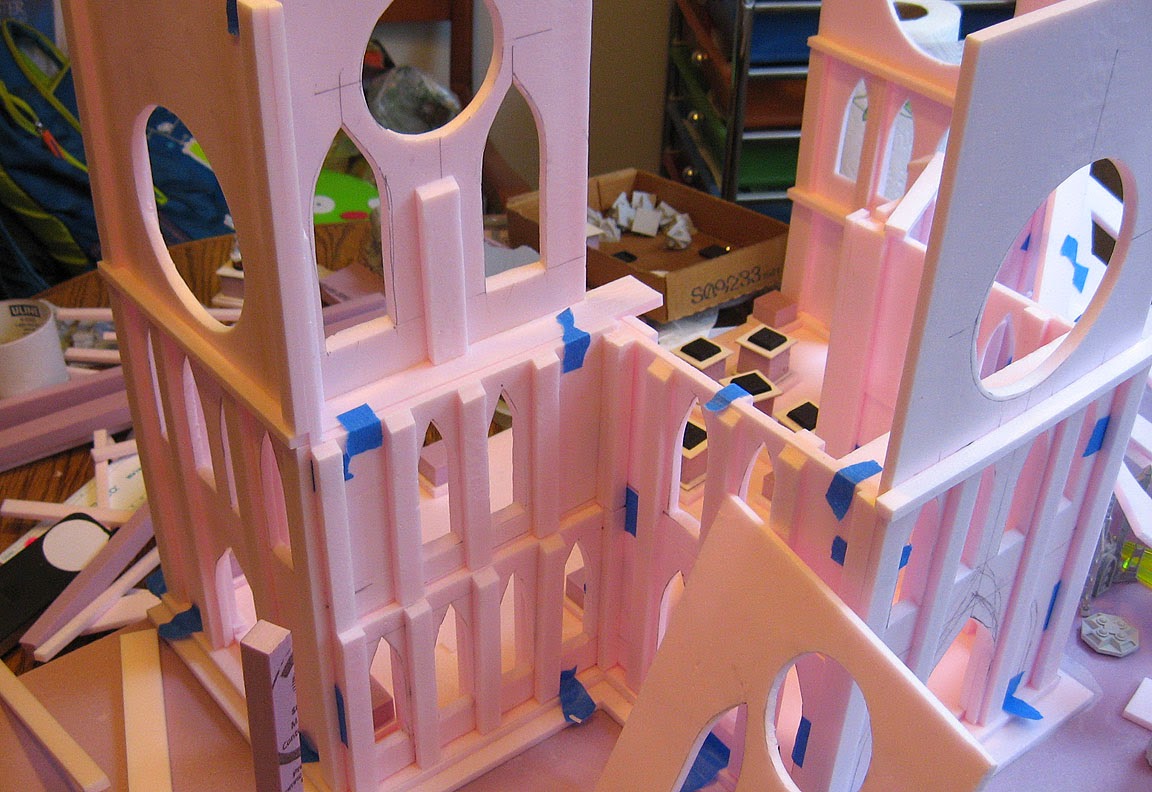
I continued to add the exterior elements, such as the bracing, so that the lower levels would be more stable, allowing me to go higher.


It did get somewhat tricky, as I tried not to glue the wrong parts together!  I had to wipe away glue more than once.


Now that all the exterior bracing was complete, I started to add the same elements to the interior.  Those were more complicated, since they would have to bear more load.  The pieces on the outside were as much for decoration as for support.


The most complicated bit was going to be these upper sections of walls, which would have to be set back about an inch.  The roof is going to be relatively heavy, since it will hold a bunch of LED lights (chock full of batteries!) and a bunch of miniatures.


I think this view gives you an even better sense of the 'verticality' that I am after.


Some of the upper sections are in place.  Keeping them aligned was definitely a challenge.  Even more so when I could not glue the main pieces together.


A view from the inside.  While I need columns to support the weight of the roof, I need to make sure there is enough room for all the statues, which will help tell the story of the army.

Oh yeah... and there are supposed to be miniatures in there!! :-)


The corners of the knave were encased, which set the level for the height of the support columns.


Speaking of which... time to make some columns!  These are going to be relatively simple, since there is already a lot going on in that space.


These four spots will carry a good chunk of the weight.  The two on the edge of the board will have to hold up even more, since the back of the structure needs to be wide open.


The upper sections are braced with decorative elements, similar to what I did on the lower levels.

With these extra pieces glued to either side of the thin walls, I have now effectively tripled the thickness (and the strength) of the walls!  Now I have the open feel of the thin .25 inch walls, with the structural integrity of .75 inch walls.


Starting to put the columns in place.  Stay tuned for more!